
PLAYDECK API

Integrate PLAYDECK into scripts, automation systems, and custom user interfaces using our standard REST API (OpenAPI 3) and WebSocket interface for real-time control on a single port.

In this article:
→ Which interface do I need?
→ REST API quickstart
→ Interactive API Reference
→ WebSocket real-time channel
→ Legacy TCP Commands Input
→ Integration Examples


Which interface do I need?

PLAYDECK offers different interfaces depending on your integration requirements. Use the following overview to select the correct protocol and port:

Use CaseRecommended InterfacePort
Scripts, cURL, Postman, Custom HTTP IntegrationsREST API /api/v1 (OpenAPI 3)11411
Live Status, Events, HTML Overlays, Bitfocus CompanionWebSocket Channel11411
Ready-made Control SurfacesBitfocus Companion (via WebSocket)11411
Legacy TCP Clients / Existing Automation PipelinesTCP Commands In11375

Recommendation: Most new integration projects should start with the REST API. Switch to or combine it with WebSocket only if you require continuous, low-latency status updates or real-time event triggers.


REST API quickstart

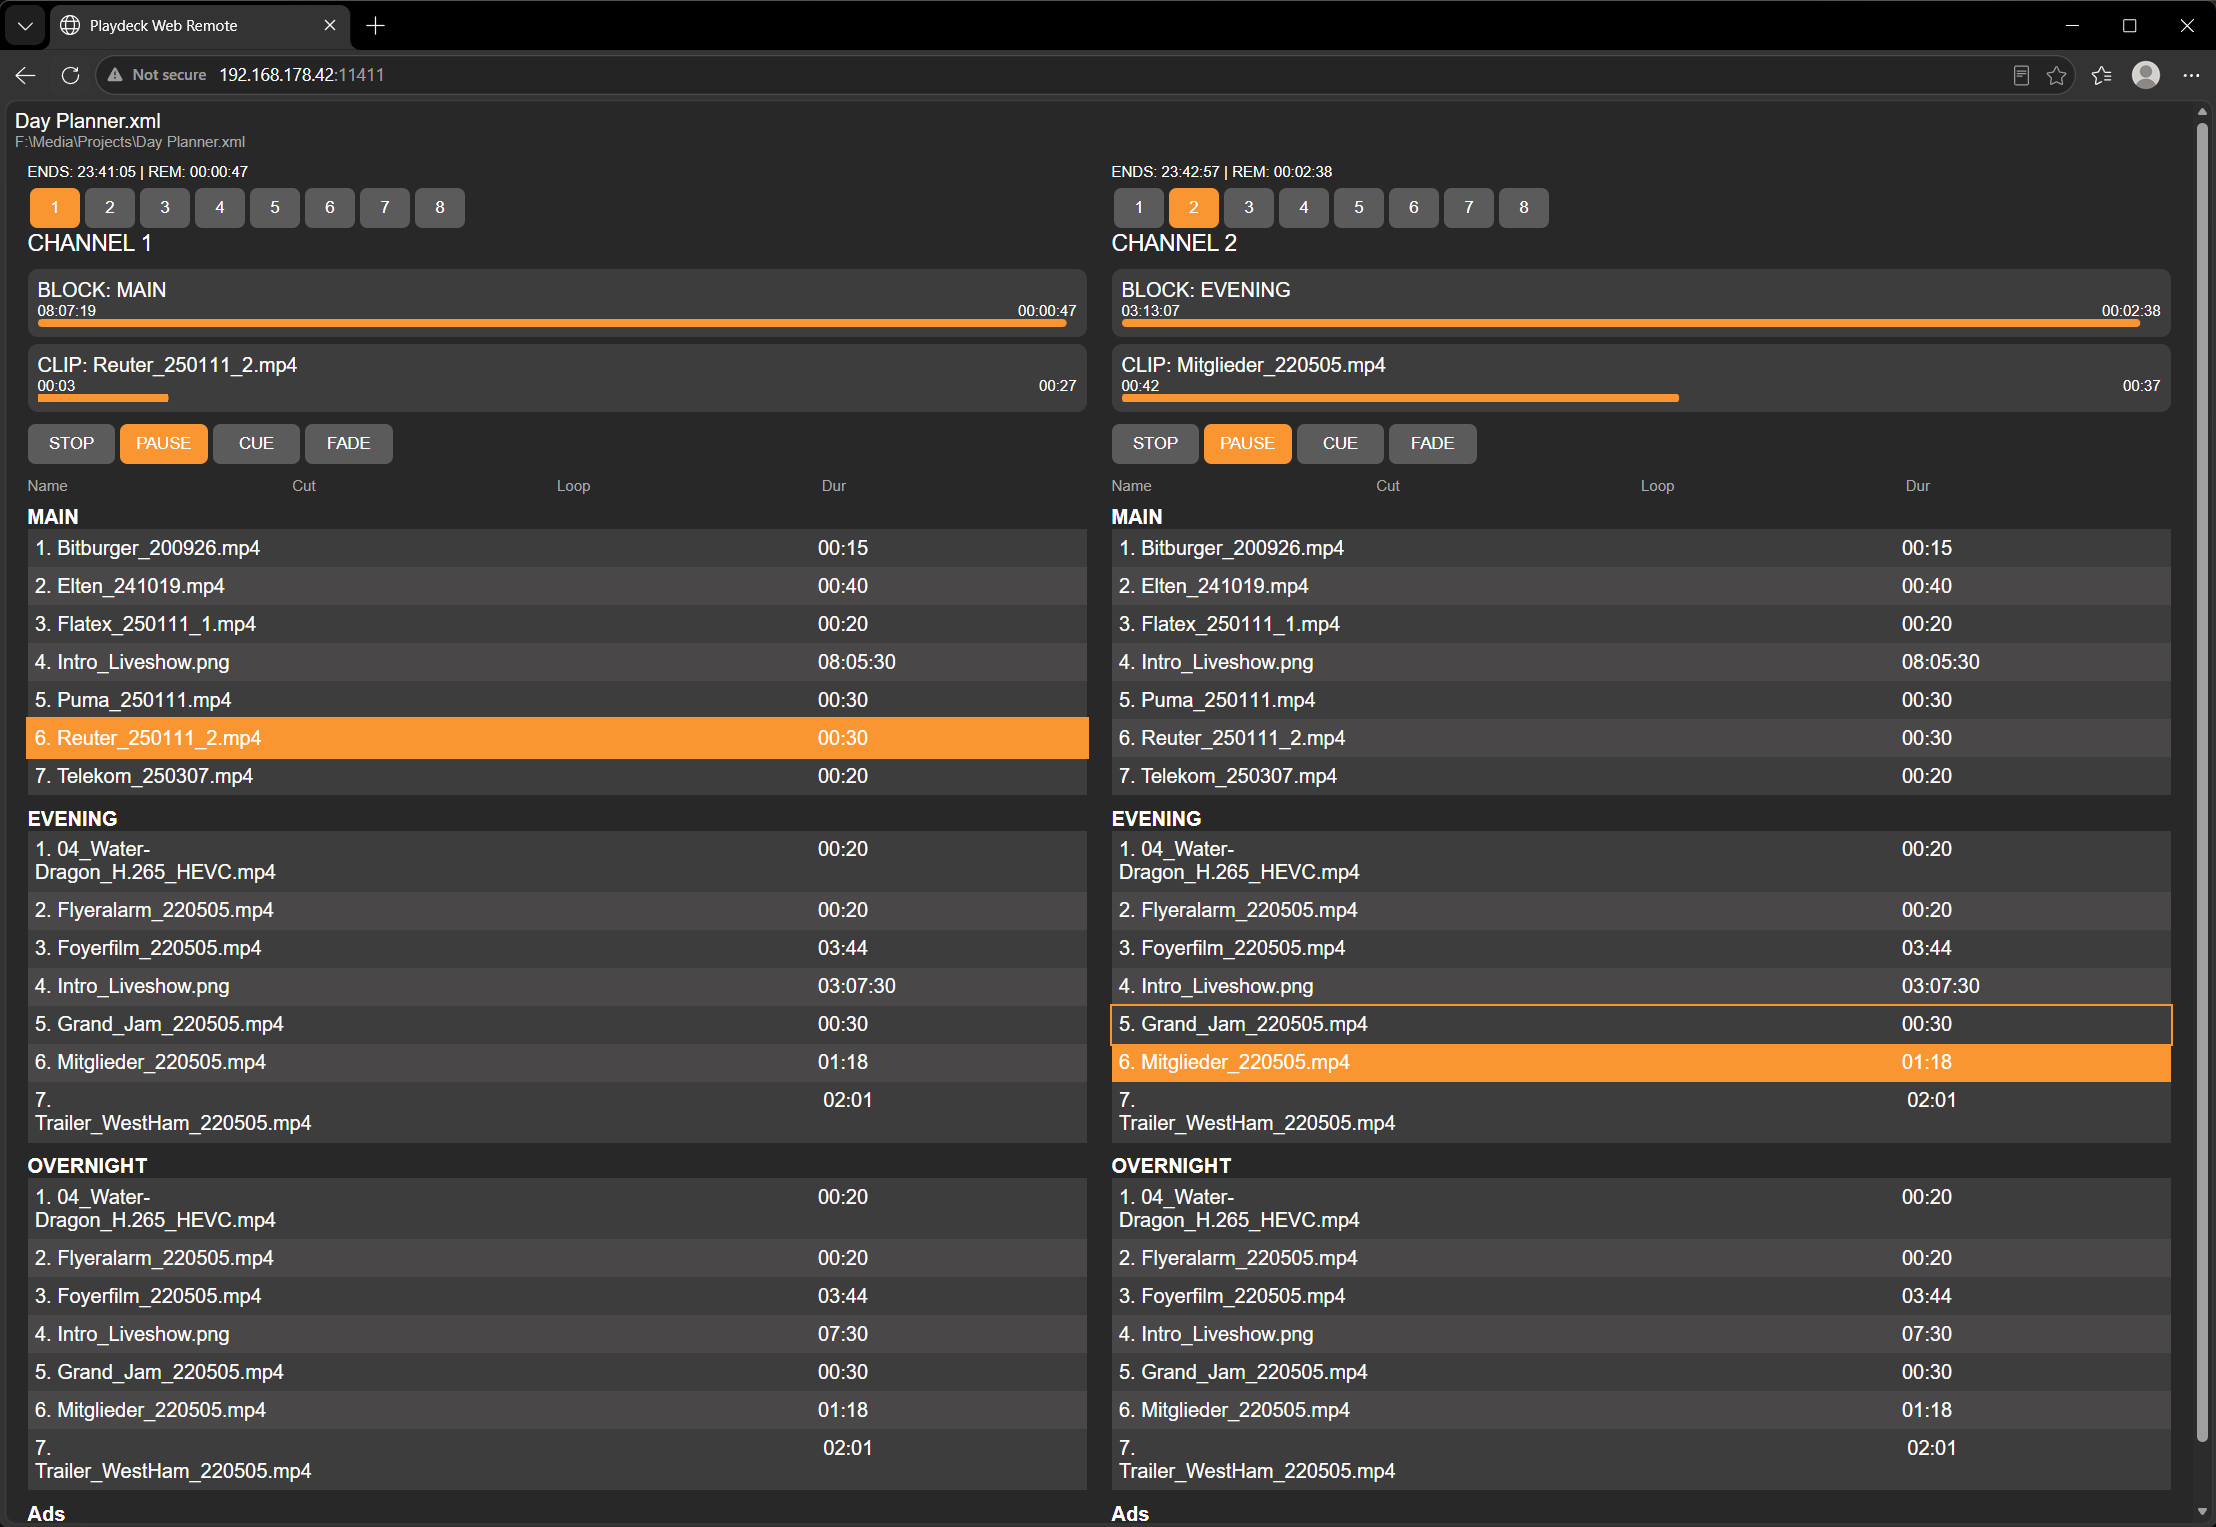
While PLAYDECK is running, the HTTP REST API is automatically available on port 11411 (sharing the same service as the built-in Web Remote).

Base URL

http://HOST:11411/api/v1


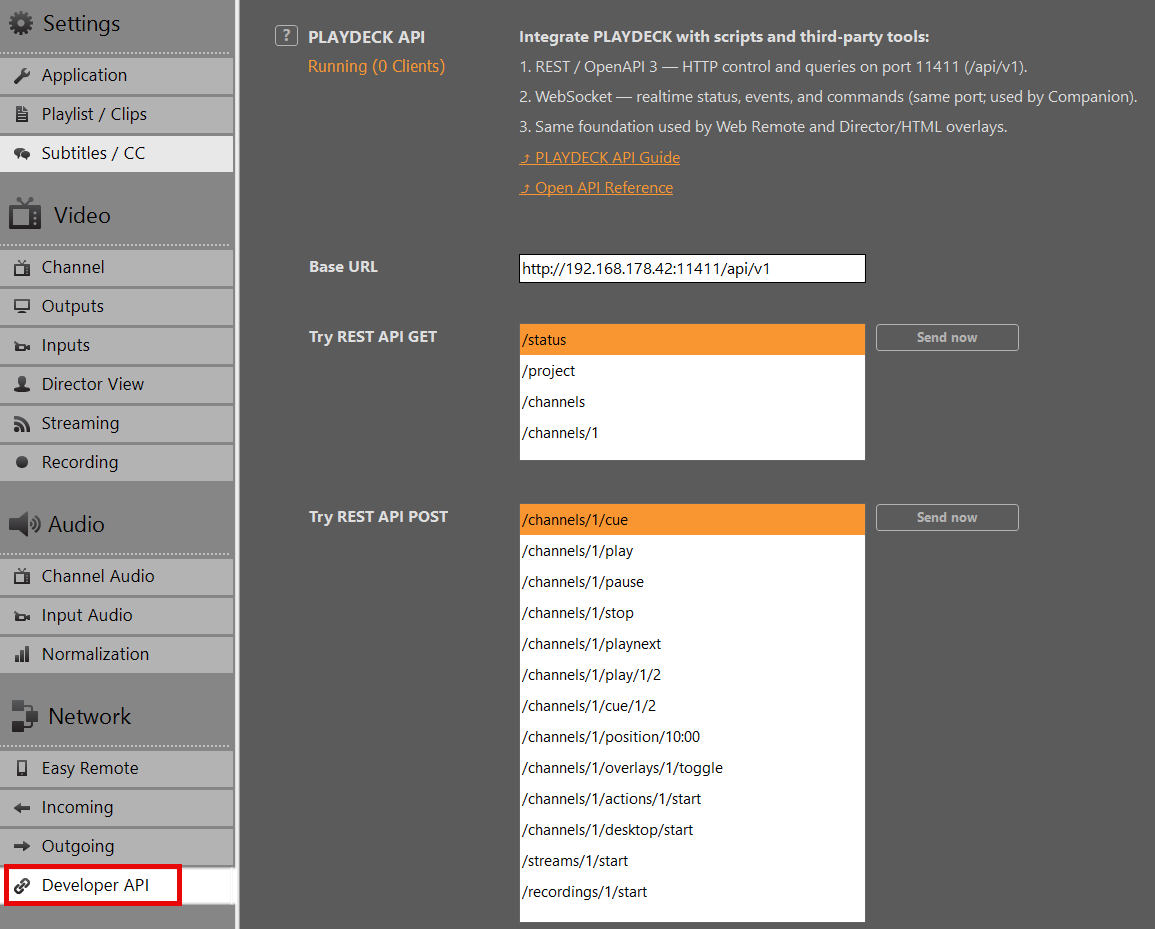
Replace HOST with the actual IP address of your PLAYDECK machine, found under Settings ➔ Network ➔ Developer API.

Testing inside PLAYDECK

You do not need external tools to start testing. Open Settings ➔ Network ➔ Developer API within the software application to send sample requests directly from the UI or launch the interactive documentation.

HTTP Request Examples

1. Service Health Check:

GET /api/v1/health HTTP/1.1
Host: HOST:11411


2. Retrieve Playout Status (JSON response):

GET /api/v1/status HTTP/1.1
Host: HOST:11411


3. Trigger Play on Playout Channel 1:

POST /api/v1/channels/1/play HTTP/1.1
Host: HOST:11411


4. Play Block 1, Clip 2 on Playout Channel 1:

POST /api/v1/channels/1/play/1/2 HTTP/1.1
Host: HOST:11411


Many actions accept optional path parameters for targeted control (such as block/clip IDs, timecode offsets, or overlay IDs).

Legacy Command Escape Hatch

If you need full coverage of the classic PLAYDECK command language via HTTP, you can pass pipe-formatted commands into the dedicated commands endpoint:

POST /api/v1/commands HTTP/1.1
Host: HOST:11411
Content-Type: application/json

{
  "command": "play",
  "args": ["1", "1", "2"]
}


Note: No API key or authentication token is required for local area network (LAN) operations in the current version.


Interactive API Reference

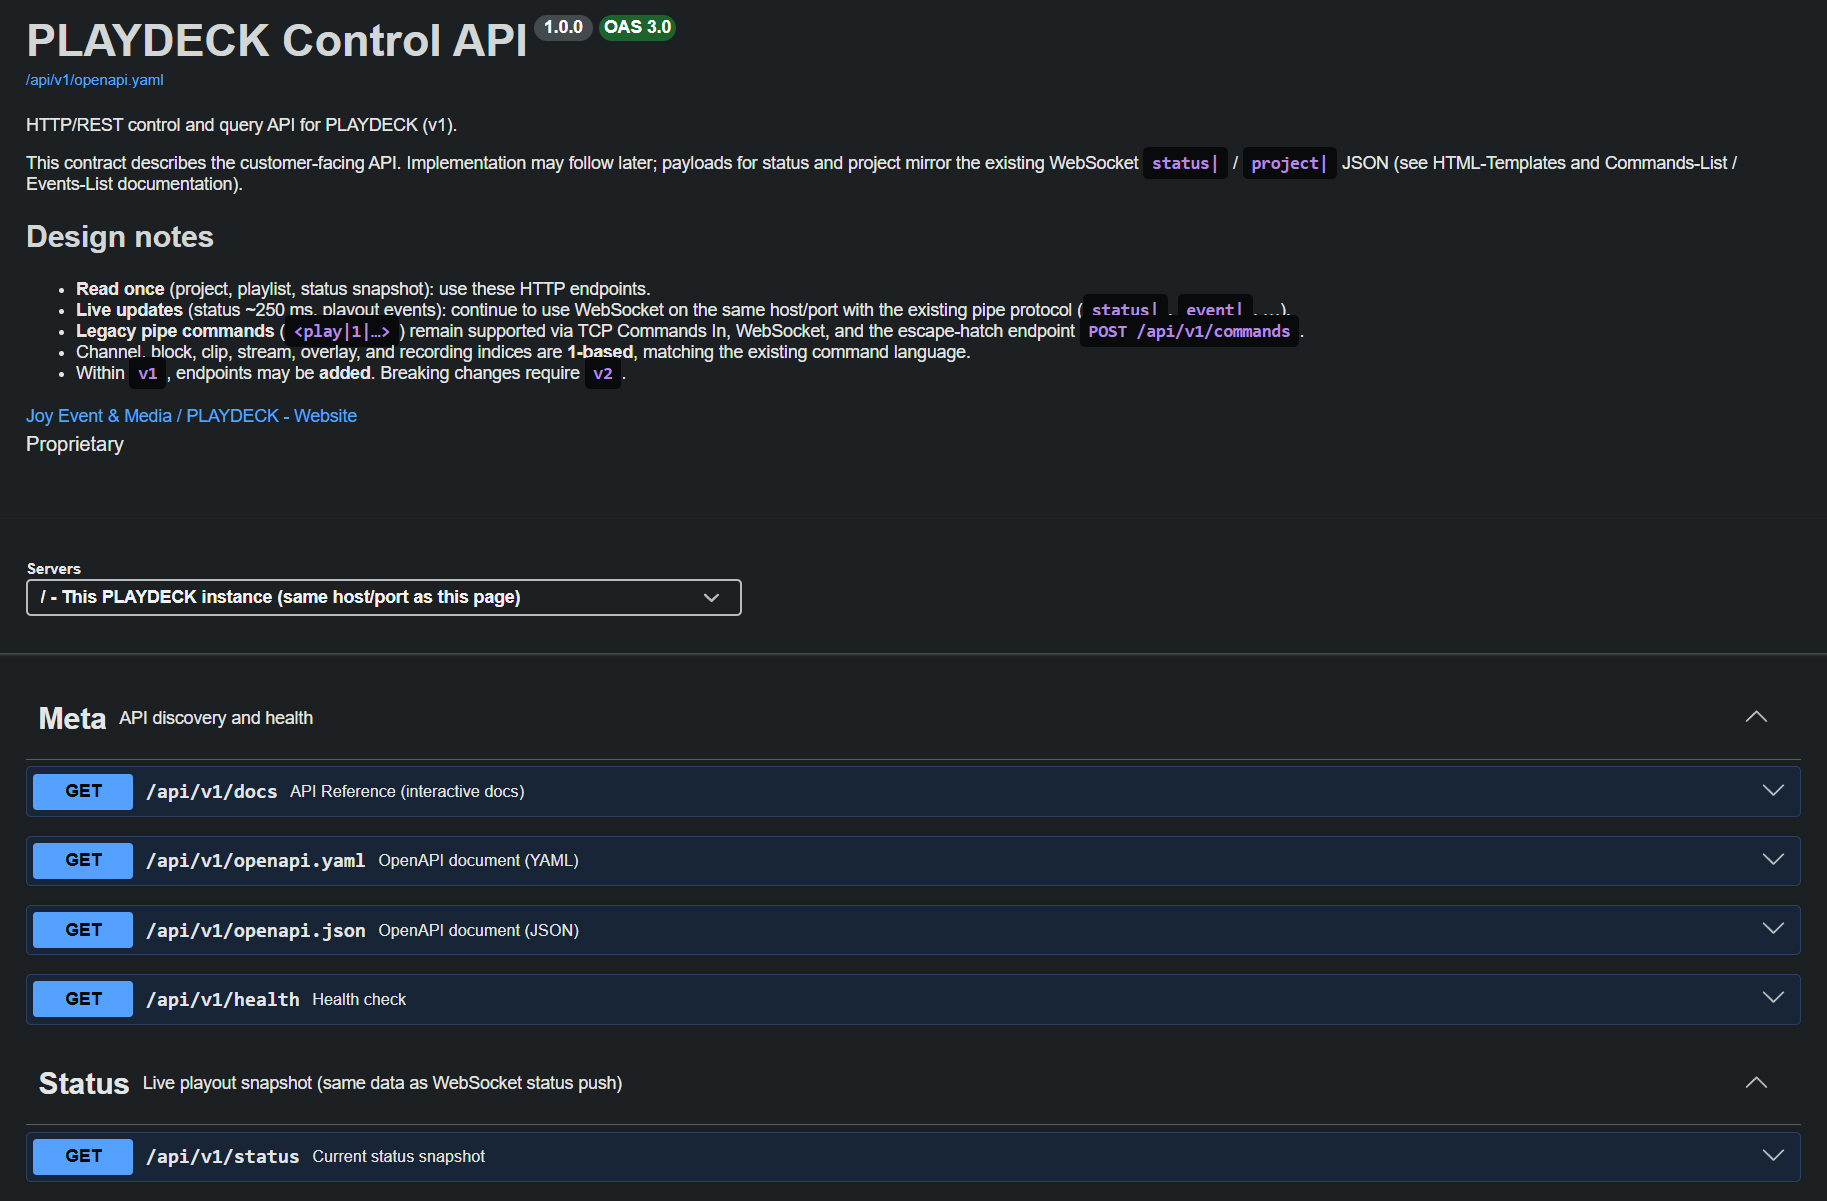
The complete machine-readable contract for this interface is provided as an OpenAPI 3 specification document.
Download: OpenAPI Specification (YAML)

For interactive browsing, payload inspection, and direct “Try it out” testing against your active PLAYDECK instance:

  1. Launch PLAYDECK.
  2. Navigate to Settings ➔ Network ➔ Developer API and click Open API Reference.
  3. Alternatively, open a web browser on any machine within the same network and navigate to: http://HOST:11411/api/v1/docs

This documentation page dynamically lists all available REST endpoints, required parameters, schema definitions, and expected response payloads.


    WebSocket real-time channel

    Port 11411 simultaneously handles WebSocket connections. This bi-directional channel is engineered specifically for operations requiring sustained data streaming:

    • Continuous Playout Status: High-frequency playback position tracking and timecode updates.
    • Event Triggers: Immediate notifications when a clip, block, or playlist starts, stops, or loops.
    • Classic Pipe Commands: Direct processing of native control commands formatted as <play|1|...>.

    The official Bitfocus Companion PLAYDECK module, the Web Remote UI, custom HTML graphics overlays, and Director View templates utilize this specific real-time channel. Complete syntax documentation for commands and event types can be found directly within the application package or within your local template directory:

    Web Remote UI:
    c:\Program Files\JoyEventMedia\Playdeck\html\webremote.html
    
    HTML-Templates:
    C:\Users\Public\Documents\JoyEventMedia\Playdeck\HTML-Templates\
    or
    c:\Users\<user>\AppData\Local

    Legacy TCP Commands Input

    To maintain backwards compatibility with existing broadcast automation infrastructure, PLAYDECK continues to accept incoming raw TCP connections on port 11375.

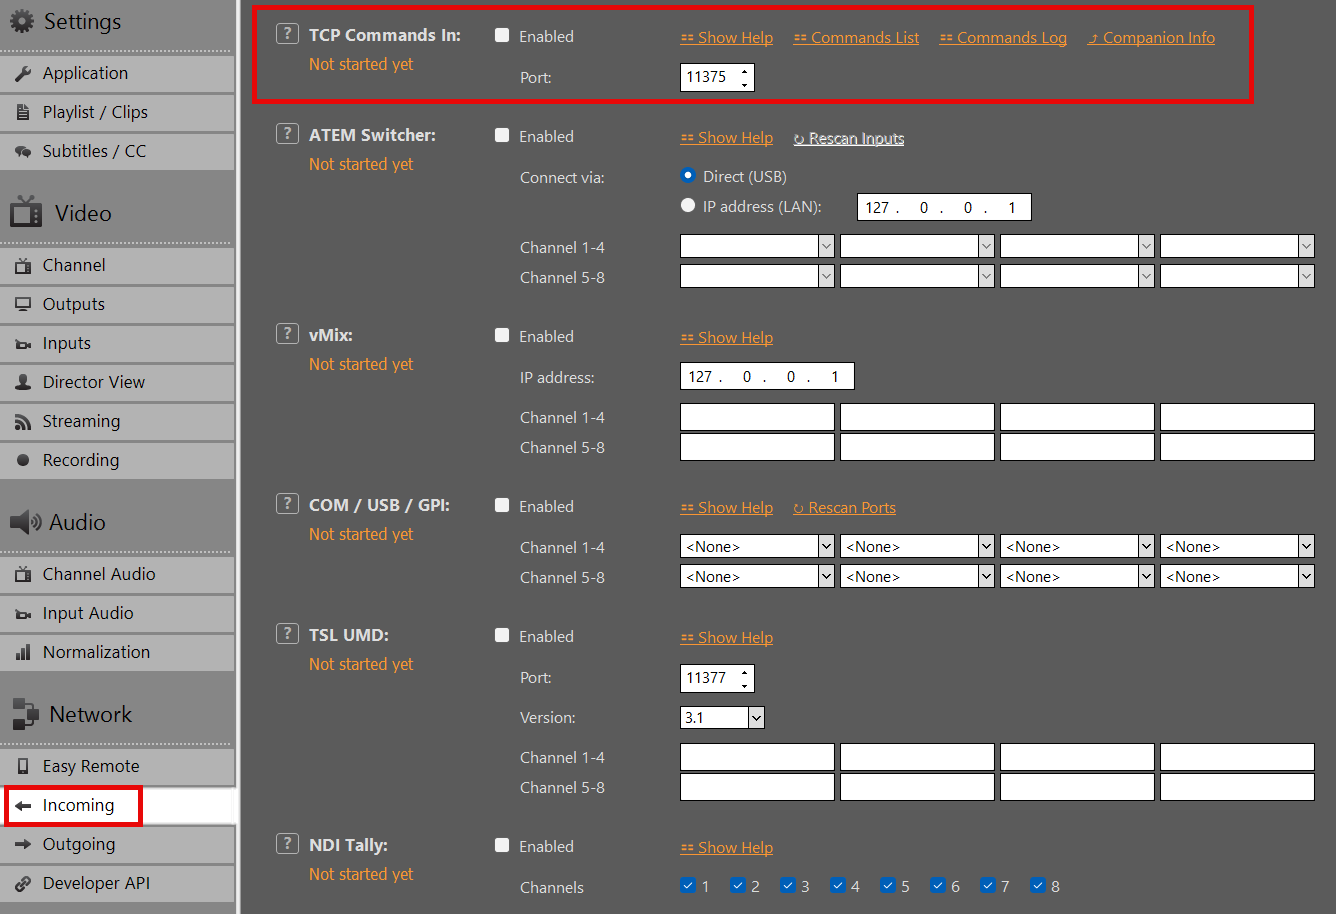
    This setting is managed under Settings ➔ Network ➔ Incoming ➔ TCP Commands In. The payload syntax matches the pipe-delimited format used by the WebSocket channel and the REST /api/v1/commands endpoint.

    • Developer Note: For all clean-sheet development projects and new script integrations, we highly recommend utilizing the REST API instead of raw TCP sockets.

    Integration Examples

    • Bitfocus Companion: Rapid deployment of physical hardware control surfaces using our production-ready native module over WebSockets.
    • Web Remote: Full-featured production control interface accessible through any browser on port 11411.
    • Director View & HTML Overlays: Built-in web templates showcasing live status binding.
    • Custom Software Tools: Rapid application development using standard HTTP clients generated from our OpenAPI specification, optionally backed by WebSockets for telemetry.

    Questions or custom workflow requirements? Contact our engineering team at [email protected].


    Translation

    This article will show how to work on translations for PLAYDECK.


    Introduction

    The existing Languages are pre-translated via Online Tools. We use DeepL for this. This works very well for longer sentences (e.g. Settings), but it works also very poorly for single words (e.g. “Input”).

    In addition, some translations use more or less space (number of character). This could lead to certain words not “fitting” into a certain Button. If the translation can’t be shortend, we can also make the button wider.

    For these reasons, every language needs fine-tuning.


    Workflow

    The translations are being edited via an external tool called “SIL Editor”, where you can load and edit our language. You can then preview your edits directly in PLAYDECK.

    One your Editing is done, you send use the Language File and we import your changes into the App.


    Downloads and Installation

    You need PLAYDECK in Version 4.2b6, which you can download here:
    https://downloads.playdeck.tv/4.2b6/PlaydeckSetup.exe

    You need the SIL Editor, which you can find here (only download “SIL Editor”):
    https://www.sicomponents.com/download/

    And you need the Language File with the Translations:
    https://downloads.playdeck.tv/4.2b6/PLAYDECK.sib

    —————-

    Install PLAYDECK and the SIL Editor, then save the SIB File here:
    c:\Users\Public\Documents\JoyEventMedia\Playdeck\PLAYDECK.sib

    If PLAYDECK detects a SIB File in this location, it will PREFER to use it over the internal translation.


    Testrun

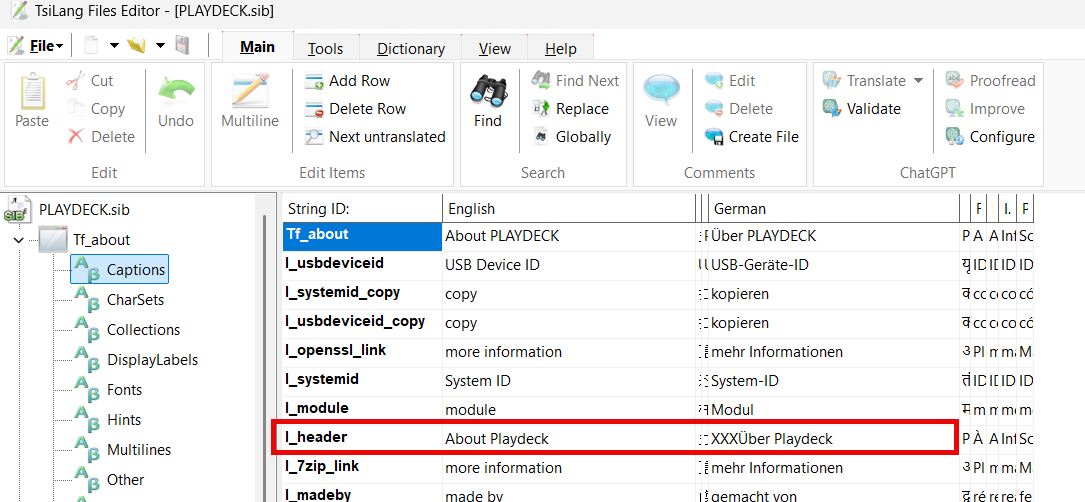
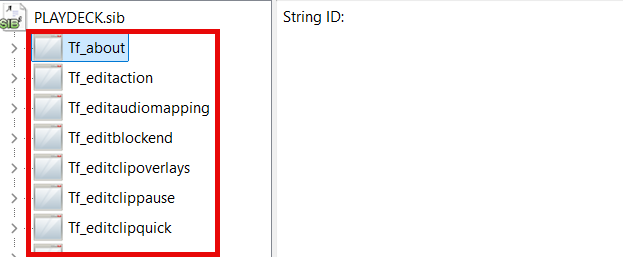
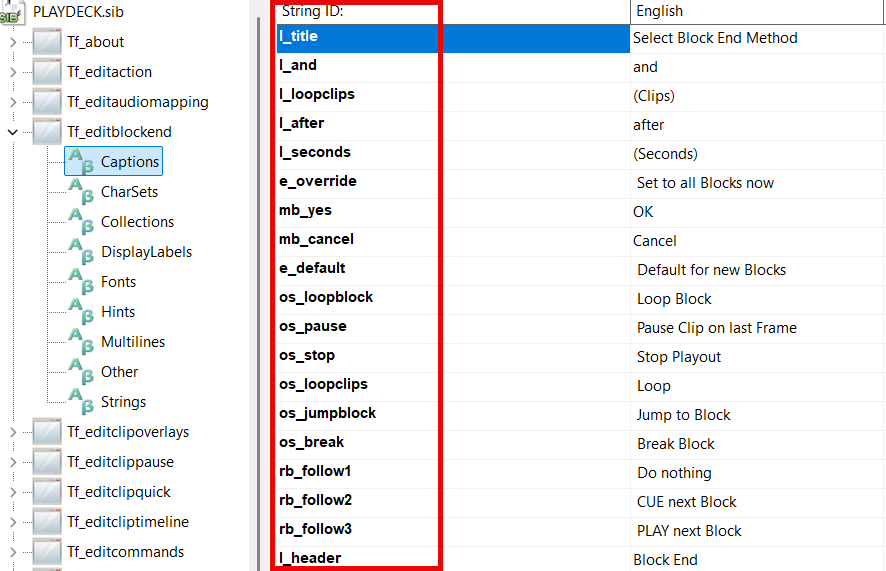
    Let’s try to edit something and check, if PLAYDECK updates the translation. Double click the SIB File, which will open the SIL Editor. Open the first branch “Tf_about”, which represents the ABOUT Popup in PLAYDECK. Click on “Captions”, which represents all static text fields in the popup. You can minimize all language columns, that don’t concern you – in this example I focus on GERMAN (can be any other language). Now for “l_header” change the translation to something noticable – in this case I simply add “XXX” infront of the text for testing.

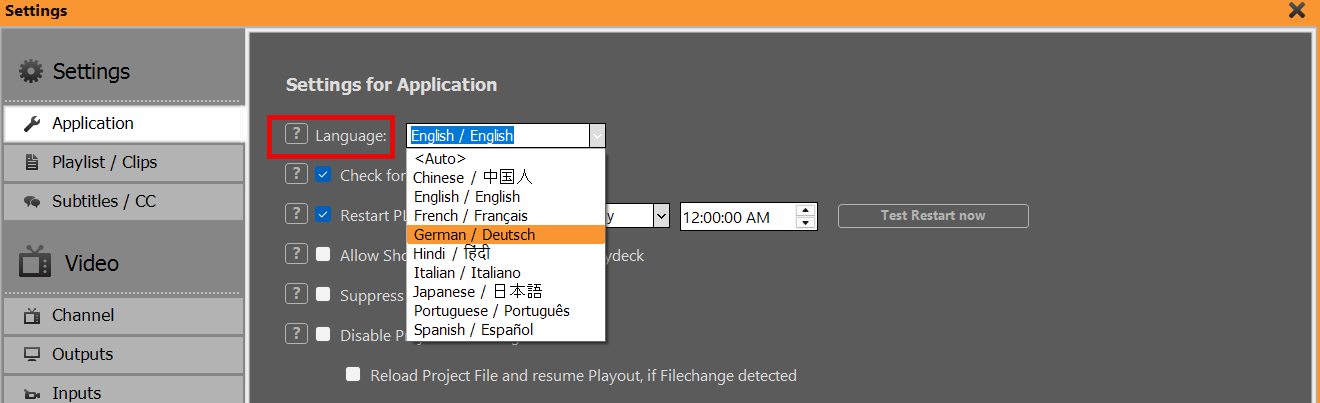
    Save the SIB File (or press CTRL+S). In PLAYDECK switch to GERMAN in the App Settings:

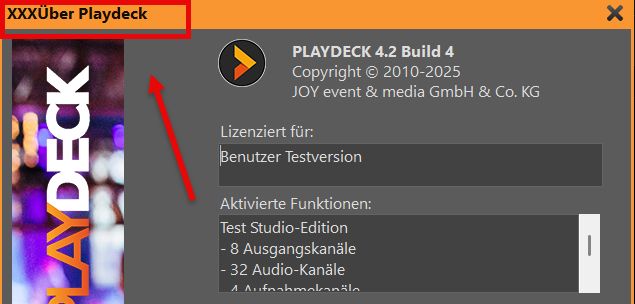
    After restarting PLAYDECK, open the About Popup via “License > PLAYDECK”. It now should reflect your text editing change. Don’t forget to change back after testing. Should this not work, please contact us.


    Where to start

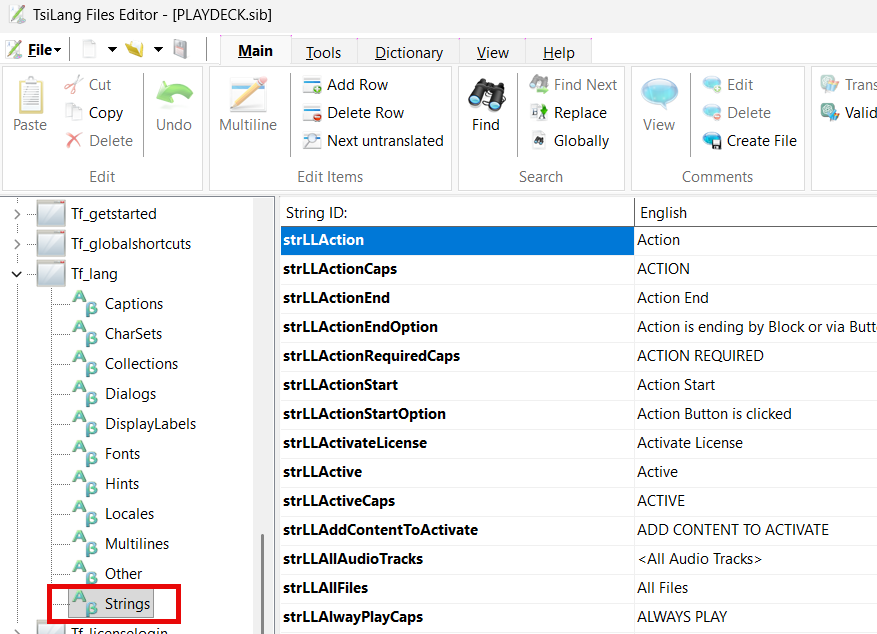
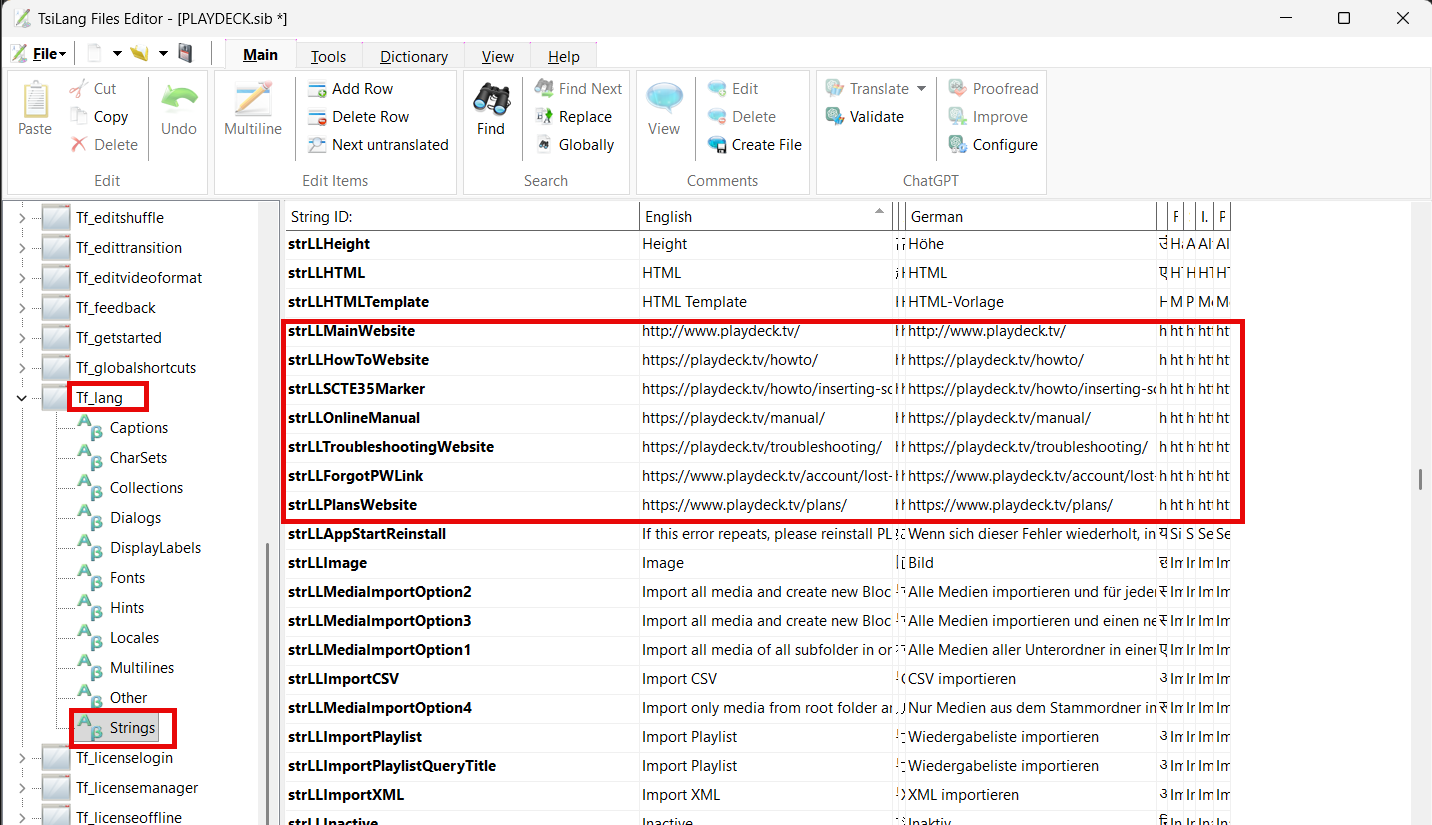
    We recommend to edit all dynamic texts first, as they are used repeatedly in PLAYDECK and therefor form the “base translation”. You can find them under “Tf_lang > Strings”:

    Once that’s done, you can decide for yourself: You can either search PLAYDECK for needed edits by walking through all Settings and Popups. Or you can walk through all Popups directly in the SIL Editor.


    Orientation and Editing

    The left Side in the Editor represents all possible Popups in PLAYDECK.

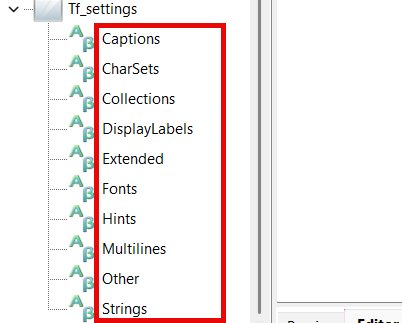
    Noticable are “main” (Main UI) and “settings” (all settings). These are further devided into groups:

    The Groups have the following meaning (only mentioning the onces you need):

    Captions: All static texts visible in the Popup, mostly Labels, Buttons, Menus
    Collections: Rarely used. Only some Dialog Options.
    Extended: Also static texts, but mostly Headlines
    Hints: Texts that appear under the Mouse, eg. the “?” Button or Toolbar Icons
    Multilines: Table Headers and Drop-Down fields with multiple selection. Edited by Double-Clicking.
    Other: Rarely used. Only some Dialog Options.
    Strings: Dynamic Text Blocks. Only used in “Tf_lang”

    In the huge middle table, where you edit your texts, there is also a column called “String ID”, which represents the internal name of the corresponding element in PLAYDECK. This “can” be of help in some cases you might be searching for something.

    Here are some information on the choice of name:
    l_: Static Text Labels
    b_ or mb_: Buttons
    cb_: Checkbox with Text
    rb_: Radio Button with Text
    pm_: Popup or Right-Click Menu
    os_ or op_: Drop Down Boxes


    Tips for Editing

    1) Please note, that there are several redundancies (same text over and over), which can’t be avoided, if for example the same text appears several times in PLAYDECK (e.g. Settings).

    2) Some Texts also can’t be translated at all, since they are deeply nested within the System or the Video Engine, which are also Settings typically (Drop Down Edits).

    3) You can search for any Text in the Editor or click on the Column Header for sorting. This can help to locate the English Original to find your Text Fields for Editing.

    4) Any translation not given (empty field) will automatically use the English Original. So you can DELETE the translation to force PLAYDECK to use the English Original

    5) All Multiline Translations need to have the same amount of Lines, otherwise PLAYDECK may fail to start or function correctly. Multiline Edits are edited by Double-Clicking the Translation.

    6) Some Text Fields have very specific characters, which help formatting and readability in PLAYDECK. These are “<br>” (Linebreak), or ” ” (Empty Space) or “:” or some UTF8-Icons. Just be aware of them and that removing them can cause loss of readability.

    7) Most Languages have “lower” and “UPPER” case and some Translations (“Strings” in “Tf_lang”) provide both cases, if needed. For languages that don’t have “case”, use the same translation in both fields.


    External Links

    You are able to change most of the Links in PLAYDECK to a different location, e.g. the Support Email-Address as well as Links to Online Documentation and other Website.

    You are 100% allowed to do so. We only ask to make sure, that emails are responded to and website links are working and updated regularly.


    External Contents

    All images in “GET STARTED” and all Documentation Files have also been translated. You can find them here:
    c:\Program Files(x86)\JoyEventMedia\Playdeck\lang

    While there is no absolute urgency to replace or update those files, you can if you want to.

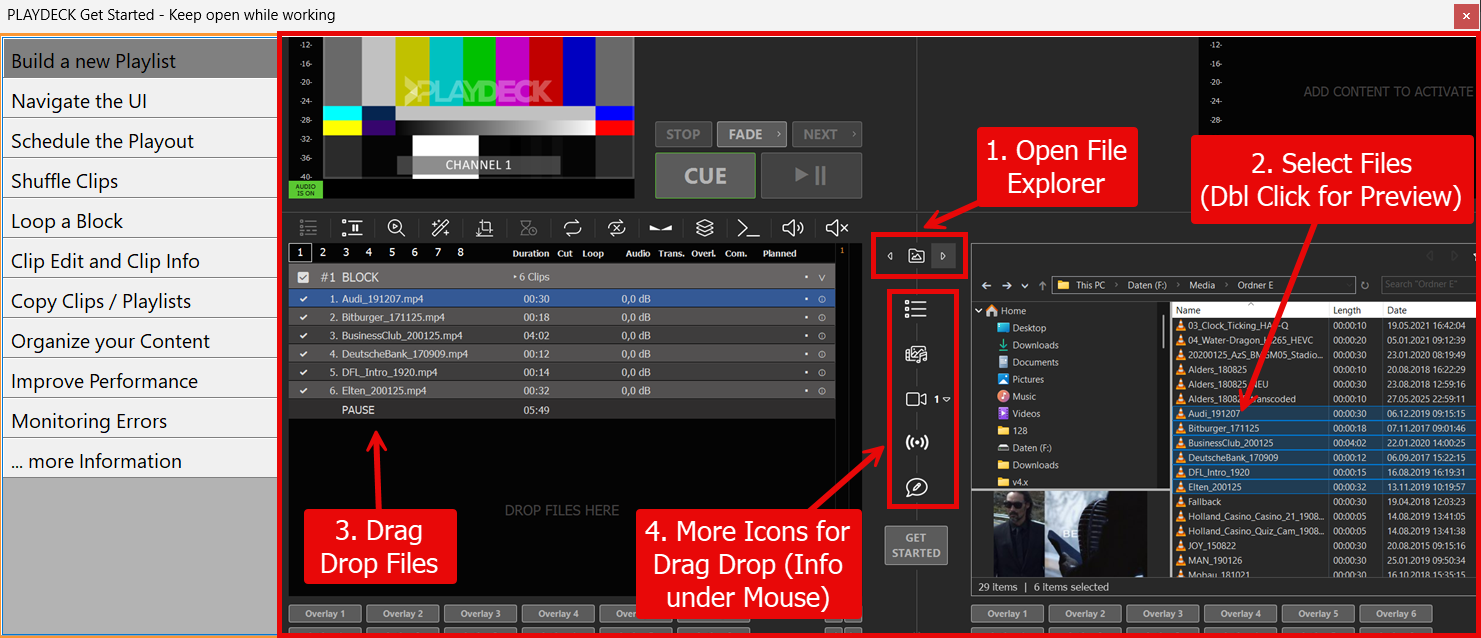
    The “GetStarted” Folder contains all PNG images, that are shown in the Get-Started Dialogue:


    The “Documentation” Folder contain all TXT Files, that are being opened as expert help on several occasions in PLAYDECK:

    Should you decide to update these Files, please don’t rename them and send them to use in the same format as the original (PNG with same dimensions and TXT with similar structure).

    Growing Files in Playlist

    This article will show how to insert growing files into a playlist.
    Definition
    A growing file is a file that is still being recorded – it is therefore growing in size.
    Recommended Setting
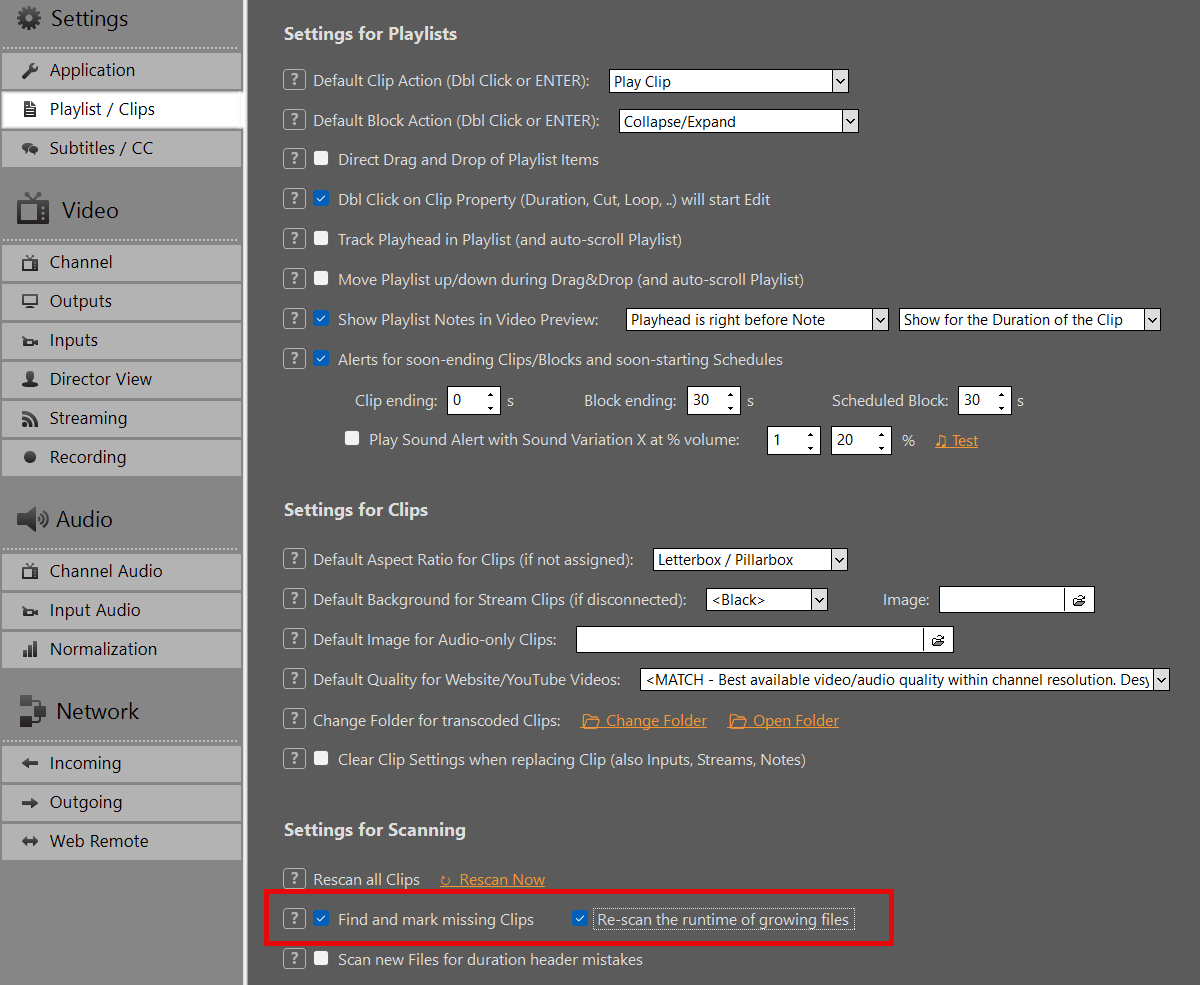
    When working with growing Files, we recommend you enabling the Settings “Re-scan the runtime of growing files” to make sure the duration is updated every 5 seconds in your playlist view:


    Insert to Playlist
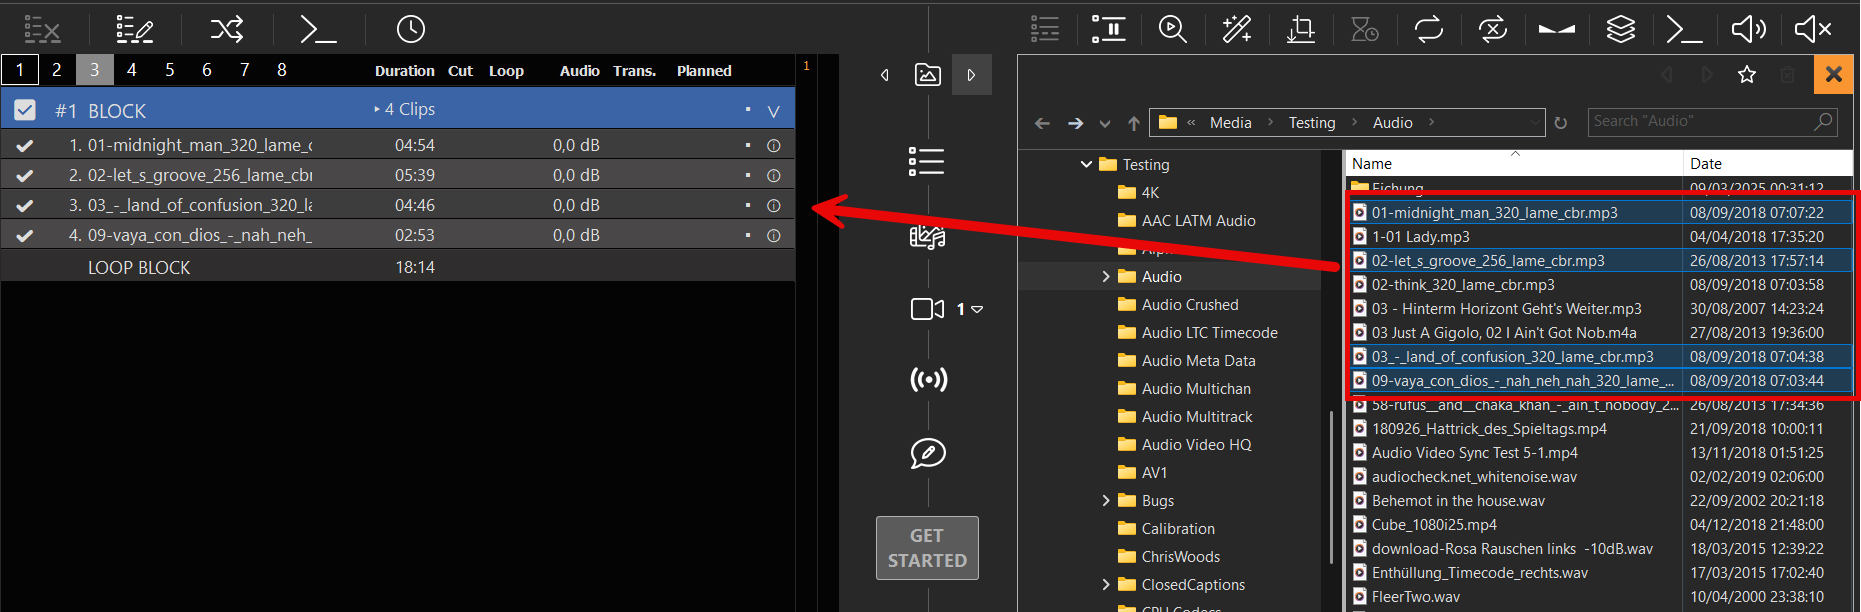
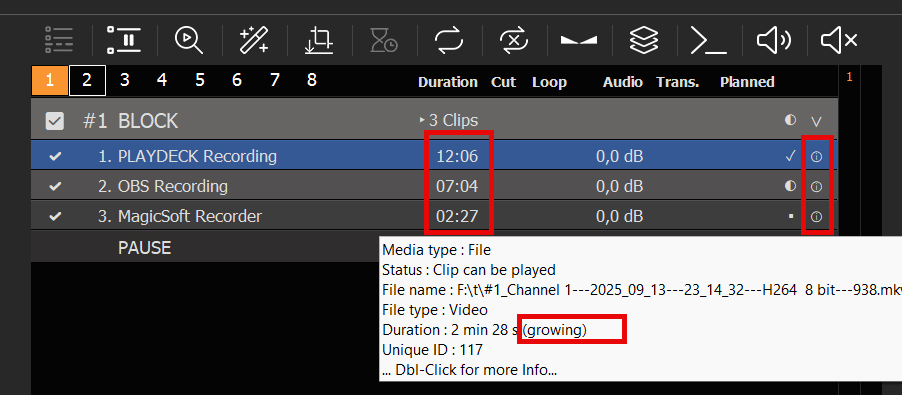
    Growing files can be inserted to the playlist like any other file: By Drag Drop from outside of PLAYDECK or using the integrated file explorer. They will be detected as “growing”, which can be verified in the info column. The clip duration will be updated every 5 seconds:

    Possible Sources
    The files can be recorded anywhere, they don’t need to be recorded in PLAYDECK. In the above screenshot we are using one PLAYDECK recording, another from OBS Studio and another from MagicSoft Recorder.

    Possible Formats
    Only the following file container formats are supported. But within that container you can use any video codec:
    – MKV
    – AVI
    – MPEG

    Cutting and Editing
    You can cut and edit growing files the same way as regular files. For example: You can set an OUT point to the file and loop it, while it is still being recorded.

    Recover lost license

    This article explains, how to recover a lost license.

    Shop license
    If you still can access the PC system with the license, you might be able to recover and move the license by yourself:
    https://playdeck.tv/howto/move-license/

    But if that PC system has crashed, is lost or you had to re-install windows, you will not be able to recover your license by yourself. In this case, please contact us at [email protected]. We are happy to release the license for you, so it can be checked out again with the license manager.

    USB Dongle license
    If the USB device is broken or lost, we can replace your Dongle and provide you with a temporary offline license during the delivery time. If the Dongle is still working, we can update the Dongle remotely with an updater-file. Please also contact us at [email protected].


    Offline license
    The offline license can’t be moved to another PC by default. Please also contact us at [email protected] to receive a new offline license from us.

    Broadcast your Video Feed

    This article will show how to send your channel video feed to any desired target and audience.

    In this article:
    Single-Monitor Output
    HDMI via Extended Desktop
    SDI / HDMI Output Card
    SMTP ST 2110 / IP Output Card
    NDI (Network Device Interface)
    Streaming (UDP, RTMP, SRT, DVB, …)
    Dante Virtual Soundcard (DVS)
    Director View


    Single-Monitor Output

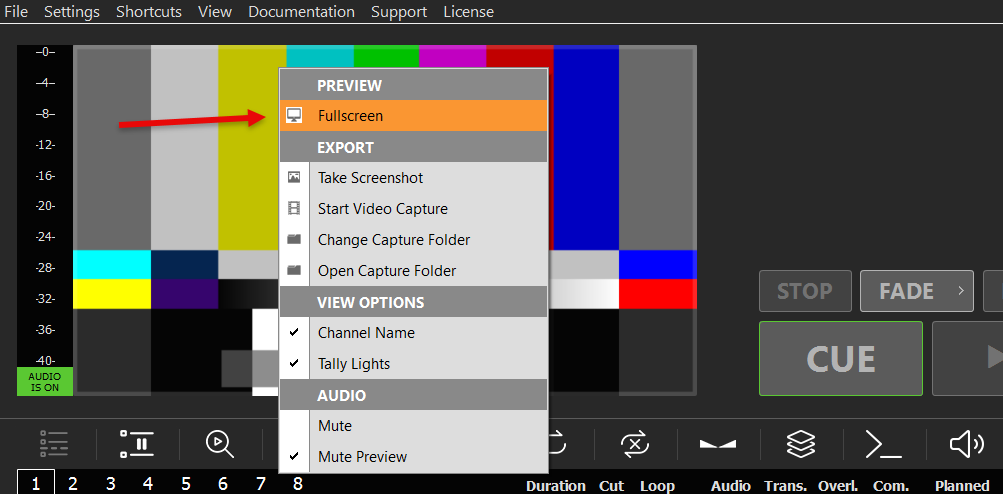
    The most simple way to show your Video Feed, is to output your Channel in Fullscreen. Enable Fullscreen by Double-Clicking the Preview or Right-Click and select “Fullscreen”:

    The Fullscreen Output will use a much higher quality and FPS as the regular Preview. You can exit the Fullscreen by pressing any Mouse Button or the ESC Key.

    This Mode is best suited for quick private Slideshows. Here is an example on how to setup a Slideshow with PLAYDECK:
    https://playdeck.tv/howto/slideshow/


    HDMI via Extended Desktop

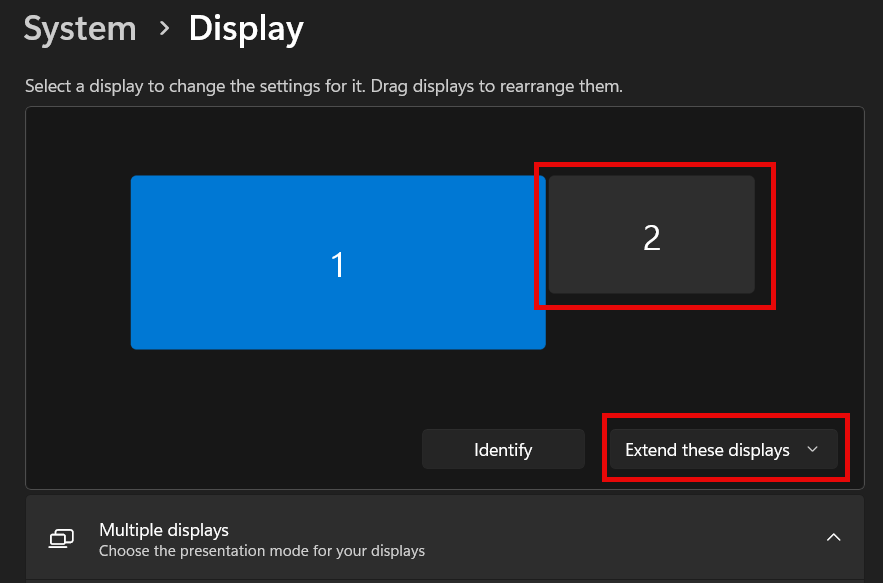
    Another simple way to send your video feed is to use your HDMI outputs of your PC or your Graphics Card. To make the HDMI Output visible to PLAYDECK, you need to setup a new “Extended Desktop Output”, like you would do, if you added a secondary Monitor:

    1. Connect in Windows
    Connect your HDMI Device to your PC physically and turn the HDMI on, so Windows can find it. Connect it to your Graphics Card (preferred) or your Mainboard. Right-Click anywhere on your Desktop and select “Display settings”. You should see your new Monitor and it should say “Display is extended” (That’s why it’s called “Extended Desktop”). If you don’t have access to your HDMI Output Device yet (e.g. LED Screen), you can use any Dummy PC Monitor for Setup. PLAYDECK will later scale your (other) output automatically, if you use the same HDMI Port. Please also make sure, your Monitor uses 60 FPS and not 120 or 144, as this might lead to lag.


    2. Assign in PLAYDECK
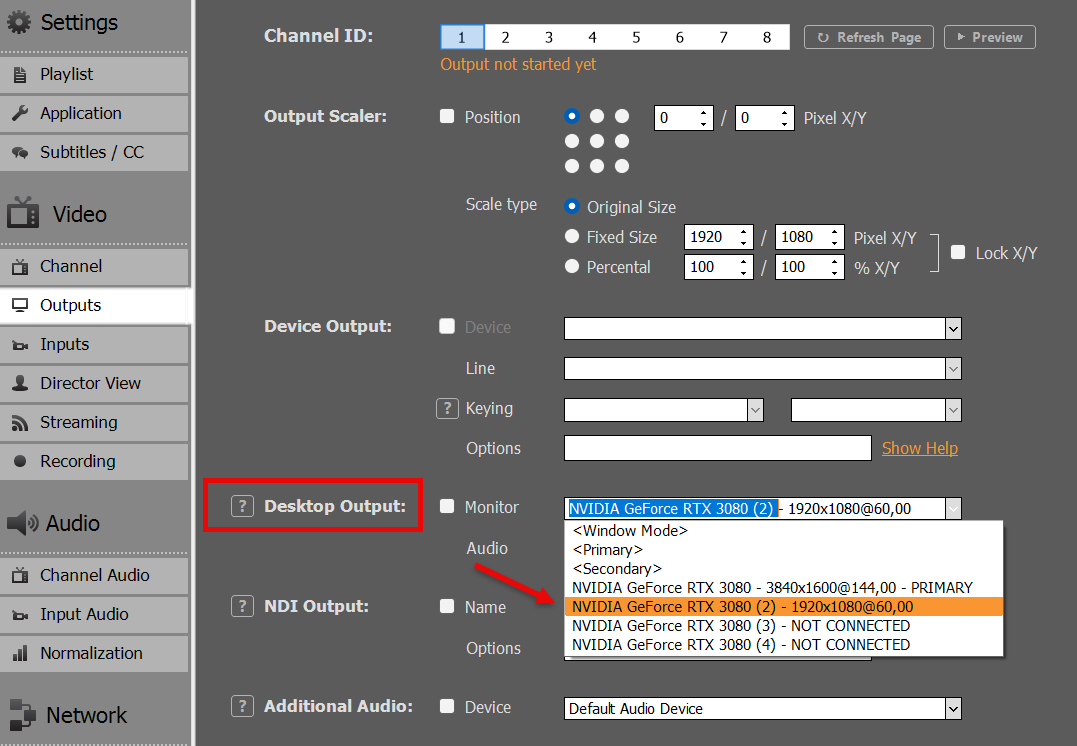
    Start PLAYDECK and select your new Monitor as “Desktop Output” for your Channel. Once activated, PLAYDECK will “overlay” its output on the Monitor. It will be On-Top of all other Windows Apps and the Mouse Pointer will be disabled. Should you accidently activate this on your PRIMARY Display, press ALT+F4 to close it, as you cant access Windows or PLAYDECK otherwise.

    PLAYDECK is able to re-connect to your Desktop Output, should it disconnect or on a power-loss or if the HDMI Device is receiving power after PLAYDECK has been started already.

    This Mode is best suited for local transmission to a TV or LED Screen, e.g. during exhibitions or events.


    SDI / HDMI Output Card

    Output Cards have a huge advantage over Desktop Output:

    – Stronger Video Signal for longer cable transport
    – Much less CPU/GPU Usage, as Card will offload resources
    – No Frame Drops, as Cards have integrated Frame Rate Control and Conversion
    – Much higher picture quality, especially Colors

    Output Cards are almost always worth the costs and are highly recommended. They provide a much more stable video transport solution compared to Desktop Output and an overall better experience.

    Find a list of all supported Output Cards:
    https://playdeck.tv/howto/supporteddevices/

    If you need a recommendation, we mostly use BlackMagic DeckLink Cards. They are available for SDI and HDMI:
    https://www.blackmagicdesign.com/products/decklink


    1. Install the Output Card into your PC
    You would need a separate PCIe Slot on your Mainboard. Imagine this Card as “Secondary Graphics Card”. Please make sure, that the PCIe provides the necessary bandwidth needed by the Device. Some PCIe Slots are “shared” and only have half the bandwidth, leading to stuttering video output. This might be changed via BIOS. You can also “host” your Card in an external housing for mobile production, like the “Sonnet Echo Express” and connect it via Thunderbolt, but please be aware that bandwidth available via Thunderbolt is lower than the PCIe bandwidth required for some some Cards like the “DeckLink 8K Pro”.

    2. Install Driver for Windows
    Most Cards need a specific Driver installed for Windows to operate. Those Driver also deliver Tools to test the Card before using it in PLAYDECK.

    Make sure, you always have the latest Version of the Driver installed in your System for maximum stability and quality. For BlackMagic Card, PLAYDECK needs at least “Desktop Video 14.5” as Driver, otherwise the Card will not work as intended:
    https://www.blackmagicdesign.com/support/family/capture-and-playback

    3. Activate in PLAYDECK
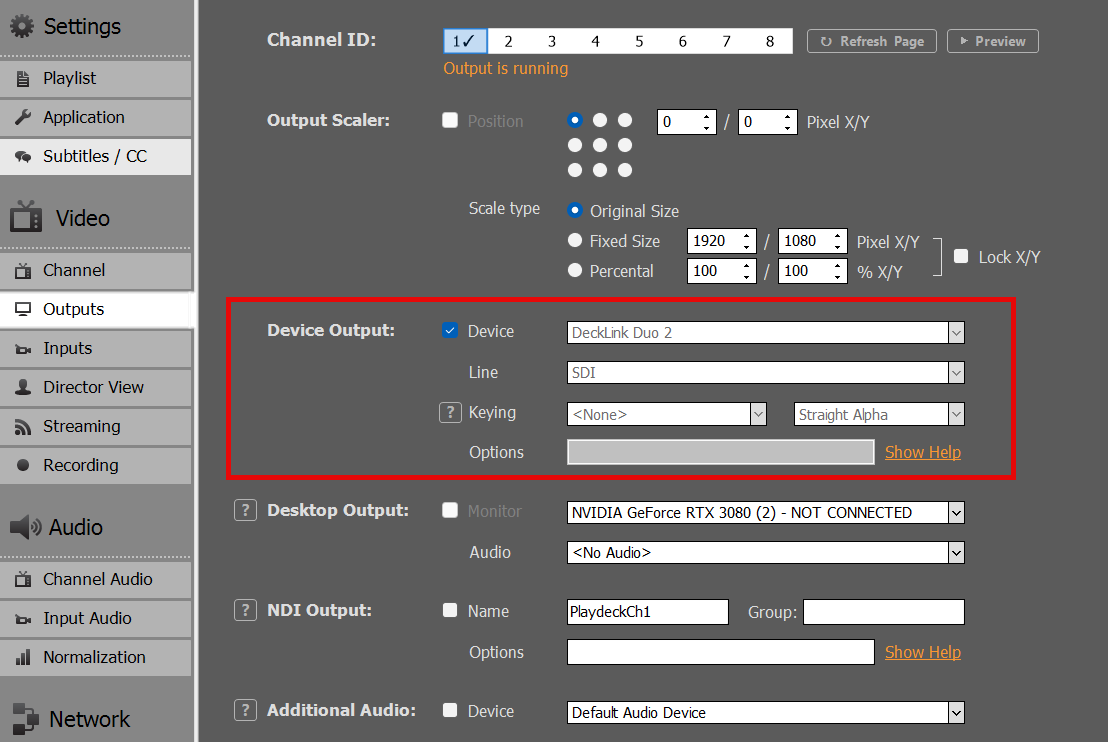
    Select your Output Cards and Line in PLAYDECK and activate the Device Output. Unlike Desktop Outputs, these Output Cards don’t need a connected display via SDI or HDMI, they will activate right away:


    SMTP ST 2110 / IP Output Card

    These Cards are very similar to SDI/HDMI Cards described above. Please read there for Installation.

    The difference between 2110 and SDI Cards is, that 2110 Cards send the signal via LAN (local area network). This is a modern and growing standard for Studios to transport video signals within the company. While it is theoretically possible to use existing LAN for ST 2110, it is recommended to use a separate LAN with specific PTP-aware switches (precision time protocol). Once setup, the main advantage is, the multiple receiver can easily access the video feed generated by PLAYDECK.

    We provide a separate article for 2110 Devices and their Network setup options:
    https://playdeck.tv/howto/2110-device-setup/


    NDI (Network Device Interface)

    NDI is another Network Transport Option for your video feeds. It can be used with the existing LAN (local area network) and doesn’t need specific network configuration. It provides its own “discovery system”, meaning: You send your NDI signal into the network and it will be automatically detected by any NDI receiver.

    NDI is the preferred method to exchange video feeds with other Applications. Here are some examples:
    https://playdeck.tv/howto/obs-studio/
    https://playdeck.tv/howto/vmix/

    NDI can also be used in a Cloud Setup, e.g. Amazon EC2 instances, to transport between server:
    https://playdeck.tv/howto/amazon-ec2/

    You can use NDI to “loop” the Signal within PLAYDECK for specific Tasks, like this Picture-In-Picture:
    https://playdeck.tv/howto/pip/

    There are many tools available to help you setup NDI in your environment:
    https://ndi.video/tools/

    If you need to setup a NDI Discovery Server, this will help you:
    https://ndi.video/tools/access-manager/
    https://docs.ndi.video/all/using-ndi/ndi-tools/ndi-tools-for-windows/access-manager

    Note: There has been a problem with NDI causing stuttering after a window update. Here is the solution:
    https://www.vmix.com/knowledgebase/article.aspx/376/windows-update-affecting-ndi-stability


    Streaming (UDP, RTMP, SRT, DVB, …)

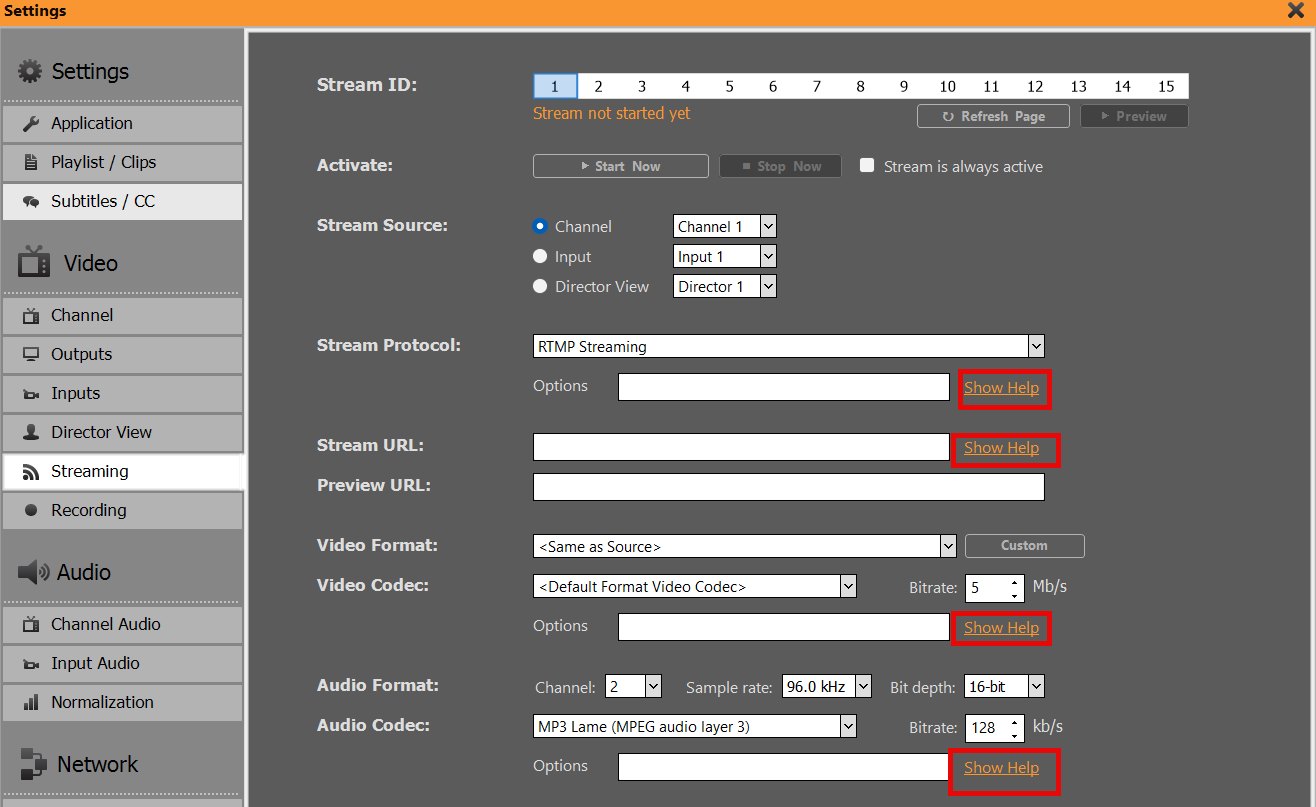
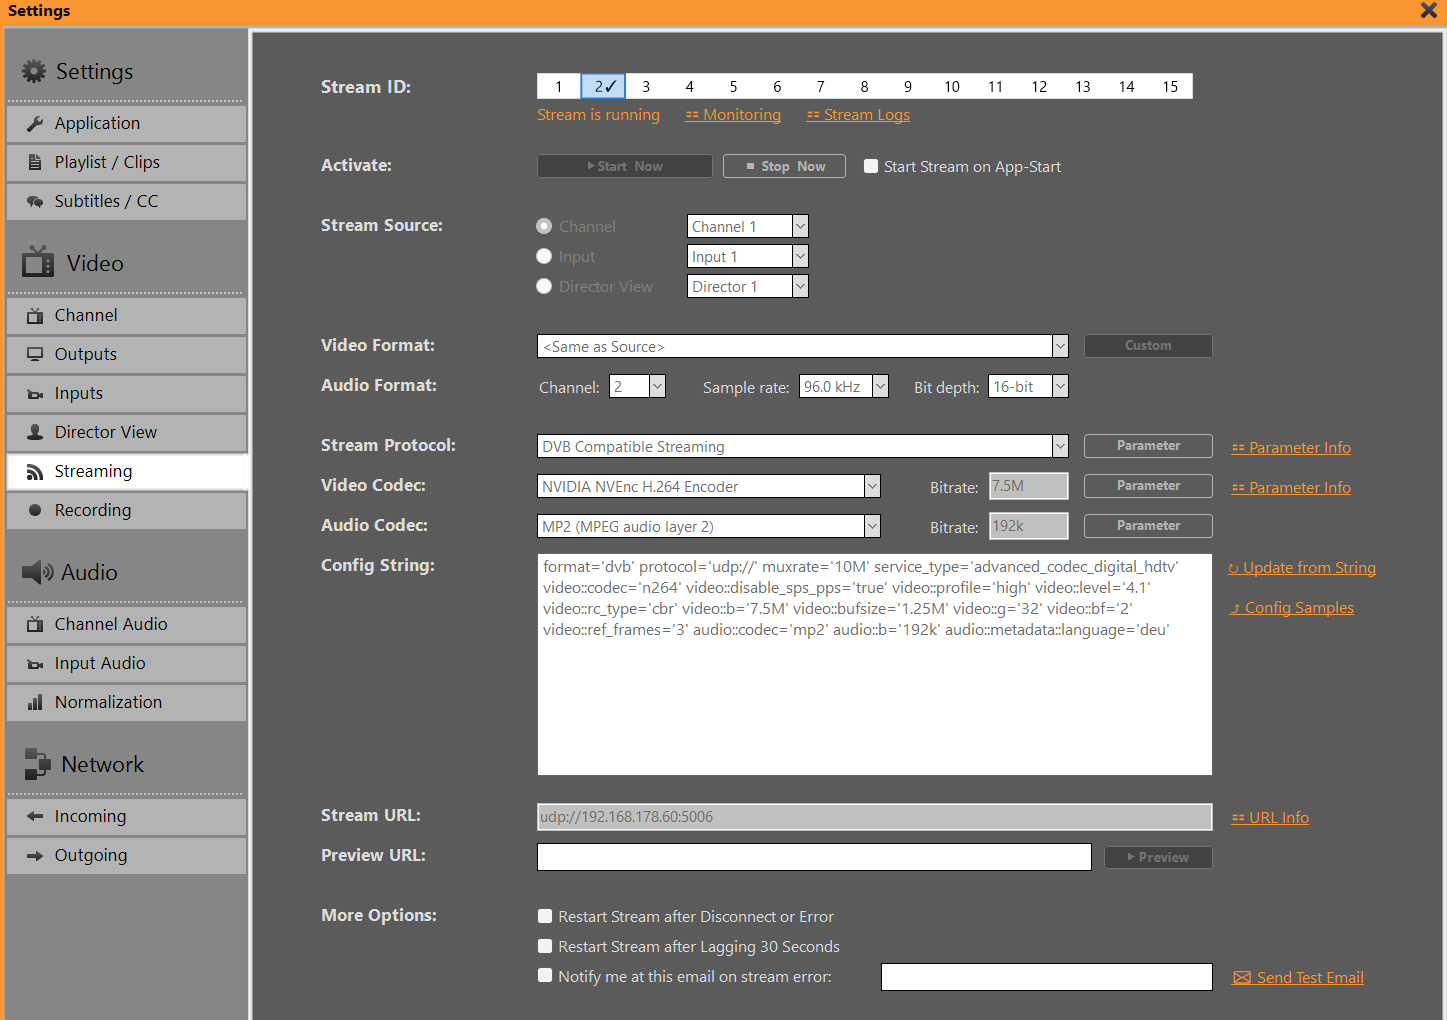
    You can pick out of several Streaming Protocols, which all serve a different purpose.

    UDP/RTMP Streaming: Low-latency Live Streaming
    SRT: High-reliability Broadcasts
    DVB: Traditional Broadcasting
    – And many more (RTP, RIST, Icecast, HLS


    We provided a more in-depth article for streaming:
    https://playdeck.tv/howto/output-streams/


    Dante Virtual Soundcard (DVS)

    This is strictly speaking not a video feed, as DVS is audio-only. This is yet another Network (LAN) Option. The use case for DVS is, if you need to send your audio feed SEPARATE or ADDITIONAL to your video feeds, or in audio-only productions. The most common use case is, that in live events, the audio mixer needs ALL audio feeds of ALL PLAYDECK channel, meaning: He wants to receive 8 audio channel in stereo pairs of your 4 video channel.

    We are providing an article to setup and use Dante:
    https://playdeck.tv/howto/dante/


    Director View

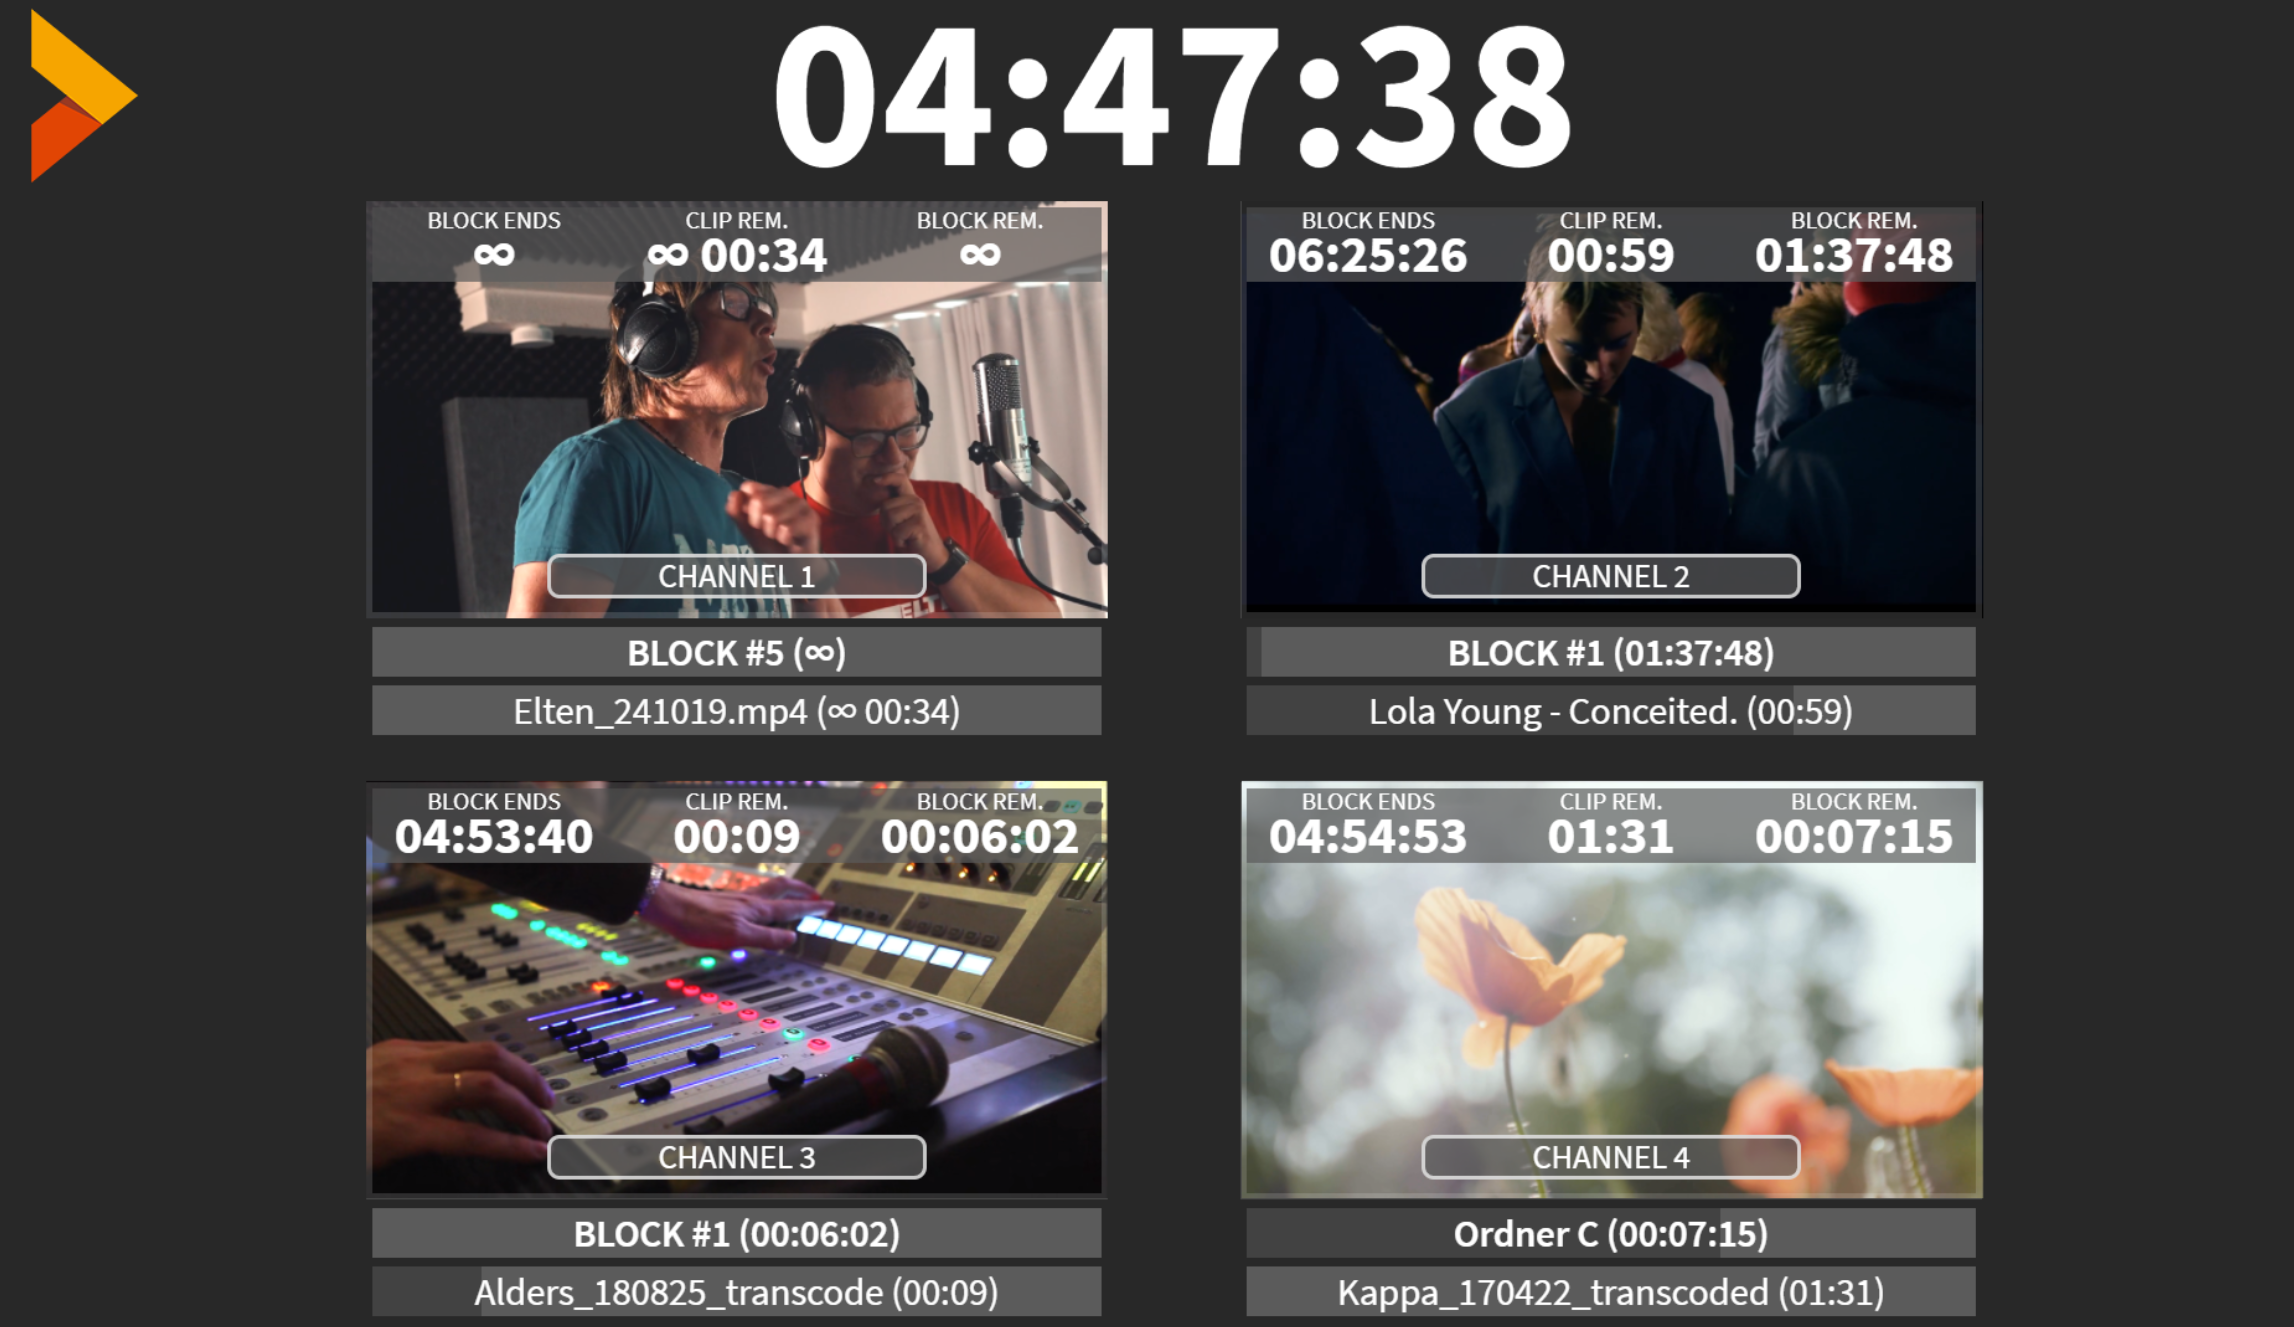
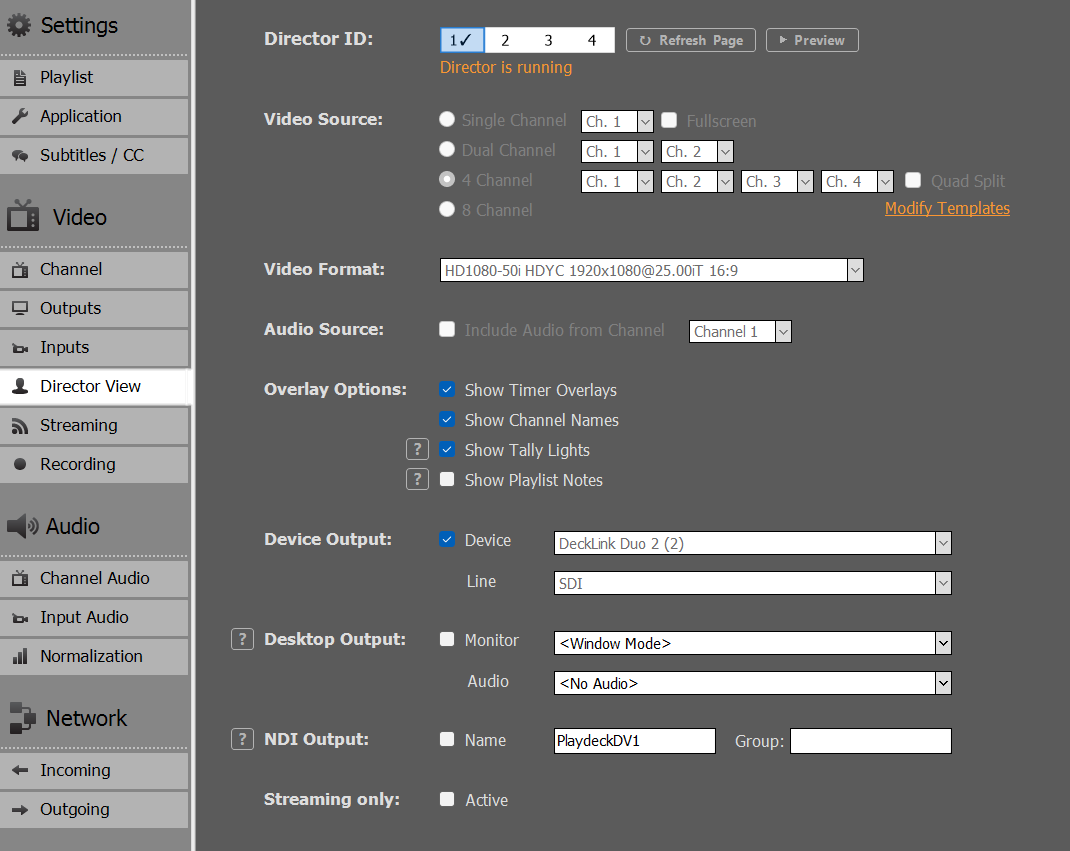
    This is a specific Output option PLAYDECK provides, to inform your crew of the state of affairs: This will mix several different video feeds into one video feed and overlay information about remaining time. This is meant to provide assistance in a multi-room or multi-person environment.

    This video feed works like a separate channel: You can send it parallel to your other outputs. You can setup and send up to 4 different Director Views. You can pick how many and which channel should be included:

    In addition, you can modify the overlay to fit your own company, e.g. integrate your own logo or change fonts.

    Activate your License

    This article will show how to activate your License and remove the Watermark from the TRIAL Edition.

    If you already have activated your License and want to know how to MOVE the License to another System, please see this article.

    There is no separate “Full Version” Download, you simply transform your TRIAL Edition into a LITE, PLUS or STUDIO Edition. Always download and install the latest Version of PLAYDECK, since we publish regular updates:
    https://playdeck.tv/download/

    In this article:
    Shop License
    Dongle License
    Offline License
    Backup License


    Shop License

    All your Shop Licenses, that you purchased via playdeck.tv, will be stored in your personal Online License Pool. This helps you organize multiple Licenses.

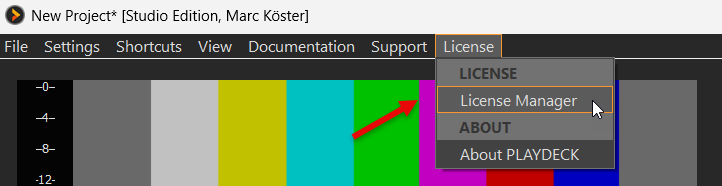
    To transfer your license from the Online License Pool to your System, go into your License Manager:

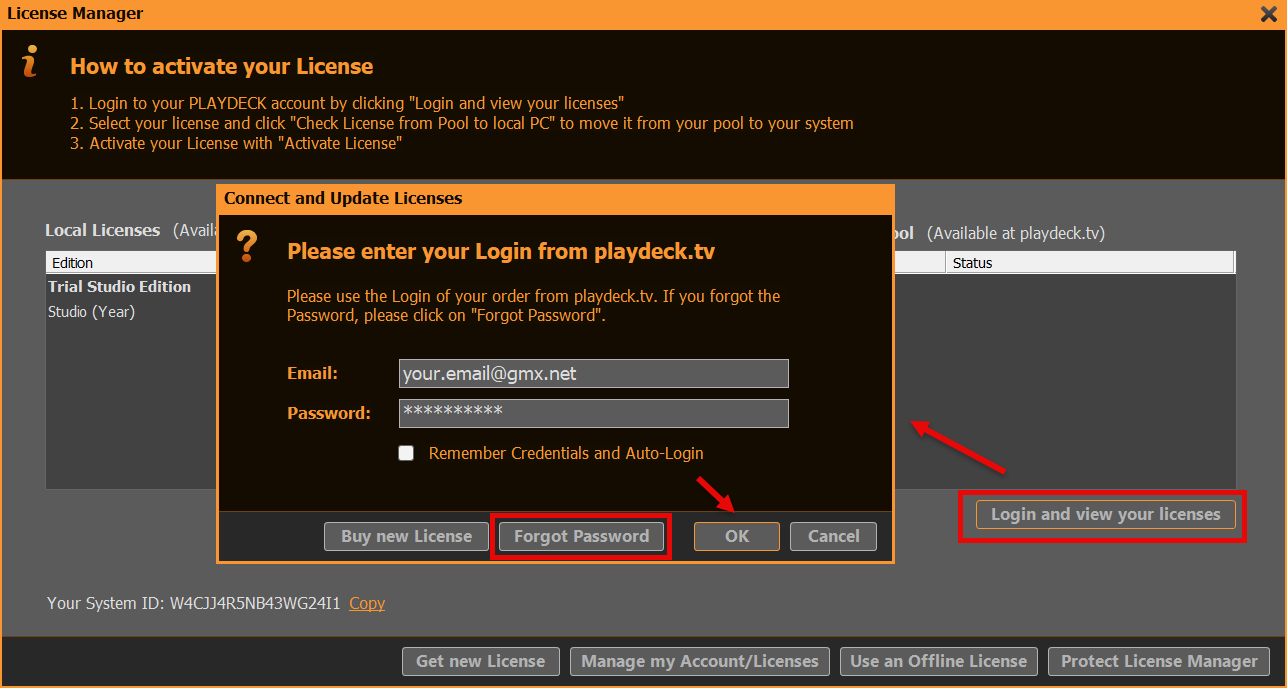
    Now login to your PLAYDECK ACCOUNT. Use the email address and password, which you used during CHECKOUT in the SHOP. Use the FORGOT PASSWORD button, if you need to reset your password:

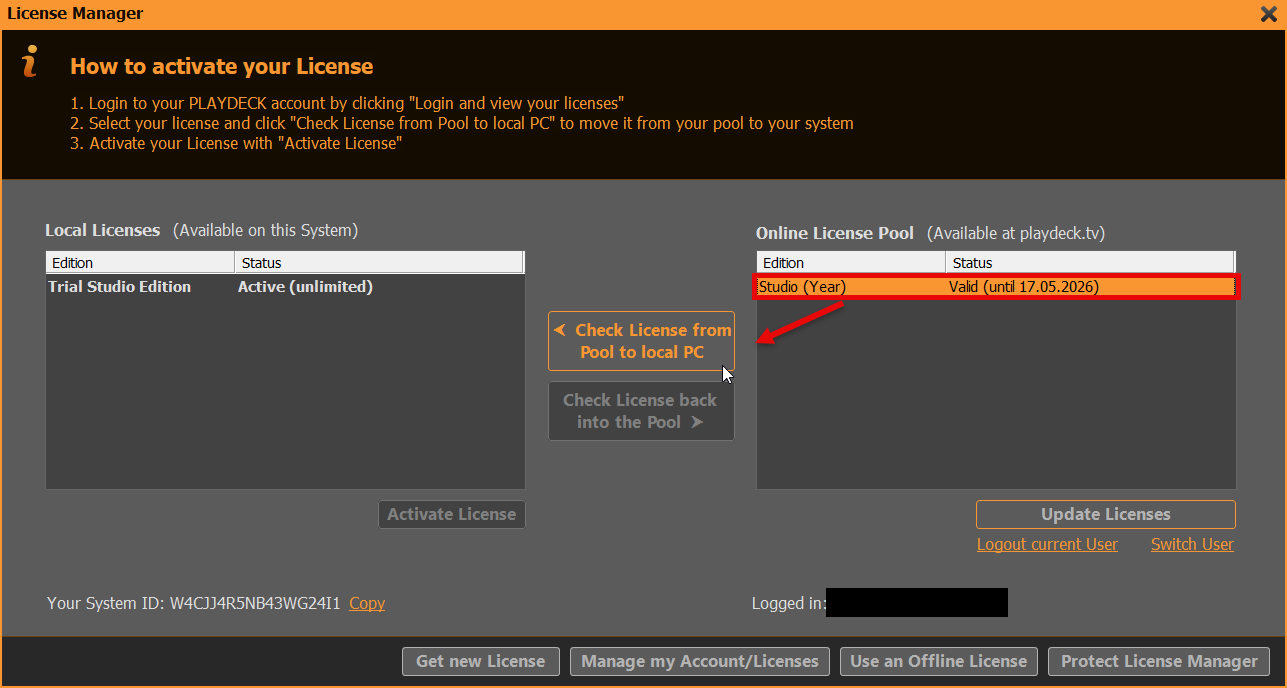
    We can now move the License from you RIGHT Side to the LEFT Side with a Button Click (CHECK LICENSE FROM POOL TO LOCAL PC). This means, that the License becomes UNAVAILABLE to other Systems and becomes AVAILABLE on THIS System. PLAYDECK will now offer to activate the License and restart:


    Dongle License

    Simply attach the USB Dongle to the PC, then start PLAYDECK on that PC. Please note, that if you detach the Dongle while PLAYDECK is still running, PLAYDECK will close immediately and without prior notice. It is recommended to close PLAYDECK regularly to ensure, that all Data is saved properly.


    Offline License

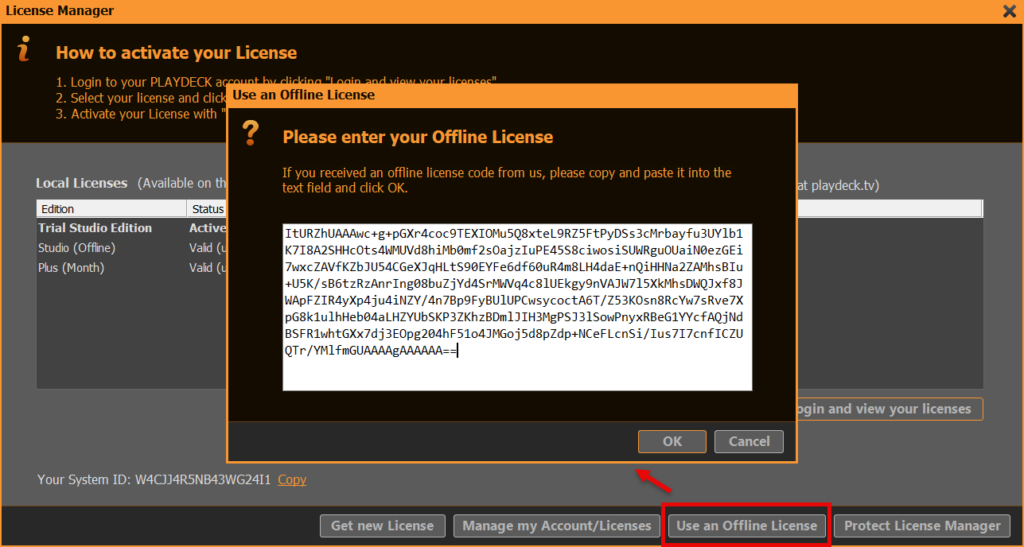
    The Offline License is bound to the PLAYDECK System ID and can NOT be moved to another System by the Customer. To activate your Offline License, open the License Manager:

    Then click on USE AN OFFLINE LICENSE and copy and paste the Offline License Code into the text field and click OK. PLAYDECK will now offer to activate the License and restart:


    Backup License

    We have a separate article on how to use the Backup License.

    Send Log Files to Support Team

    This article will show how to send you PLAYDECK Log Files to our Support Team.

    In this article:
    Send via Internet
    Send offline via ZIP File

    IMPORTANT: Please always send a message to [email protected], informing us about:
    – Log Files have been uploaded
    – Your PLAYDECK System ID
    – Date/Time of last occurrence of issue/problem

    Thanks!


    Send via Internet

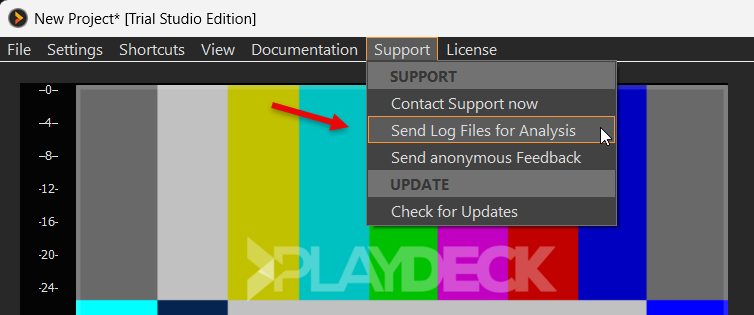
    If you have an active Internet Connection on your PLAYDECK System, open the Main Menu and select SUPPORT and then SEND LOG FILES:

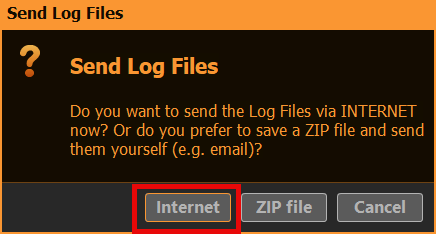
    Then select the INTERNET Option:

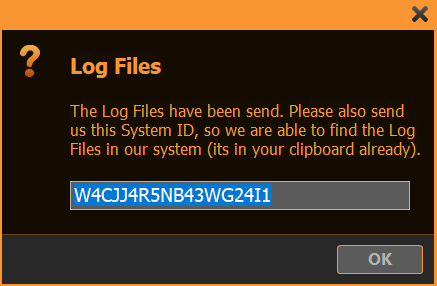
    After the upload is complete, please send us a message to [email protected] along with your System ID. If you seen the following Popup, the System ID is in your Clipboard already and you can simply paste it with CTRL+V into your email message:


    Send offline via ZIP File

    If you DONT have an active Internet Connection on your PLAYDECK System, open the Main Menu and select SUPPORT and then SEND LOG FILES:

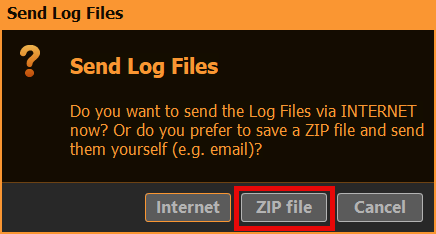
    Then select the ZIP FILE Option:

    After you pick a destination Folder on your System, a 7-ZIP-file will be written there:

    Please send us a message to [email protected] along with your ZIP-file.

    If your Email-system doesn’t allow sending Files or the ZIP-file itself is too large (> 5 MB), you can also use our download portal to upload the File.

    Note: If you are unable to even start PLAYDECK, please ZIP this Folder manually:
    c:\ProgramData\JoyEventMedia\Playdeck\logs

    Upload Files to Support Team

    This article will show how to upload Files and send them to the PLAYDECK Team.

    Open our download portal via this URL: https://download.joy-event-media.de/

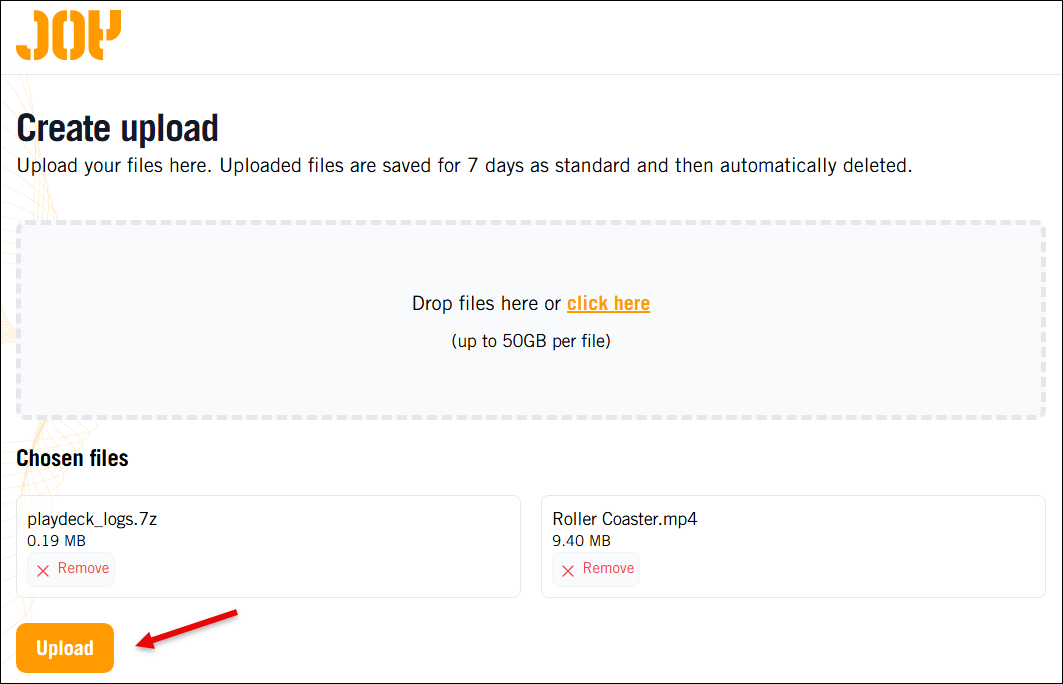
    You can add your Files now via Drag-drop or file-browser. In our example we already added some PLAYDECK Log-files and a sample video. If you are done adding, please click UPLOAD.

    Important: Without the Download-link we cant access your Files. This is to protect Customer data.

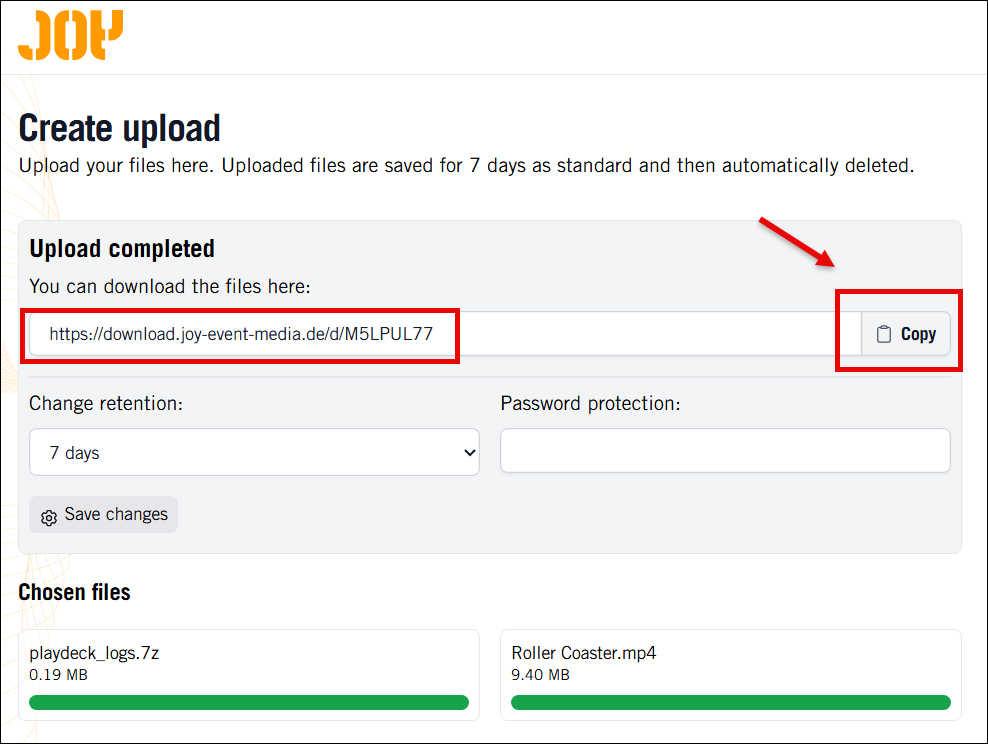
    After the Upload is complete, please click COPY to put the Download-link into the Clipboard. Then write us a message to [email protected] along with that Download-link:

    Best Video Codecs for Playback


    PLAYDECK can play almost any Codec out there. If the Codec is not supported by your GPU, it always falls back to CPU to make it work. There are very view exception: NotchLC for example cant be played with PLAYDECK.

    We understand, that most of you have not much control over the Video Codec selection, as you receive your Video Files from Customer right before the show.

    But if you have the Time to transcode the Video Files or even more are part of the production process, then you have more options than just H.264 MP4 Files.

    We recommend going with AV1, if your NVIDIA supports it, except when you need Alpha-channel, than switch to HAP. In all other cases fall back to H.265/HEVC. ProRes has the best image quality, but is not really suited for real-time playback, as it is more of an editing and post-production codec.

    There is also a Feature in PLAYDECK to quickly transcode your Video Files to a GPU-supported Codec. Please see this article.


    H.265/HEVC

    General-purpose codec. Use, if your NVIDIA GPU does not support AV1 and if you dont need Alpha-channel.

    • Developer: JCT-VC
    • GPU Decoding: Yes, but depends on NVIDIA GPU, see this List
    • Quality: Good quality at all bitrates
    • Alpha-channel: No
    • Features: HDR, 10-bit color, 8K


    AV1

    Most efficient Codec. Use, if you your GPU supports it and you don’t need Alpha-channel. Near-lossless quality and significantly smaller file sizes than ProRes.

    • Developer: Alliance for Open Media (Open Source)
    • GPU Decoding: Yes, but depends on NVIDIA GPU, see this List
    • Quality: Better quality than H.265/HEVC, esp. at lower bitrates
    • Alpha-channel: No
    • Features: HDR, 10-bit color, 8K


    HAP

    Very universal Codec. Use, if you need Alpha-channel, and preferred over ProRes because of lower CPU load.

    • Developer: Vidvox
    • GPU Decoding: No, but lower CPU load than ProRes
    • Quality: Better quality than H.265/HEVC, but less than AV1
    • Alpha-channel: Yes (with HAP Alpha and HAP Q)
    • Features:


    ProRes

    Offers highest image quality with ProRes 4444. Preserves fine details and colors exceptionally well, at the cost of high CPU load. Use only, if you can afford the CPU load and need highest possible visual quality. This is an editing codec and no real-time codec.

    • Developer: Apple
    • GPU Decoding: No. High CPU load
    • Quality: Better quality than all other, esp. at higher bitrates
    • Alpha-channel: Yes (with ProRes 4444)
    • Features: HDR, 10/12-bit color, 8K


    PiP (Picture-in-picture) with Internal Keying

    This article will show how to utilize Internal Keying as means of overlaying Video over Video (Picture in Picture).


    1. Setup of Internal Keying

    We need to setup PLAYDECK to have a BG FEED and a PIP FEED and mix them into the MAIN FEED. For this we use Internal Keying. See this article for more info on Internal Keying.

    Use any Device that is capable of Internal Keying. In our example we use the Blackmagic DeckLink Duo2. Open the Desktop Video Setup and combine and first 2 SDI Outputs. Leave the other Outputs solo:

    Next we enable Internal Keying in Channel 1 in PLAYDECK:


    2. Setup of BG FEED

    Now we need to send our BG FEED to SDI 1. For this we use Channel 2 and send it via SDI Loop from SDI 3 to SDI 1. Please note, that because we combined SDI 1+2, SDI 3 is now designated as “Decklink Duo 2 (2)”:

    Then we start any video content on Channel 2:

    If you have a SDI Monitor on SDI 2, you can already see the BG FEED playing there now.

    We could now go ahead and play any Content with Alpha on Channel 1, which is keyed over the BG FEED, e.g. Alpha Videos (ProRes, HAP-A) or simple Overlays. But since we need our PIP FEEDBACK scaled and positioned, we need to set it up on another Channel.


    3. Setup of PIP FEED

    We use Channel 3 as PIP FEEDBACK, so we can play regular Video Content here. We want to send it via NDI from Channel 3 to Channel 1 and activate the Output Scaler, so that our PIP is in the UPPER RIGHT Corner:

    We now insert a Video Clip on Channel 3, but this could also be Live Video, Streams or anything else:

    We loop this NDI Feedback to Input 1:

    Then insert Input 1 into the Playlist of Channel 1:

    We now downscaled the Channel 3 Playlist into Channel 1, which will be keyed over the BG FEED of Channel 2.


    4. FINAL OUTPUT / MAIN FEED

    The MAIN FEED is send to SDI 2 and this is the result on the SDI Monitor of SDI 2 (photographed):


    1 2 3 4 5