This article will show how to use bitfocus Companion together with PLAYDECK. Companion has a ready-to-use module for PLAYDECK. This is the most comfortable way to connect PLAYDECK to your ATEM Mixer or STREAMDECK.
The Companion Module has been developed and is maintained by Nick Semonov. He is a Community Developer and also a great guy to work with.
In this article:
→ Installation
→ Button Page with Presets
→ Custom Commands instead of Actions
→ Custom Button Feedbacks
Installation
1. Start PLAYDECK, so Companion can find it
2. Download and install the latest stable Version of Companion
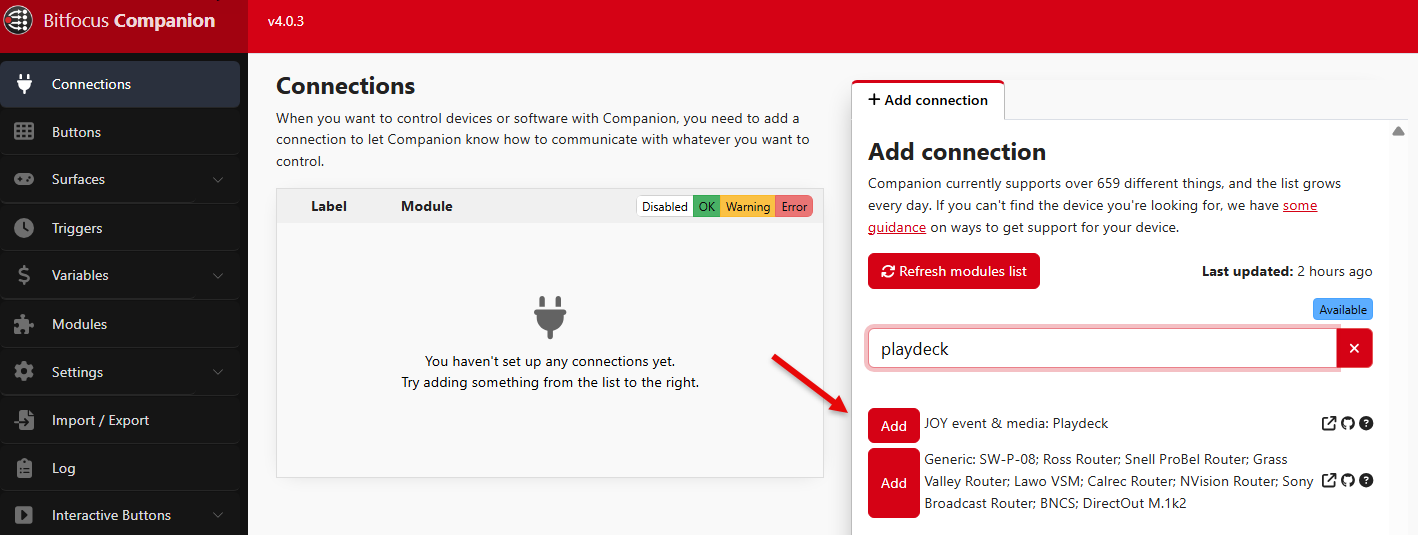
3. Start Companion and add the PLAYDECK Module
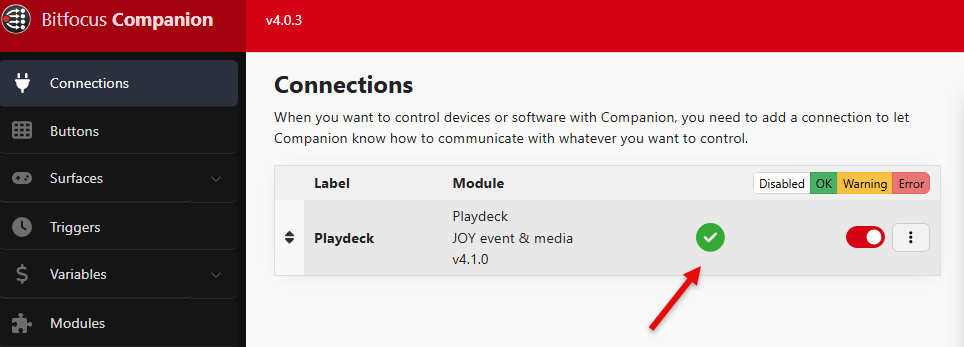
4. You are done, if Companion shows a GREEN Checkmark for this Connection. If you cant get a Connection, please disable your Firewall or allow TCP Port 11411.
Button Page with Presets
We will use Companion Presets to quickly create a fresh Page of Buttons for a casual Playout Situation.
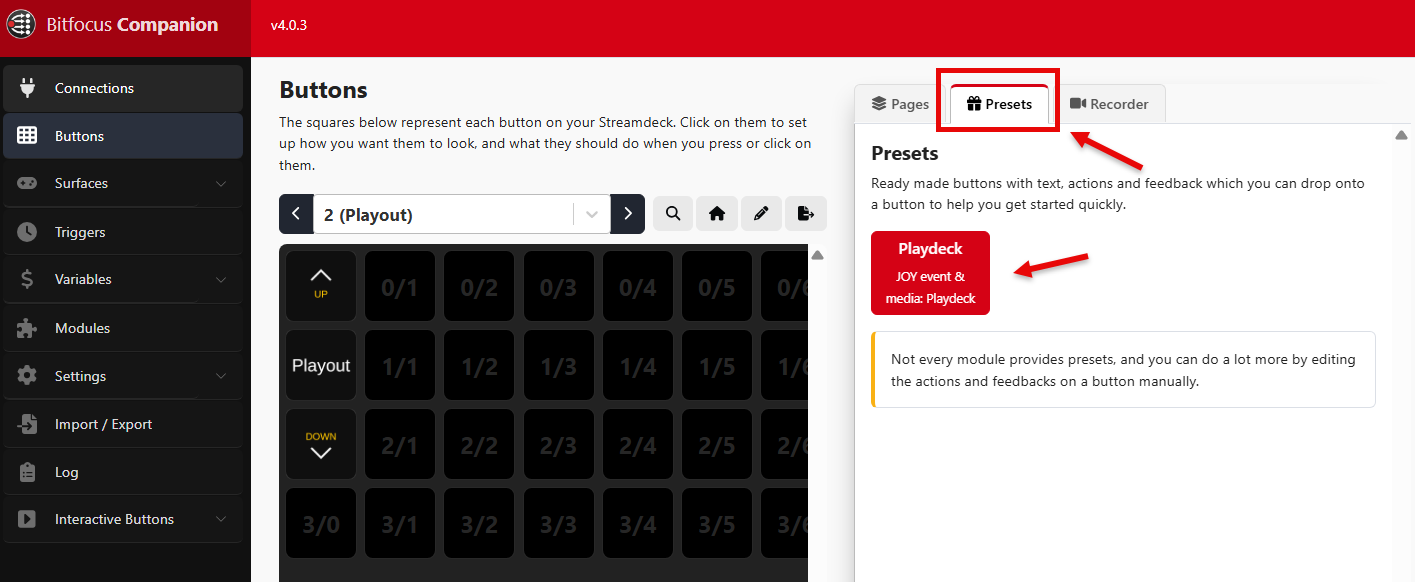
1. Create a new Page, then go to PRESETS and select PLAYDECK
2. For our Sample we specifically want to target Channel 1. You could also use LISTS, which are dynamic and use the visible Channel in PLAYDECK (Left and Right). You could also control your ASSETS (Streams, Recordings). Select CHANNEL 1 to continue

3. With Drag & Drop we create a simple Playout Solution: Play Control with some Overlays. The Buttons are added with FEEDBACKS, meaning: You will get a RED Button according to the PLAY STATE (CUE, Playing, Paused, Stopped).

4. The PLAY Button also shows the remaining Clip Time during Playout:

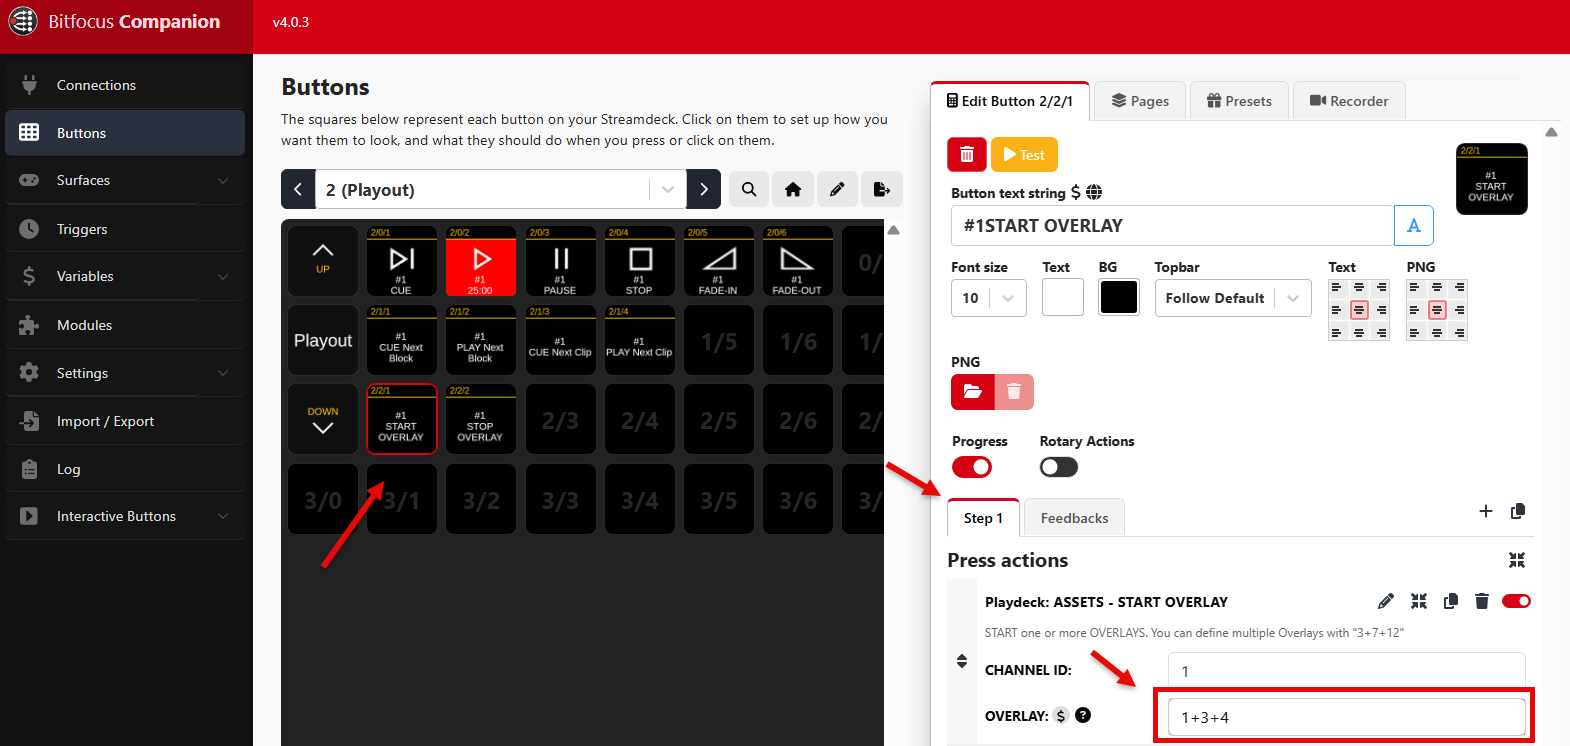
5. Some Buttons need more Information for you, like the START OVERLAY Button. It needs to know, which Overlay(s) should be started:
Custom Commands instead of Actions
We will add any PLAYDECK Command to a Companion Button. This is useful, if you are more of a “code” type of person or if there a new Commands in PLAYDECK, which are (not yet) available in Companion. Its also possible to add multiple Commands at the same time.
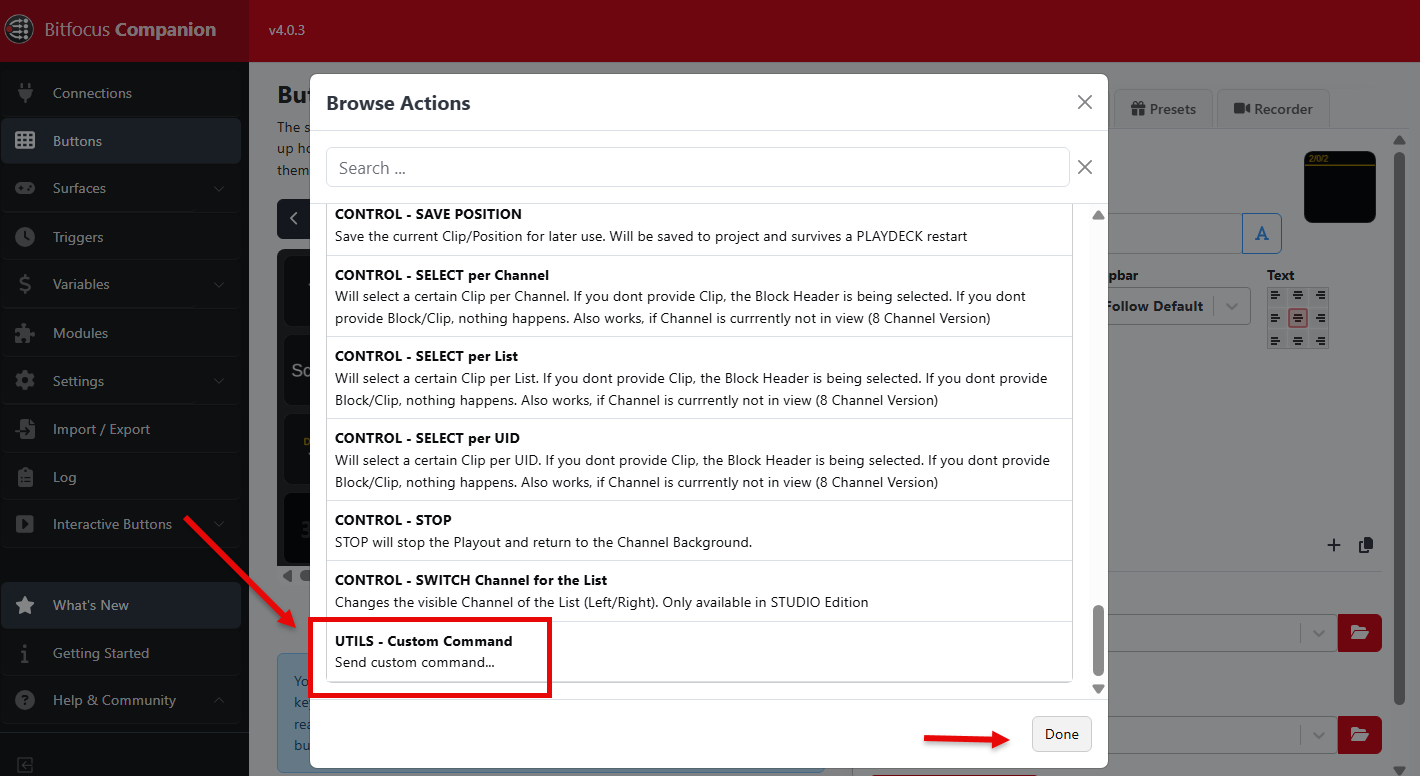
1. We create a new Button and add a new Action. We now select CUSTOM COMMAND and click DONE
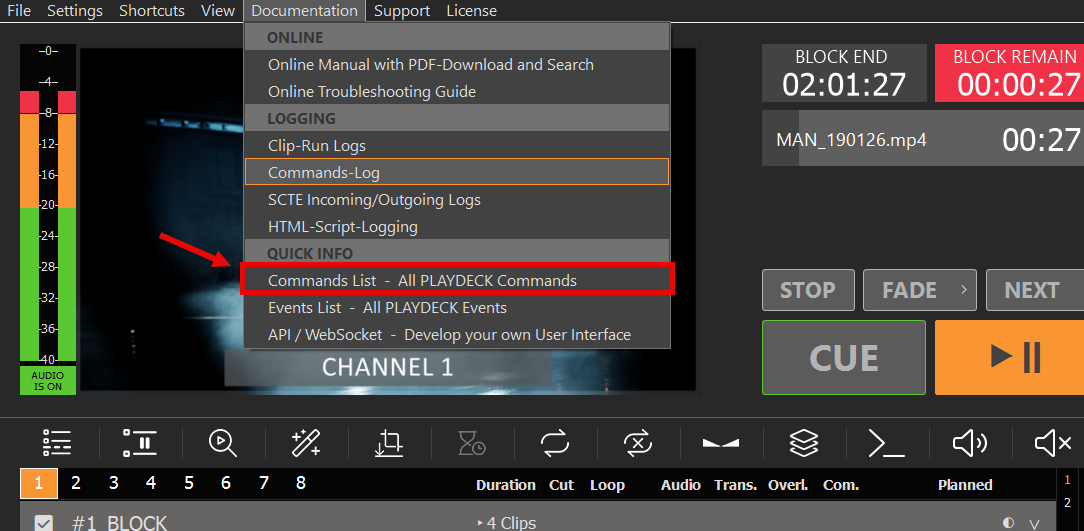
2. In PLAYDECK we open the COMMANDS LIST to review, which Command we want to use
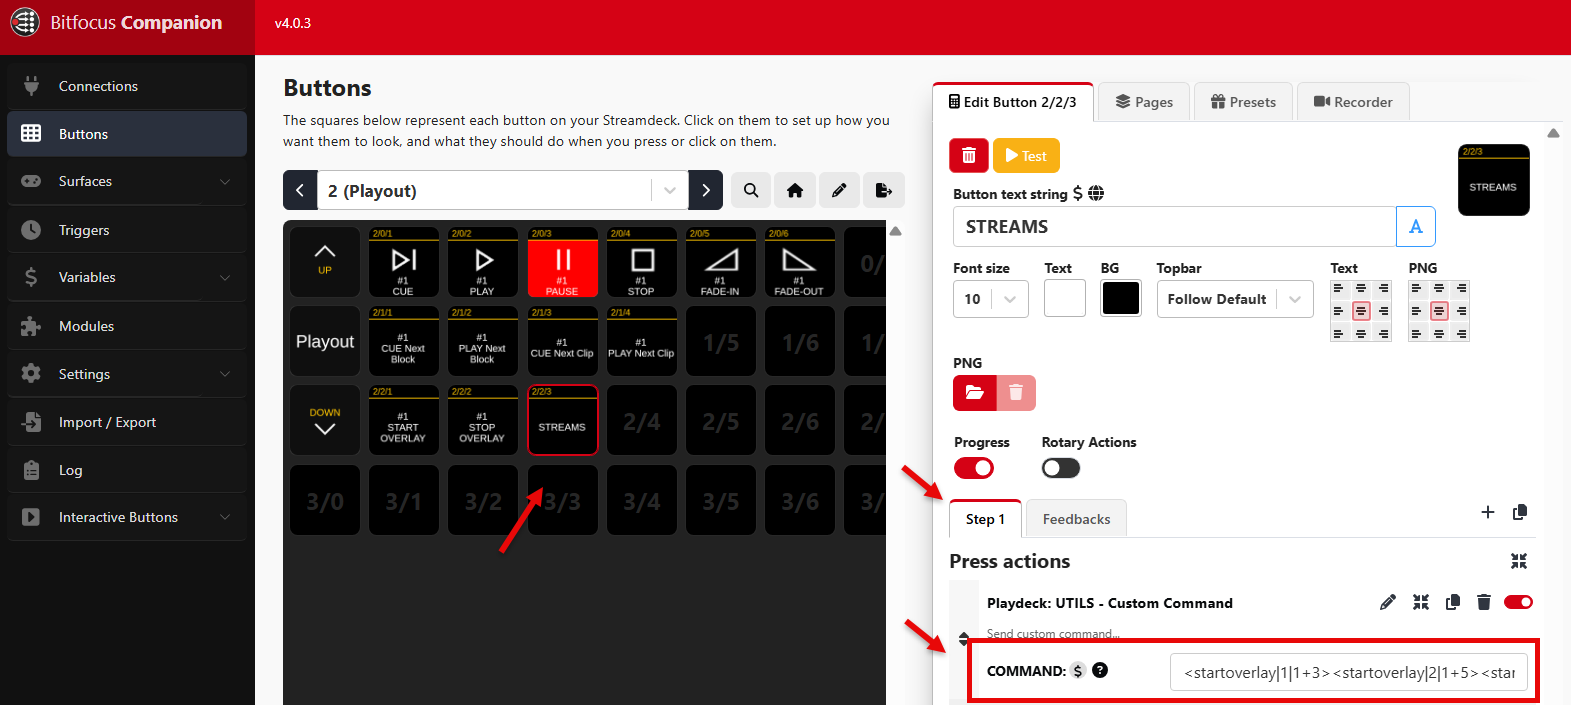
3. We decide that we want to start multiple Overlays on several Channel and after that start 2 Streams:
<startoverlay|1|1+3>
<startoverlay|2|1+5>
<startstream|1>
<startstream|2>
4. We wrap up all Commands into one Line and copy it into the COMMANDS Field. If we then press our Button, we start our Overlays and our Streams, as all Commands are executed in the written order.
5. Another good example is starting 2 Channel synchronized:
<cue|1><cue|2><wait|1000><play|1><play|2>
This will CUE both Channel, then wait 1 Second for CUE being ready (Clip Caching), then PLAY both Channel.
Custom Button Feedbacks
Instead of using the pre-defined Feedbacks (e.g. PLAY STATE), you can use Companion VARIABLES to use many more Feedbacks. In this example we will start a specific Block and show its remaining Time on the Button.
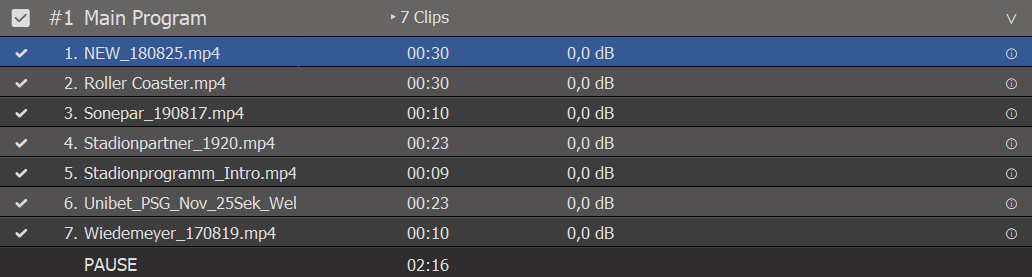
1. We add a new Block to Channel #1 in PLAYDECK and rename it “MAIN PROGRAM”
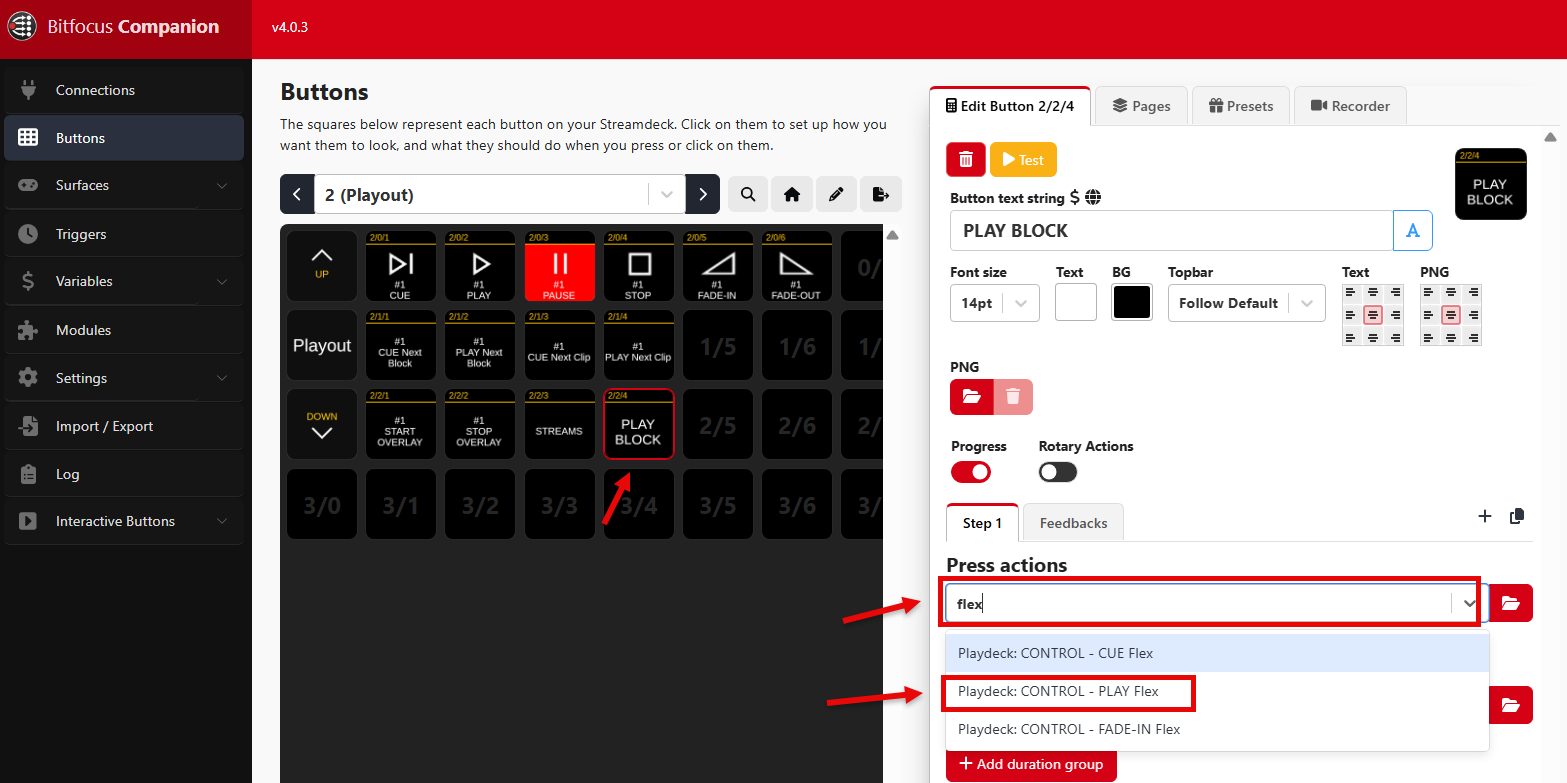
2. Now we add a new Button to Companion and assign the CONTROL PLAY FLEX Action to the Button.
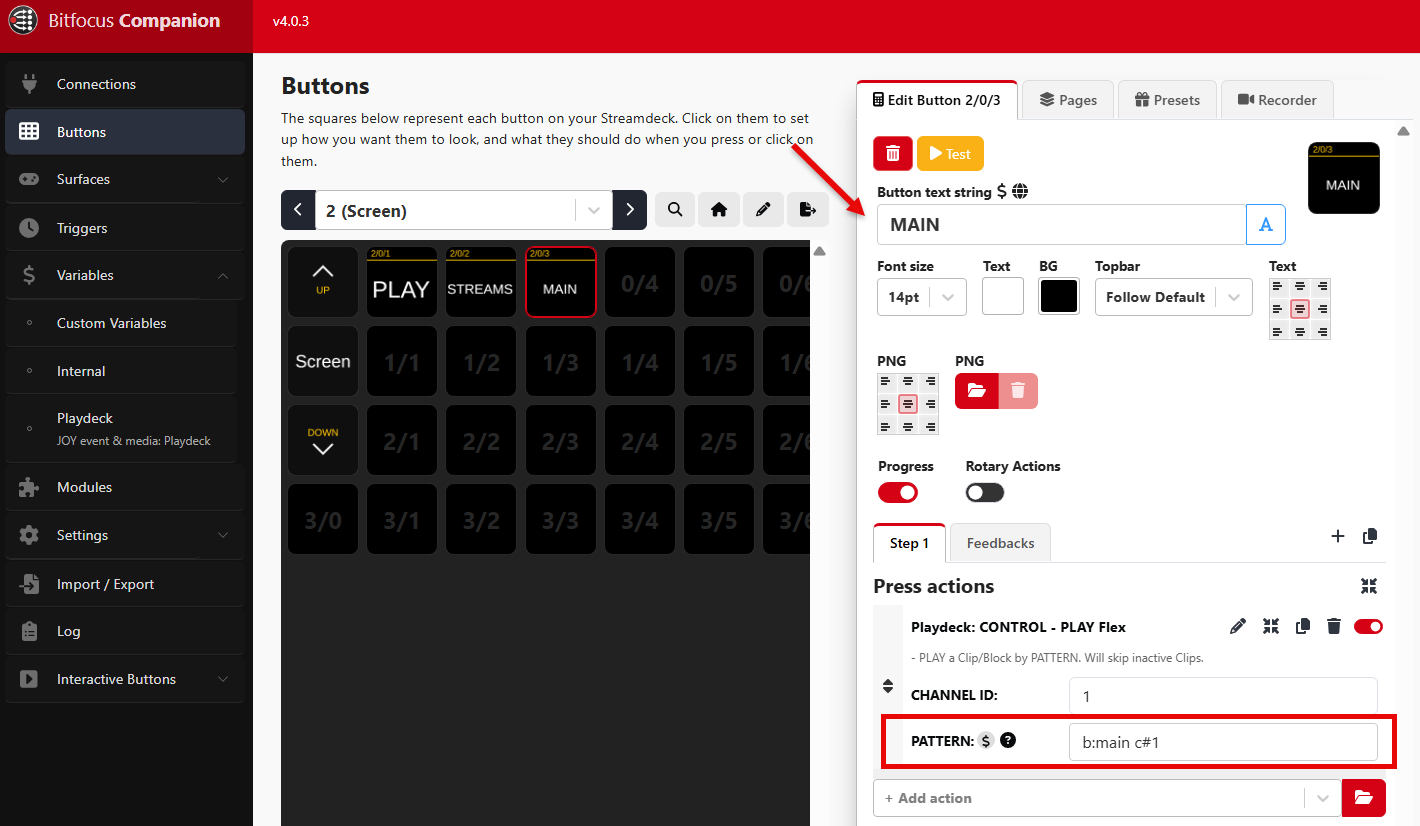
3. The PLAY FLEX Action allows us to play a Block by Name (instead of ID). We use the PATTERN “b:main c#1” to start our Block, as described in the COMMANDS LIST (PLAYDECK > Main Menu > Documentation):
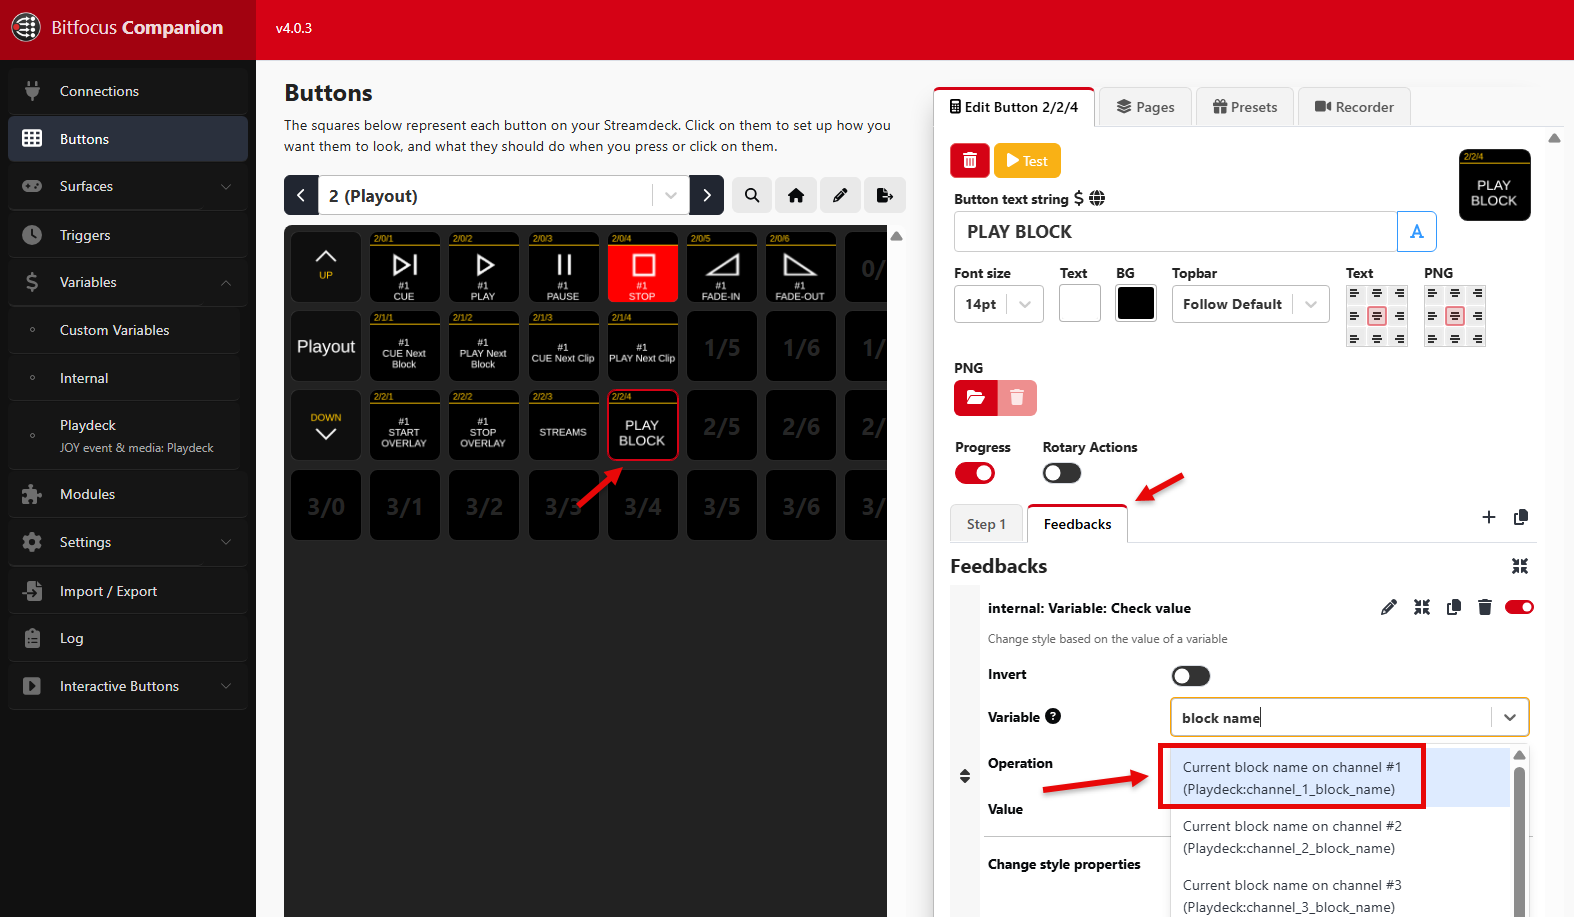
4. We now have a Block Play Button, but we also want the remaining Block Time to display, once the Block is playing. For this we need to add a custom Feedback to the Button, which will check “some” variable and do “something”:
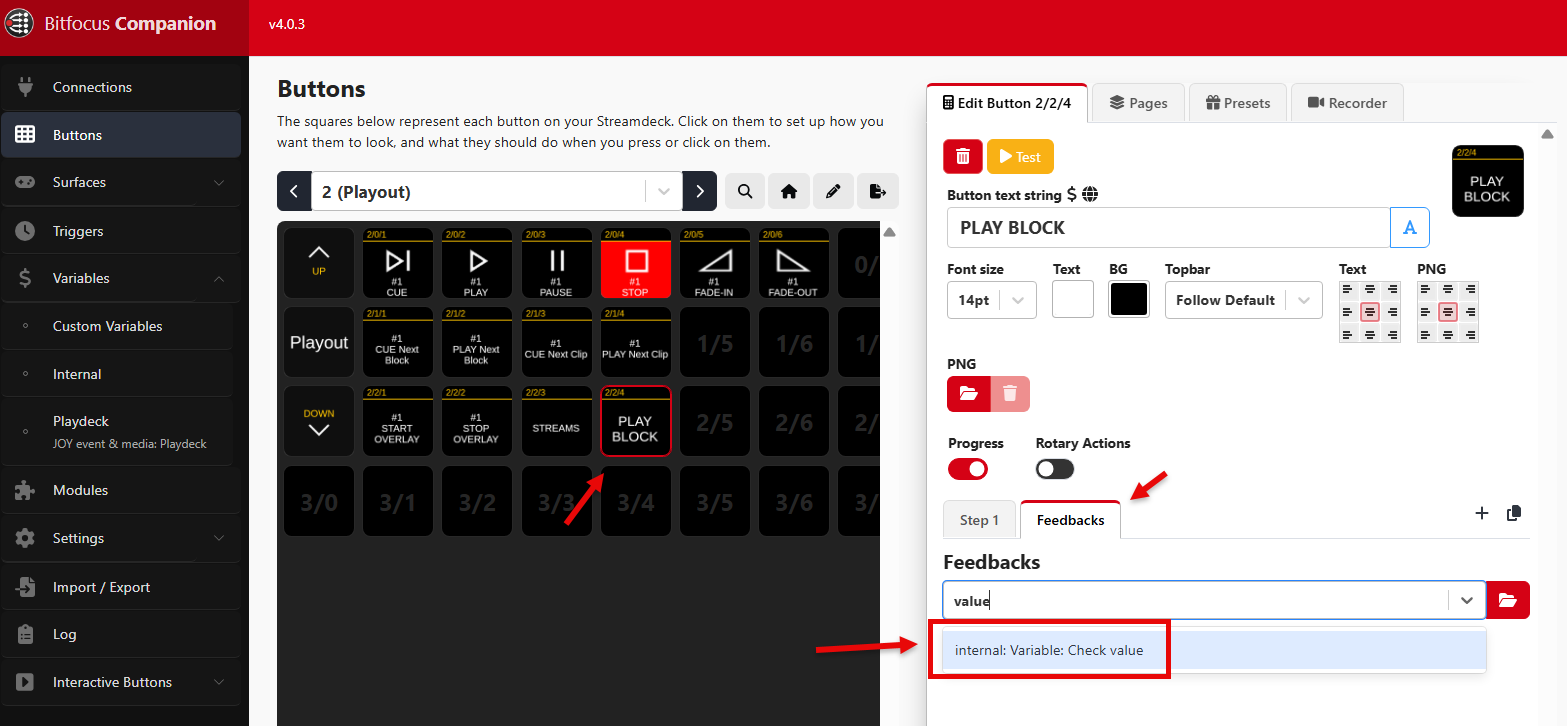
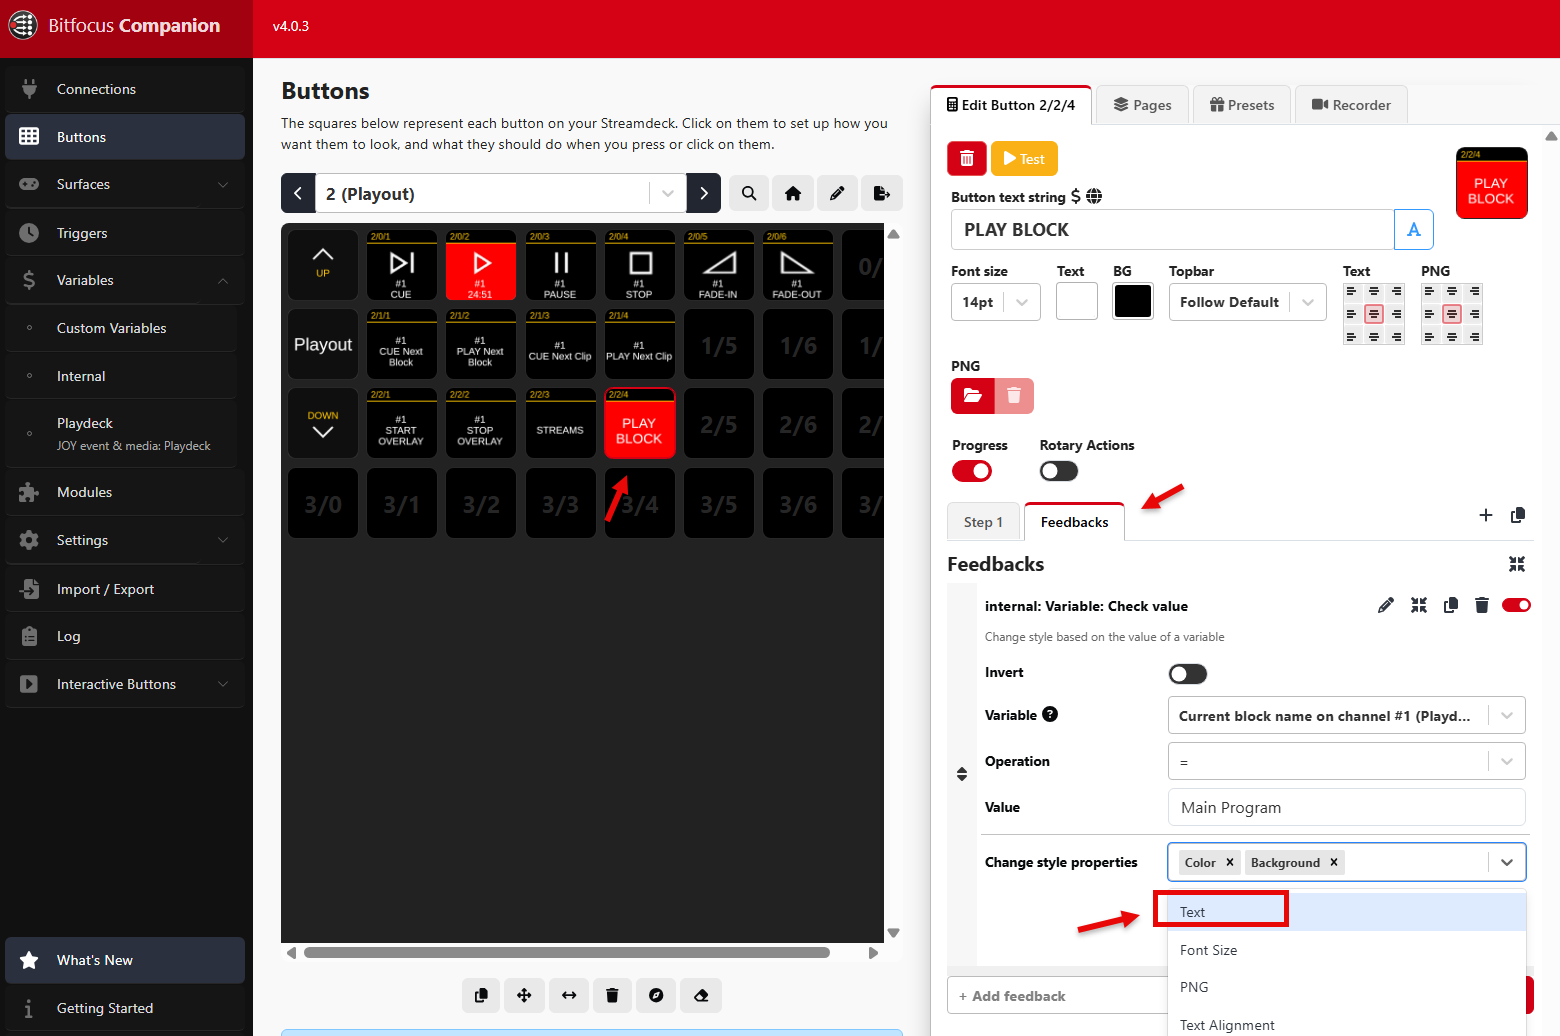
5. We check against the current playing Block by searching for “block name” in the VARIABLE field and add our Block “Main Program” as VALUE:
6. We then add TEXT as new STYLE PROPERTY, since our intention is to show the remaining Block Time:
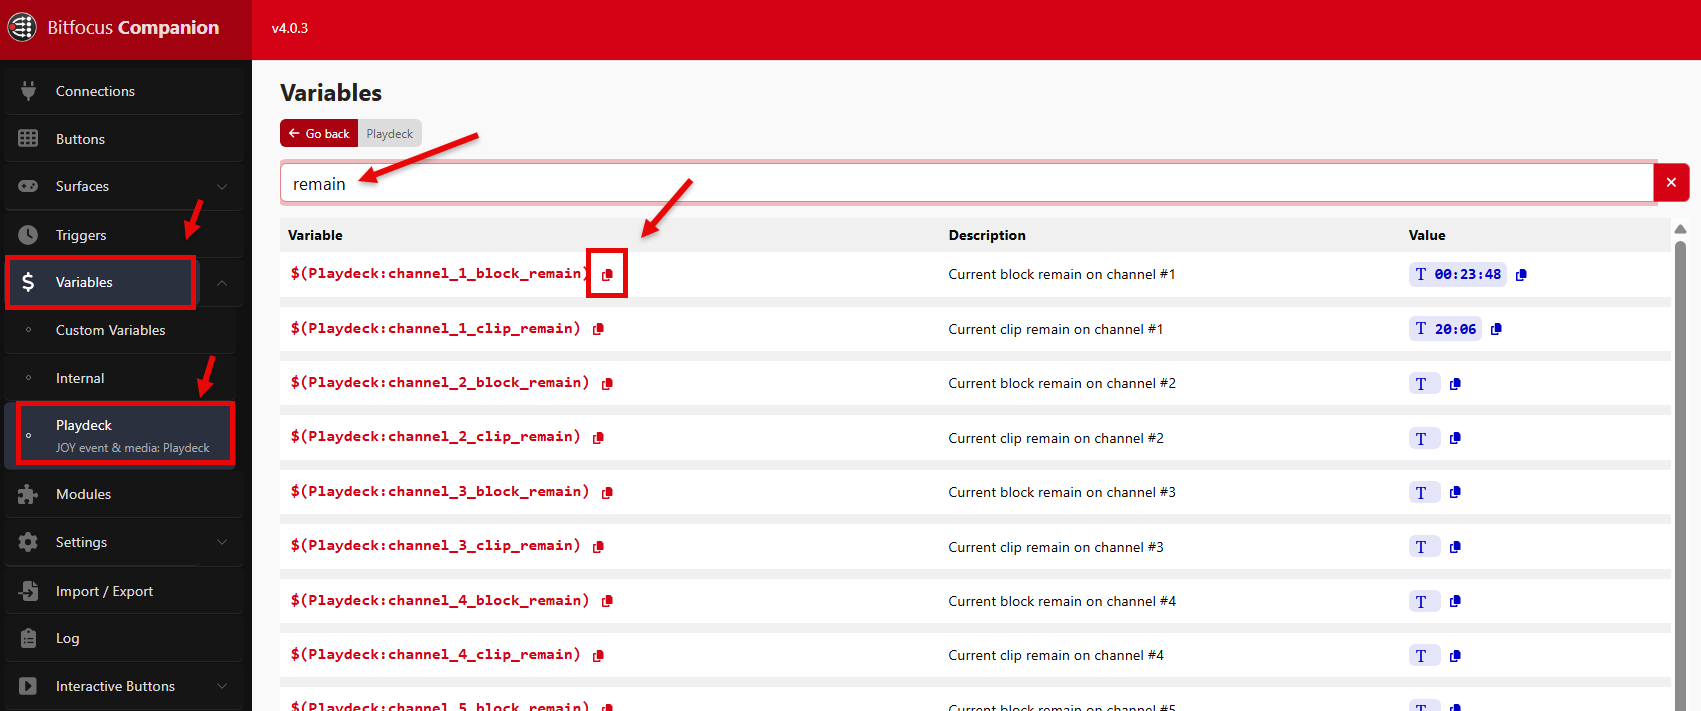
7. Add “$(Playdeck:channel_1_block_remain)” as BUTTON TEXT STRING, and our Button is finished:
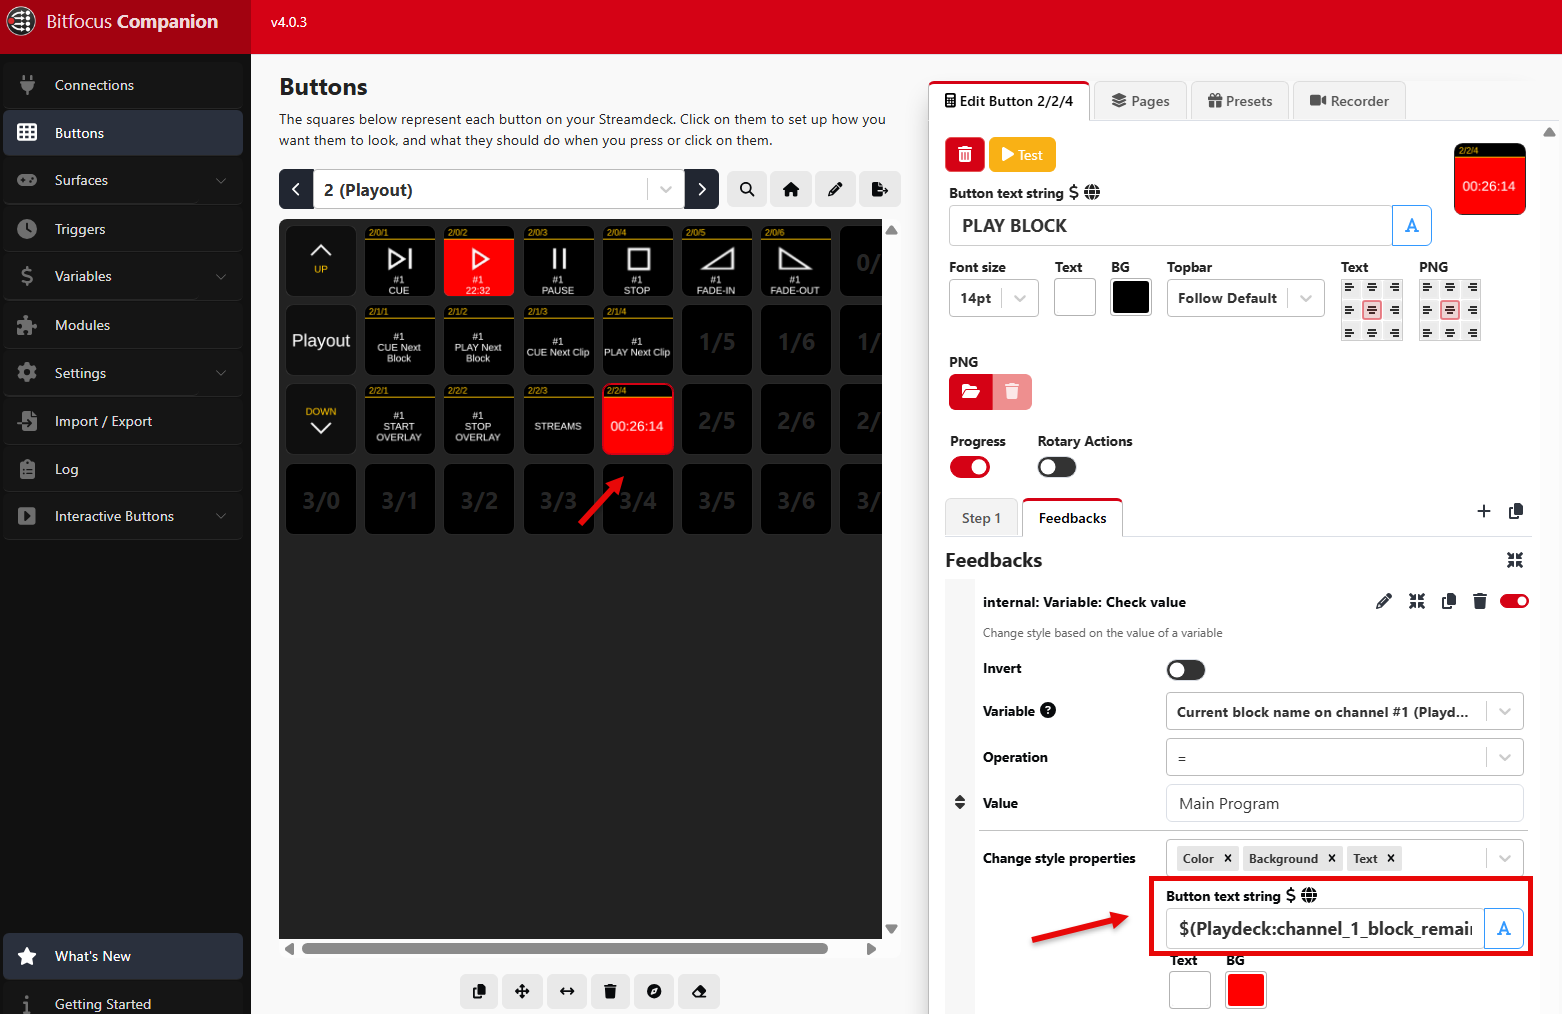
8. But how did we receive our BUTTON TEXT STRING? Companion will show you all available VARIABLES you can use in PLAYDECK. You can then click the small COPY ICON to transport the Variable to your Buttons: