This article will show how to trigger external Overlay Engine during your Playout.
1. Create external Overlay with ClassX
We use ClassX Liveboard as an example to show, how to work with external Overlays. This sample can be easily copied to any other solution, like: CasparCG, Singular.live.
ClassX Liveboard is a professional CG Playout Solution for automating dynamic overlay contents. You can register for a Demo Version on their website.
After installation of LiveBoard, you can simply add Videos, GFX and other Contents via the user interface. There you also name the Contents with a unique identifier, e.g. “MyLowerThird” for later reference.
LiveBoard allows to connect via TCP and send Commands to show/hide certain Contents. A complete list of Commands is always found in the Window installation path:
C:\Program Files\…\ClassX_Applications_v6\remotecontroltester\commands
For now, these 2 Commands are enough for us:
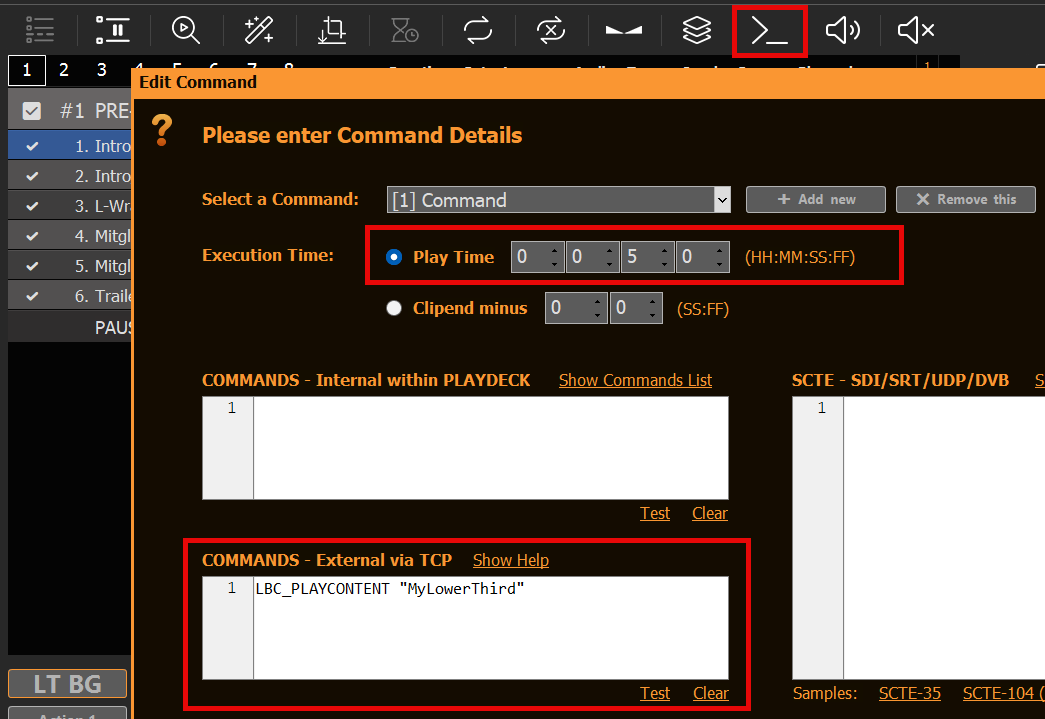
- LBC_PLAYCONTENT “MyLowerThird”
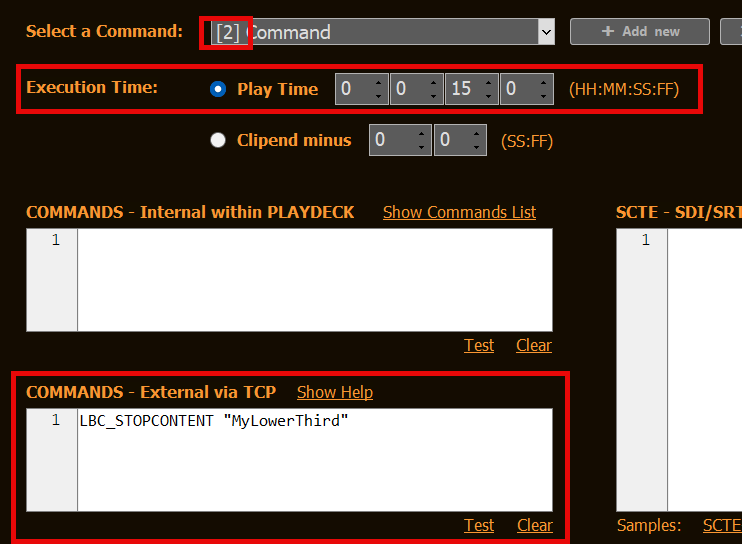
- LBC_STOPCONTENT “MyLowerThird”
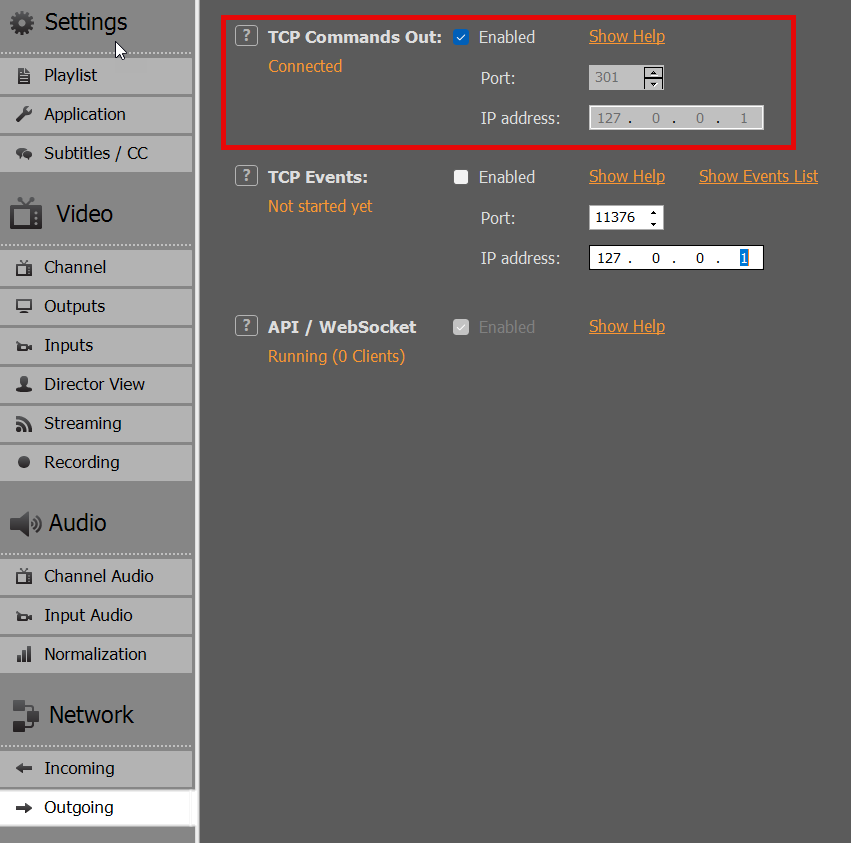
Lets enable our TCP in PLAYDECK to talk to LiveBoard. The default Port of LiveBoard is 301. Enabling this will show CONNECTED, if the LiveBoard Server is running. Otherwise PLAYDECK will try to connect every 5 seconds, so you can start LiveBoard before or after PLAYDECK:
2. Add Commands to PLAYDECK
You can now add the above Commands to:
- Clips
- Blocks
- Actions
- Other Overlays
For our Sample we want the external Overlay to show together with a specific Clip. We select this Clip in the Playlist and click the COMMANDS Icon, then add our 2 LiveBoard Commands from above. In this case with start the Overlay 5 seconds into the Clip and show it for 10 seconds in total:
3. Mixing Video Content and Overlays
If you don’t use an external Mixer to mix the Overlays with Alpha Channel over your PLAYDECK playout, you can also use Internal Keying, where you feed the Overlay Signal into PLAYDECK, and have your Output Hardware mix both Layer. See this article on Internal Keying.
If you want to mix on a software level, you can use vMix on the same System as ClassX and PLAYDECK.
