HDR Output and Recording
PLAYDECK supports HDR playback, SDI output (via Blackmagic DeckLink) and HDR recording.
→ Prerequisites in Hardware
→ Enabling HDR Mode
→ Setting up SDI Output
→ Setting up Recording
→ Monitoring & Controlling
Prerequisites in Hardware
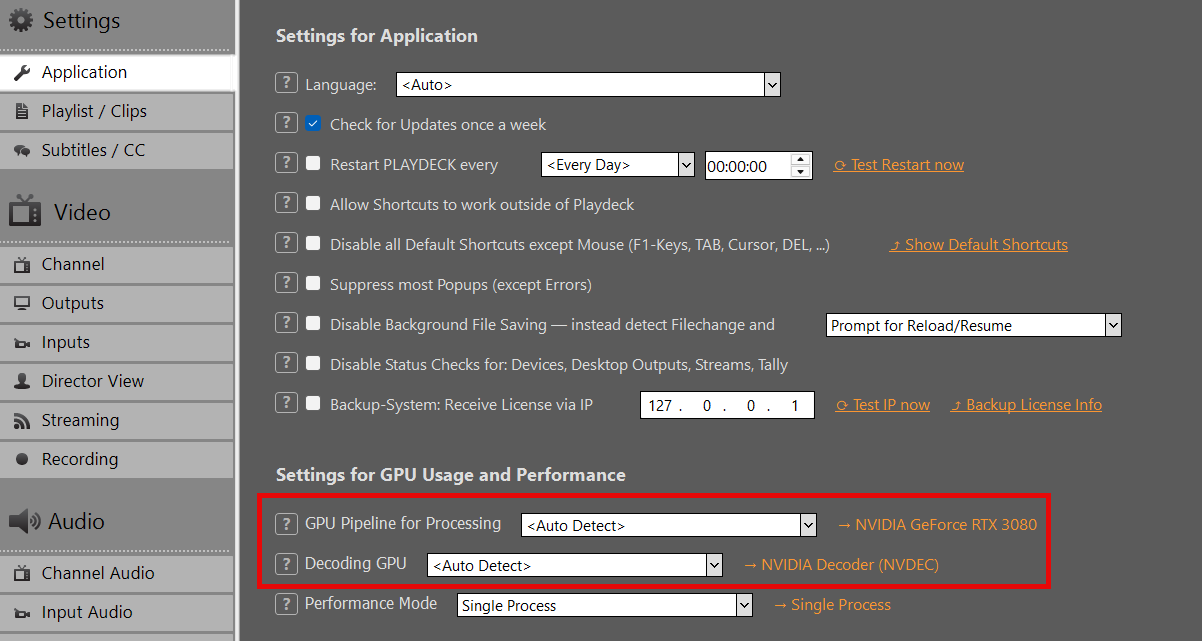
Graphics card
NVIDIA GPU with at least Turing architecture (GTX 16xx / RTX 20xx or newer).
Recommended: RTX 30xx / 40xx series (e.g. RTX 3080, 4070, 4080).
→ Required for 10-bit decoding/processing/encoding.
SDI output card
Blackmagic Design DeckLink with 10-bit and HDR metadata support:
– DeckLink 8K Pro
– DeckLink 12G Extreme
– DeckLink 6G / 12G models (Quad 2 / Duo 2 / Mini Recorder 4K etc.)
→ Older models (e.g. DeckLink 4K Extreme without 12G) may be limited to 4K 30p or no HDR metadata.
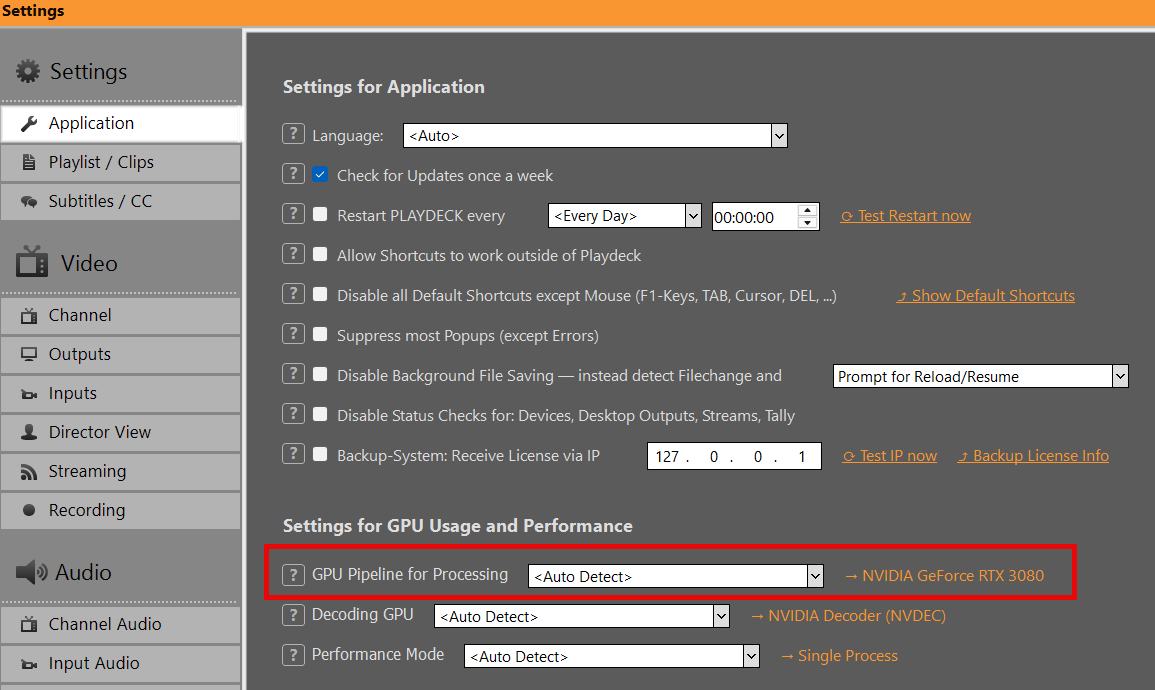
You can check your Graphics card in PLAYDECK:
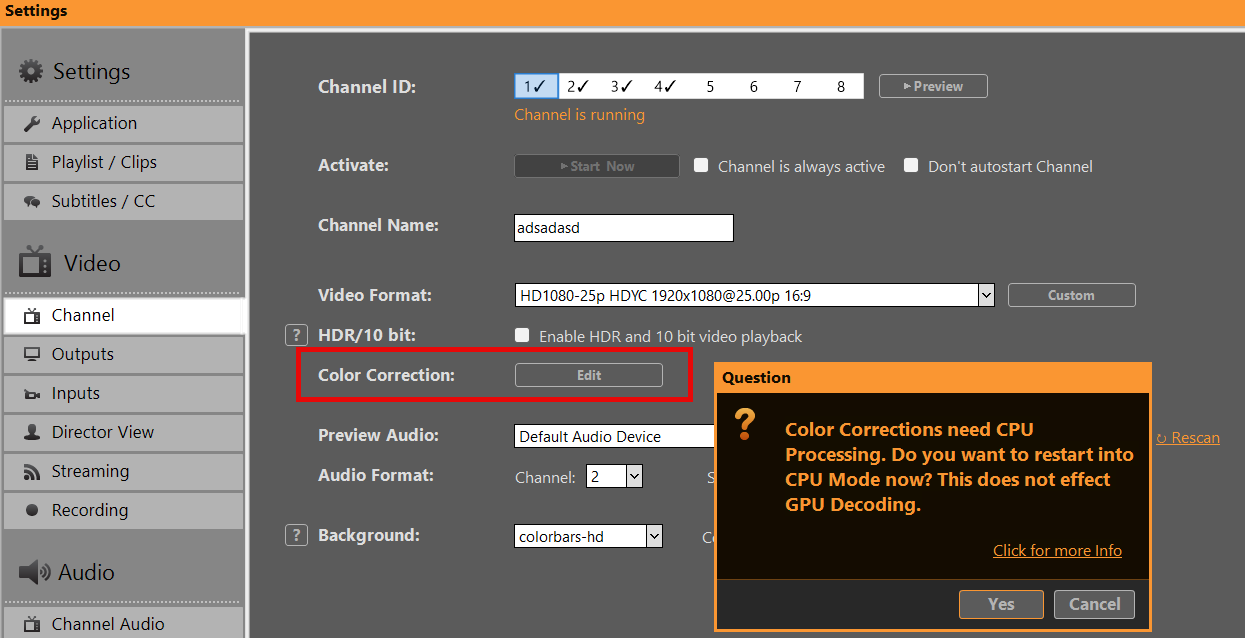
Enabling HDR Mode
HDR Mode needs to be enabled in the Channel Settings. In HDR Settings, choose one of the following Output Pixel Format. Start with v210 unless you specifically need RGB processing.
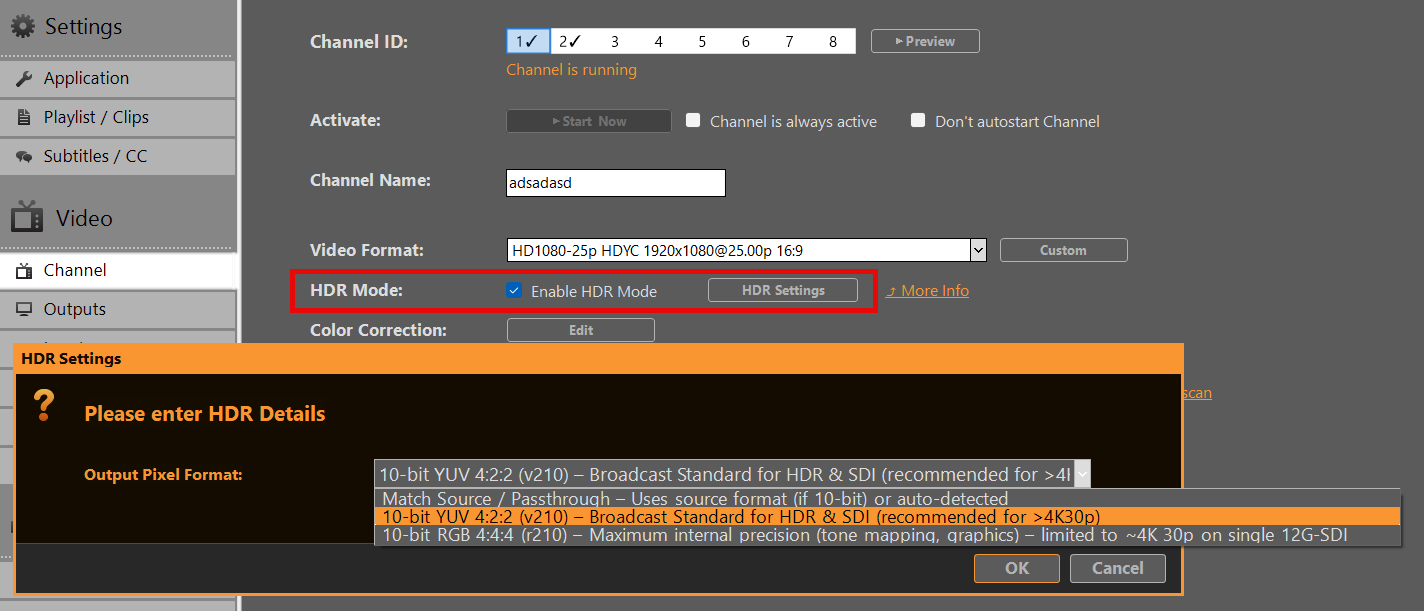
Match Source / Passthrough
Uses the source pixel format (if 10-bit) or auto-detected
→ May default to r210 on HLG/PQ content.
10-bit YUV 4:2:2 (v210) – Broadcast Standard for HDR & SDI (recommended)
→ Preferred choice for most SDI workflows.
→ Full compatibility up to 8K 60p on single-link 12G-SDI.
→ Recommended when frame rate > 4K 30p.
10-bit RGB 4:4:4 (r210) – Maximum internal precision
→ Best for tone mapping, keying or heavy internal processing.
→ Limitation: On many DeckLink cards limited to ~4K 30p (bandwidth constraint on single 12G-SDI link).
→ Use with caution at higher frame rates.
Setting up SDI Output
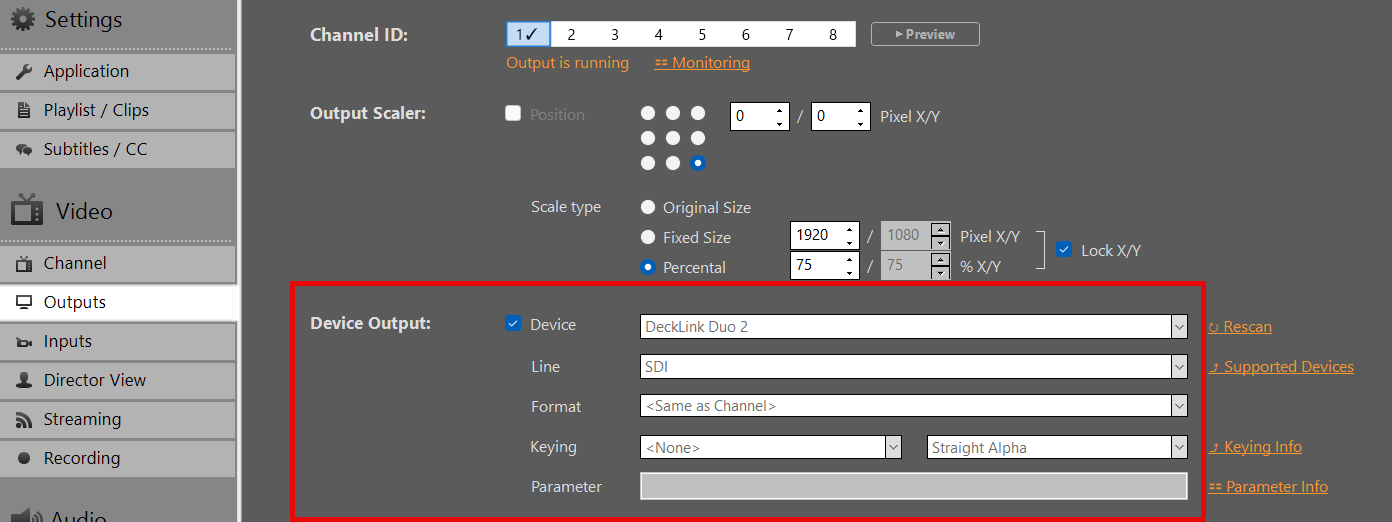
In Output Settings, select your DeckLink card as the output device. 10-bit Output will be activated automatically. If the Card doesn’t support it, it will fall back to SDR.
Important:
HDR metadata (PQ/HLG) is carried in VANC (Vertical Ancillary Data) on SDI.
Most modern DeckLink cards and downstream devices (monitors, switchers) detect this automatically when 10-bit signal is present.
You need to re-enable your Device, if you changed Output Pixel Format in HDR Settings.
Setting up Recording
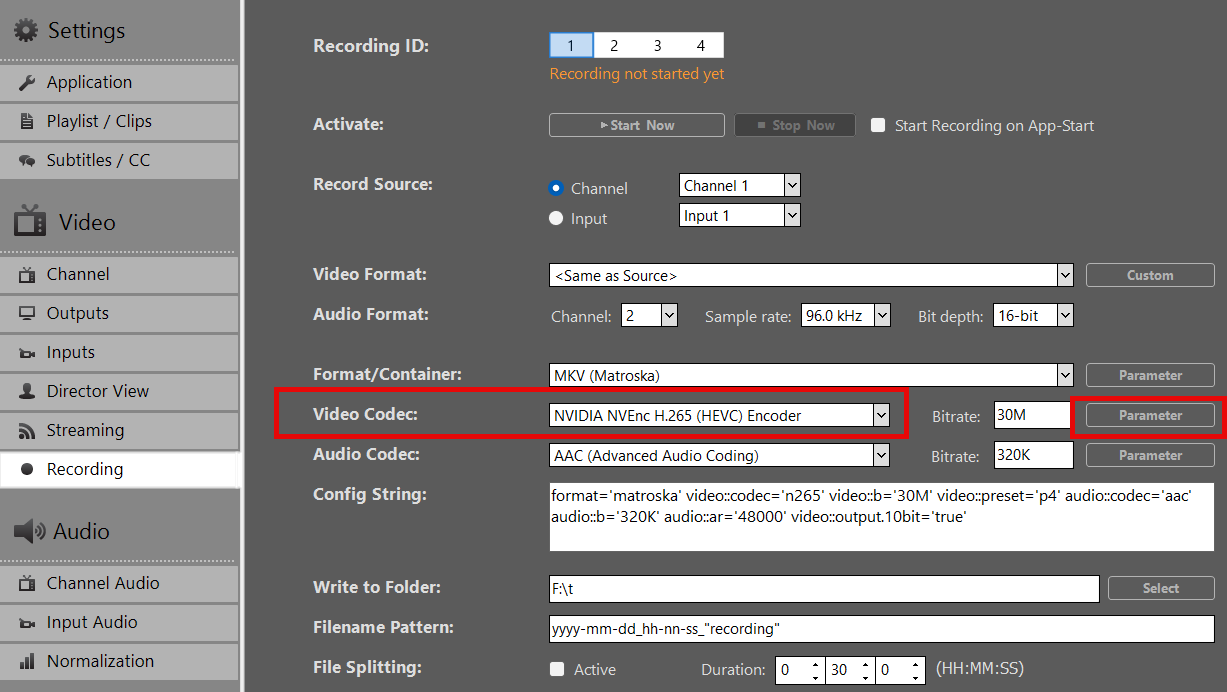
- Select a Format/Container (recommended: MOV or MKV).
- Pick NVIDIA H265 HEVC as Video Codec. Currently, no other Video Codecs are supported for HDR.
- Apply your preferred bitrate (50–100 Mbps recommended for 4K HDR)
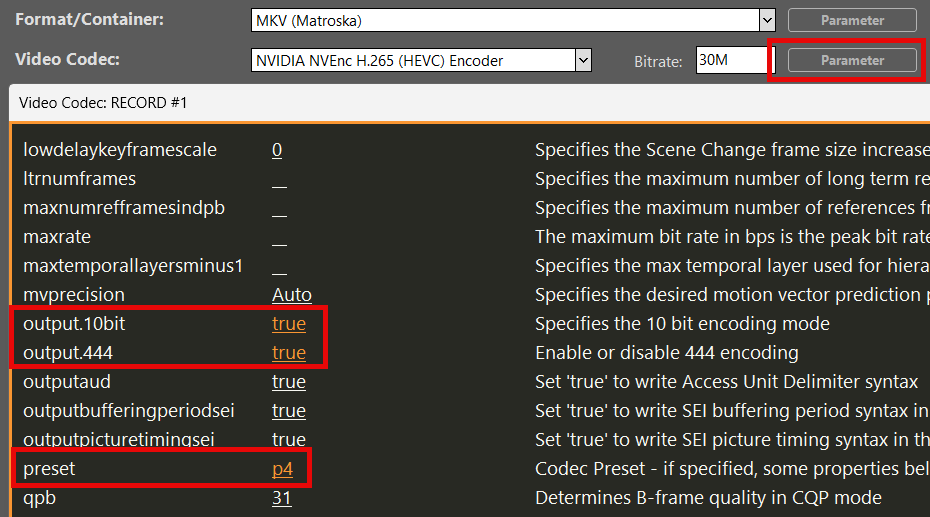
- Click on Parameter behind Video Codec and set these options:
– output.10bit = true
– output.444 = true (! Only is “10-bit RGB 4:4:4 (r210)” selected in HDR Settings)
– preset = p4
Result: Recorded file contains BT.2020 + HLG/PQ metadata when source was HDR.
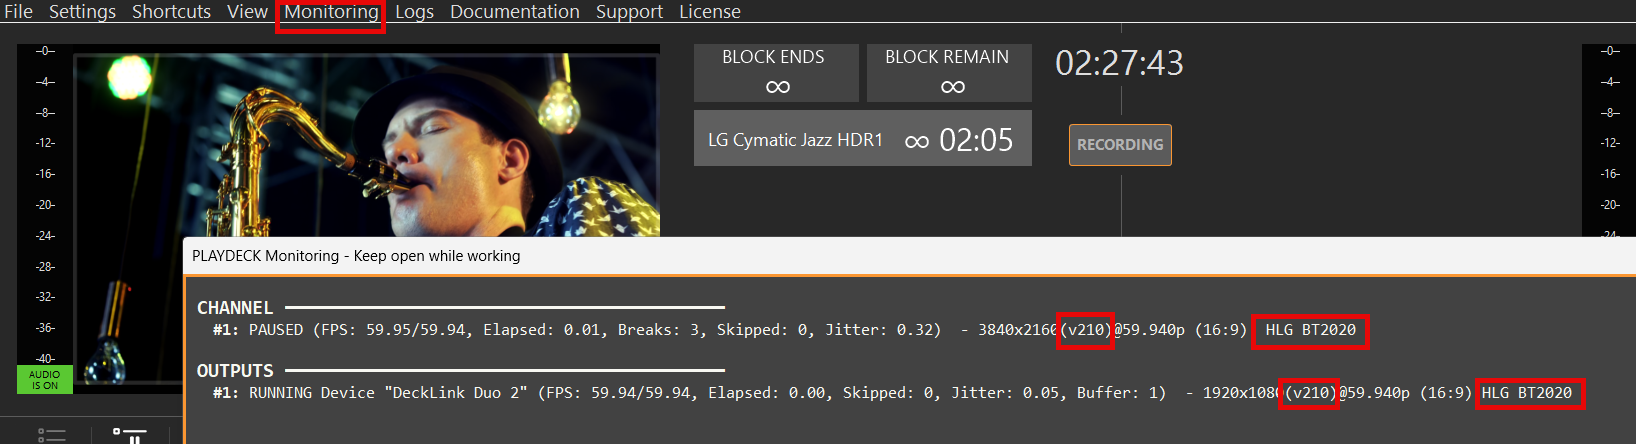
Monitoring & Controlling
Play a HDR Clip in the Playlist. You can download this HDR HLG BT2020 Test Video.
Note: Preview on standard HDMI SDR monitors may appear washed-out or flat for HDR content — this is expected behavior.
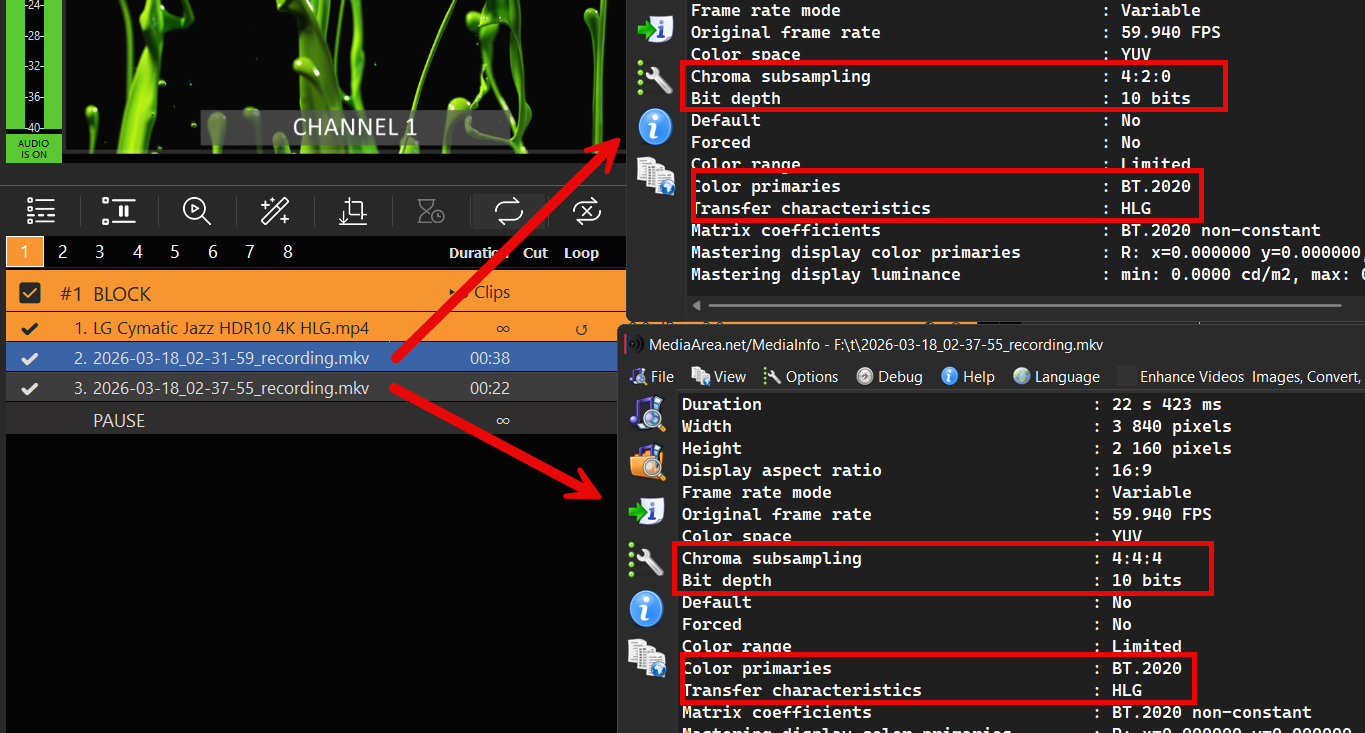
You can check on the Clip’s HDR properties by right-clicking the Clip and selecting MediaInfo:
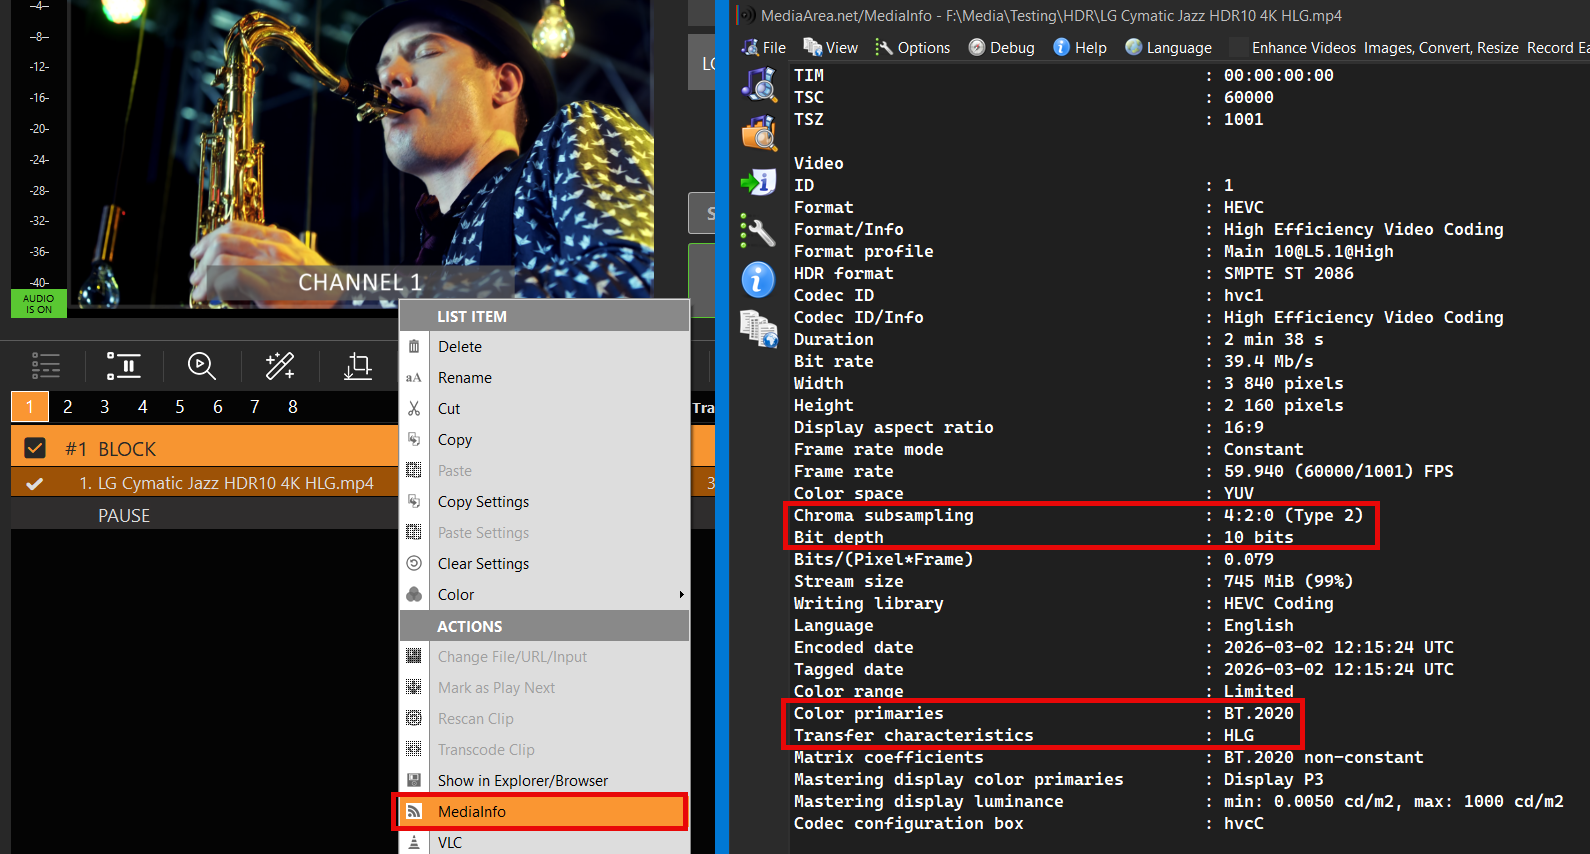
To verify, if PLAYDECK is correctly processing your HDR File, open Monitoring from the Main Menu and check these properties:
– Pixel Format (v210 or r210)
– Transfer characteristics (HLG or PQ)
– Color primaries (BT2020)
This allows you to check, if your SDI Card is sending HDR without a SDI HDR Monitor.
To verify your Recording, open the Recording Folder and Drag Drop your new File into the Playlist.

It should show the same HDR Meta Data as your Original (or your HDR Settings):