This article will show how to use how to create Overlays Groups and bind them to Clips or schedule them.
In this article:
→ Create Lower Third (with overlays.uno)
→ Create Lower Third (with ClassX)
→ Create Lower Third (in PLAYDECK)
→ Automate Overlay with Clips/Blocks
→ Schedule Overlay
→ Remote Control
→ External Keying
1. Create Lower Third (with overlays.uno)
For this example we use a ready-to-go Lower Third Overlay from overlays.uno.
Open this Overlay Template and click on “Use for free”:
https://overlays.uno/library/199-Lower-Third—Prism
Then click on “Copy Output URL” to have the target URL in your Clipboard.
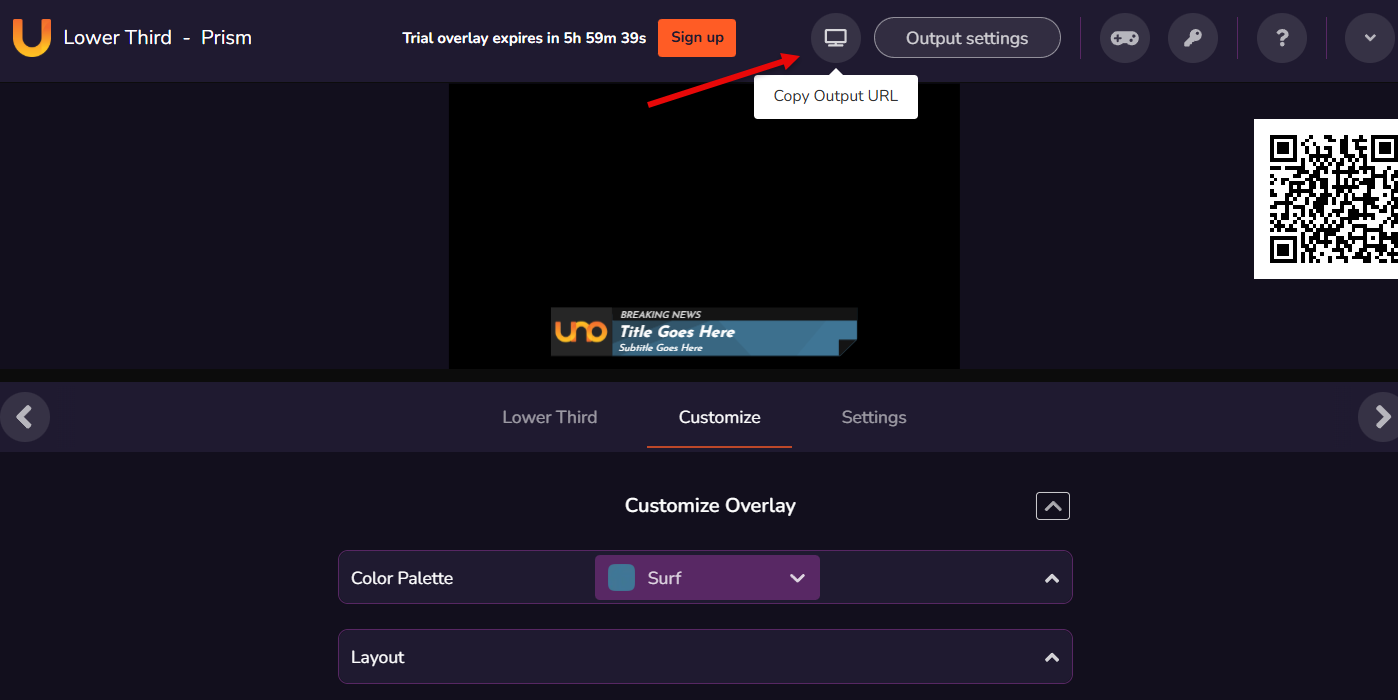
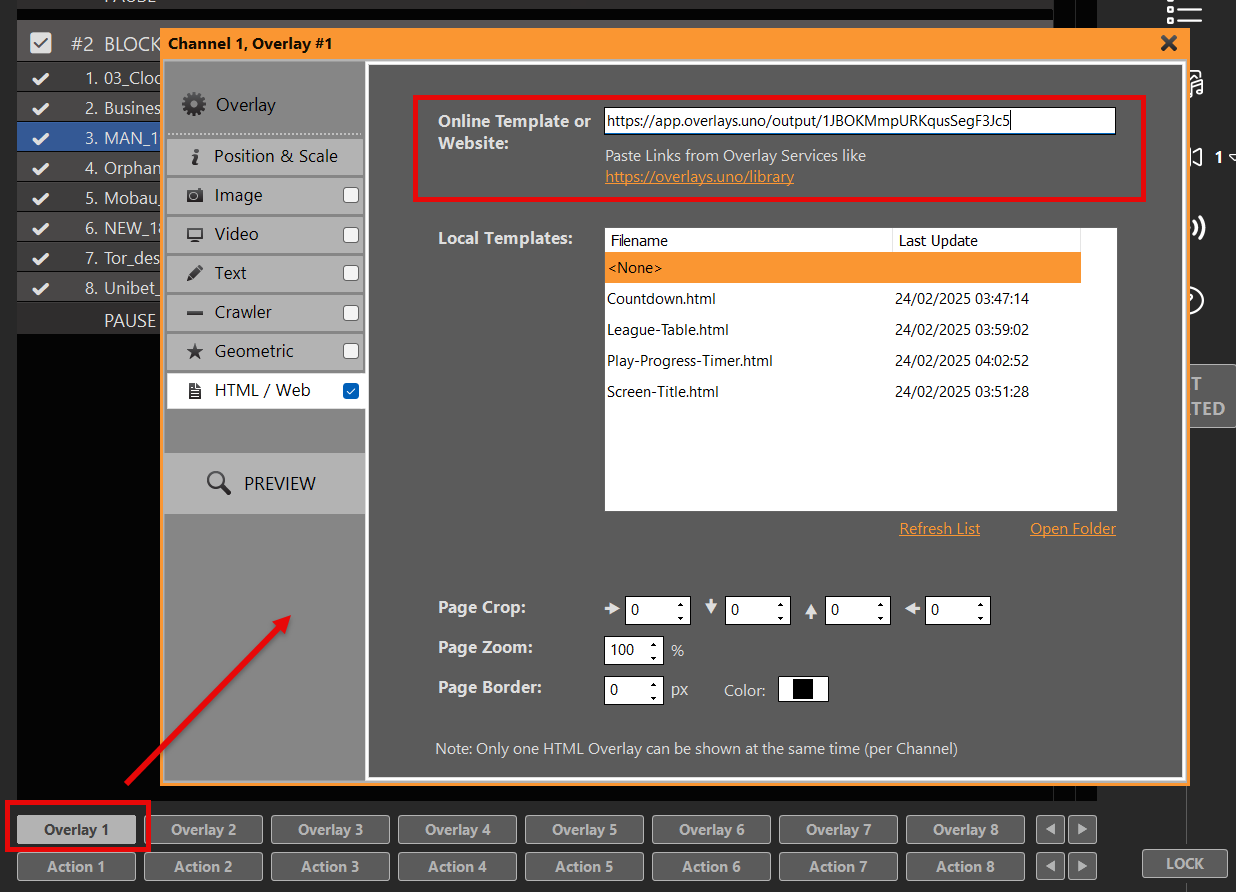
In PLAYDECK, click on any empty Overlay Button, select “HTML” and paste the URL into the upper Online Template Field:
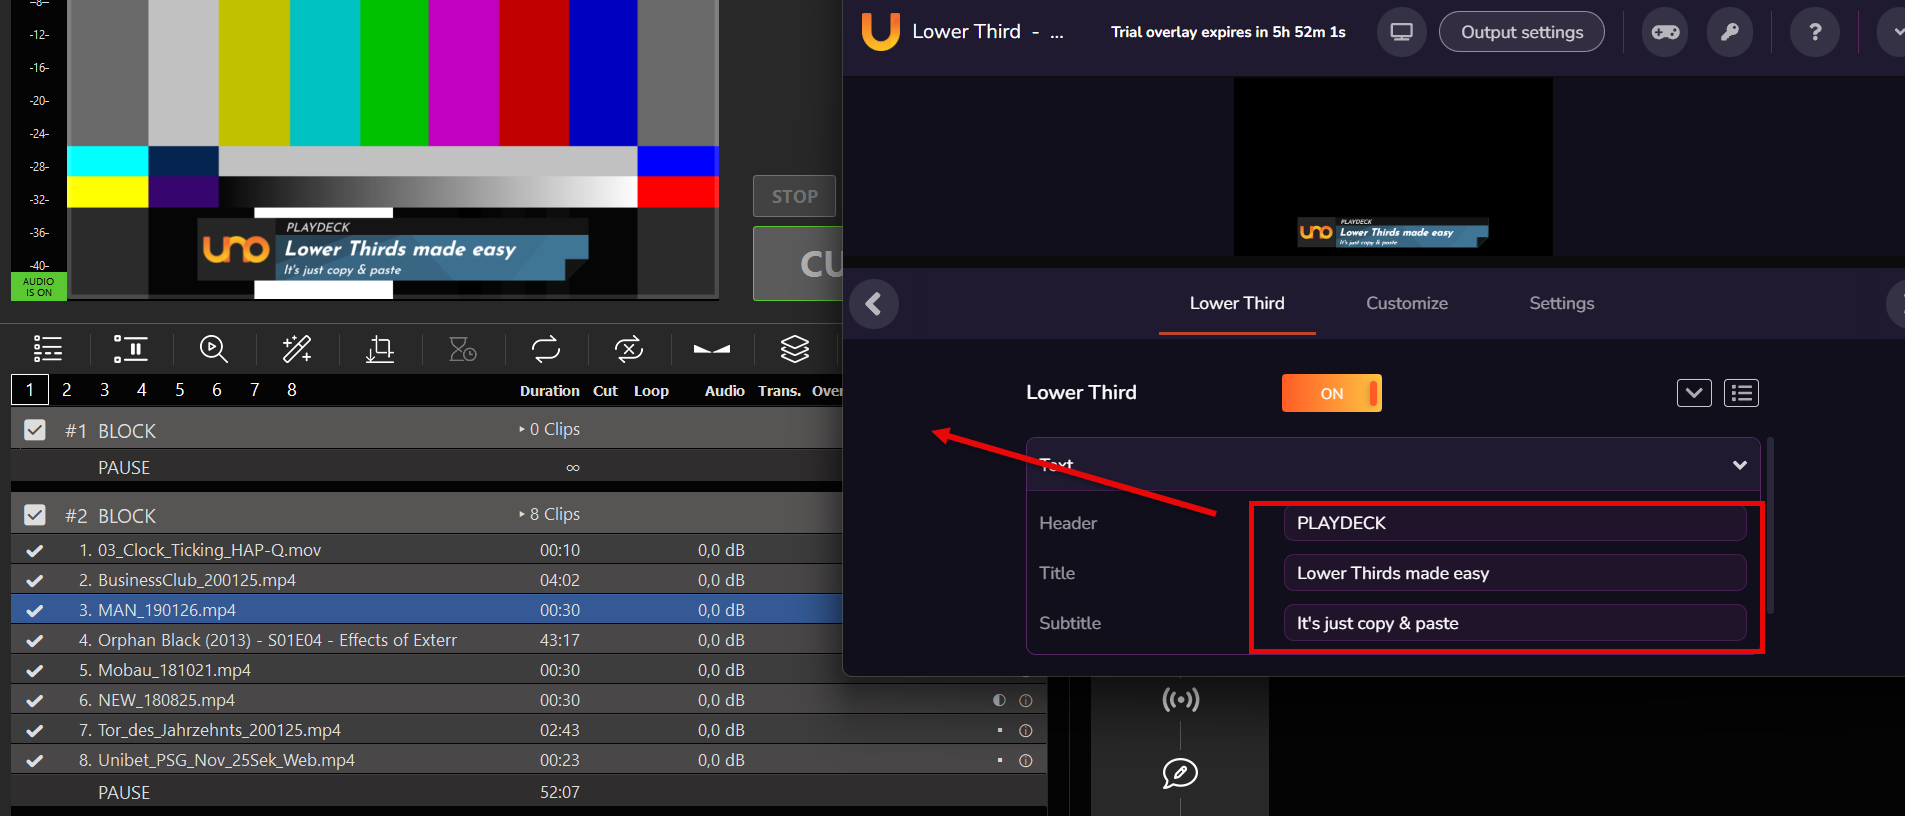
The Overlay is immediately ready for display. You can even live-update Logo and Text via the overlay.uno Overlay website:
2. Create Lower Third (with ClassX)
ClassX Liveboard is a professional CG Playout Solution for automating dynamic overlay contents. You can register for a Demo Version on their website.
After installation of LiveBoard, you can simply add Videos, GFX and other Contents via the user interface. There you also name the Contents with a unique identifier, e.g. “MyLowerThird” for later reference.
LiveBoard allows to connect via TCP and send Commands to show/hide certain Contents. A complete list of Commands is always found in their Window installation path:
C:\Program Files\…\ClassX_Applications_v6\remotecontroltester\commands
For now, these 2 Commands are enough for us:
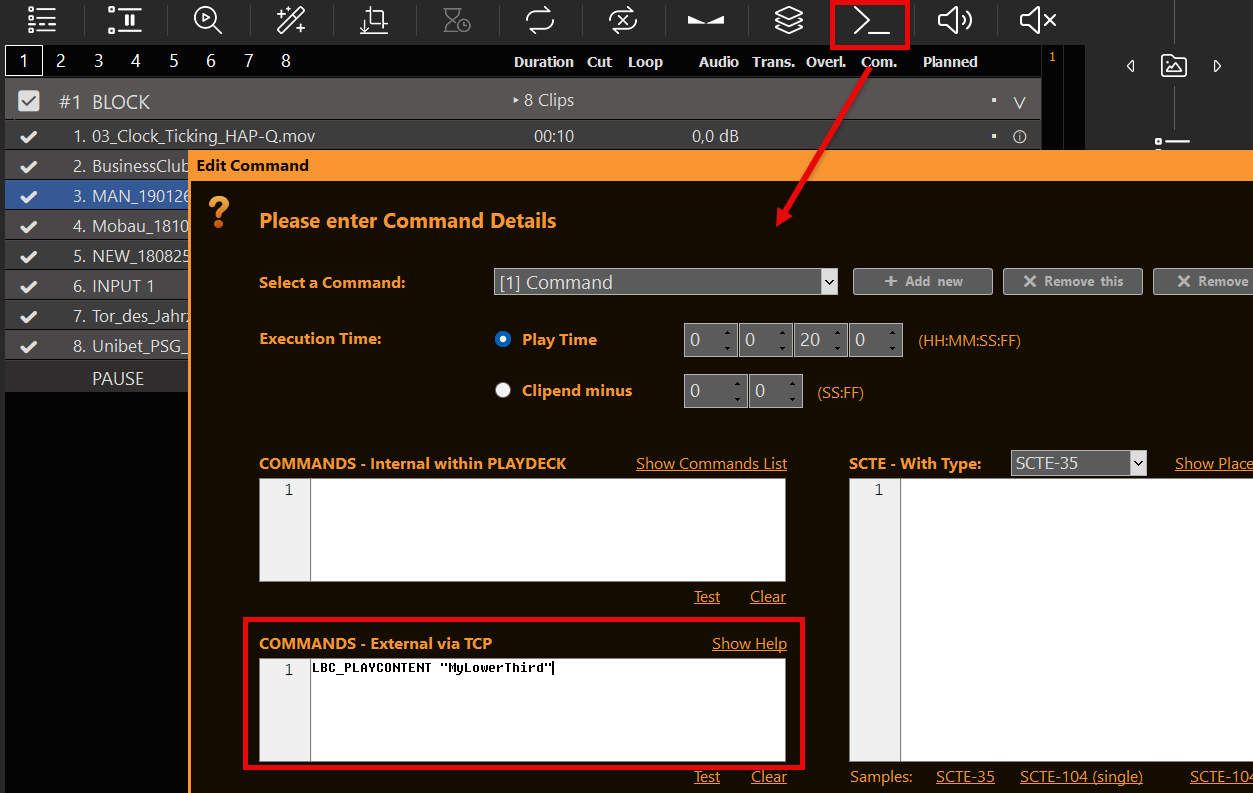
LBC_PLAYCONTENT "MyLowerThird"
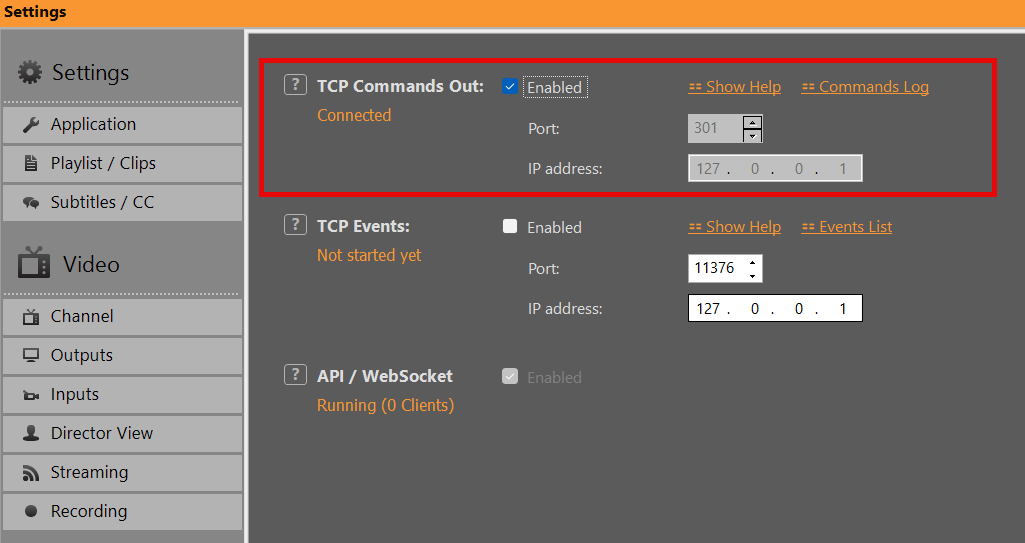
LBC_STOPCONTENT "MyLowerThird"Lets enable our TCP in PLAYDECK to talk to LiveBoard. The default Port of LiveBoard is 301. Enabling this will show CONNECTED, if the LiveBoard Server is running. Otherwise PLAYDECK will try to connect every 5 seconds, so you can start LiveBoard before or after PLAYDECK:
Please follow up with 4. Automate Overlay with Clips/Blocks
3. Create Lower Third (in PLAYDECK)
Lets create our own custom “lower third” composed of a background GFX and Text and group them together.
Click on an empty Overlay Button to open the Editor, then add some Background GFX. Close the Editor, right-click the Overlay Button and position your Background to the bottom area. We also right-click in the video preview and disable “Channel Name”:
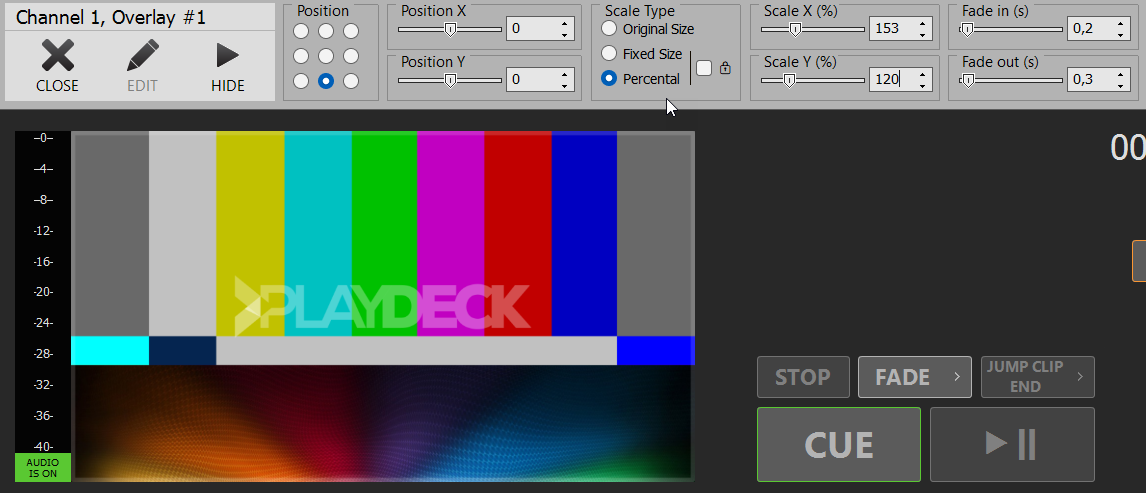
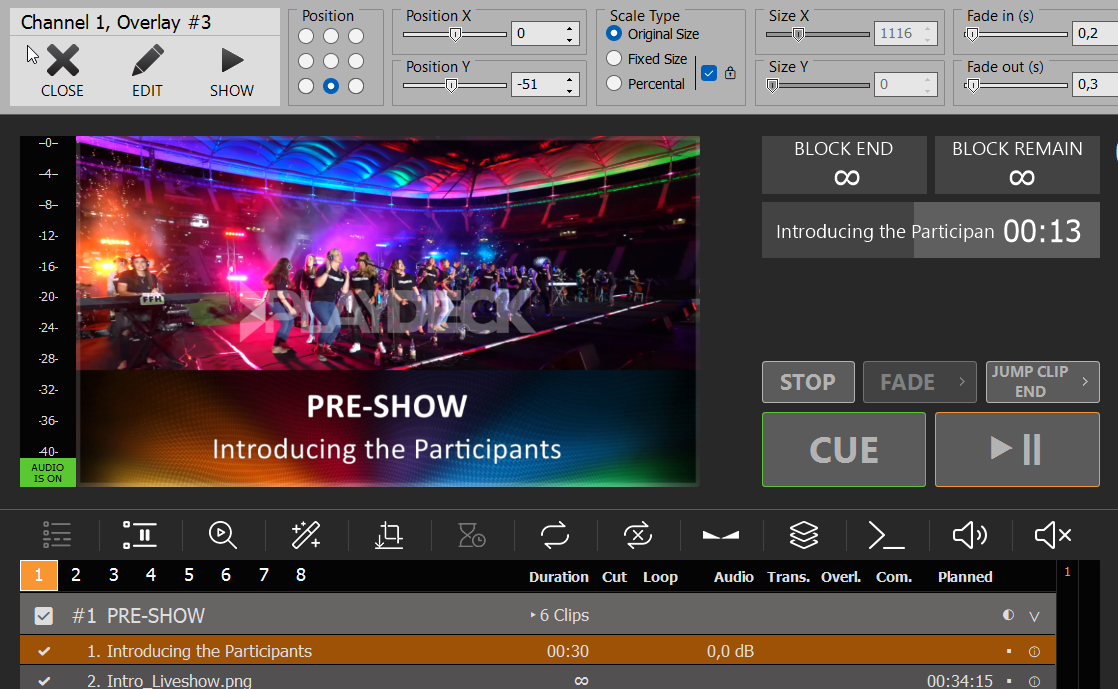
We add another Text Overlay and use {blockname} as text placeholder for our title text. Then add another Text Overlay and use {clipname} as text placeholder. Then some positioning and it looks like this:
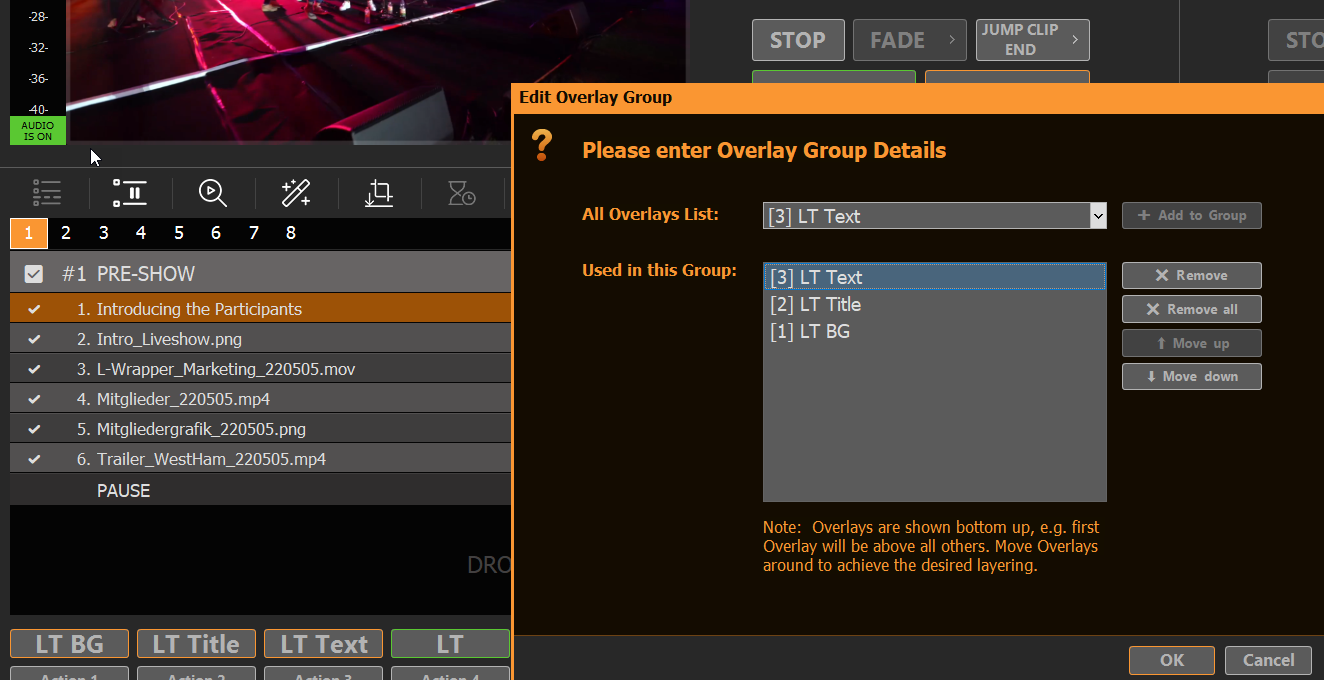
Now lets group then together: Right-click an empty Overlay Button and select “Create Overlay Group”. Then add our 3 previous Overlays and order them bottom-up:
4. Automate Overlay with Clips/Blocks
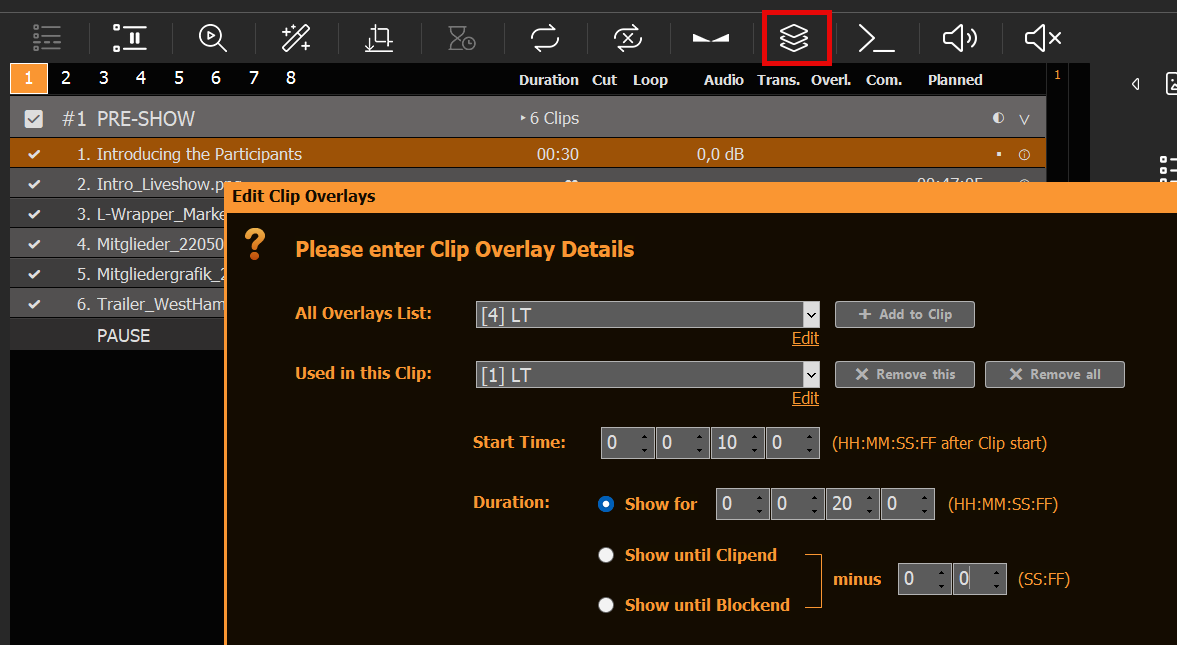
We now have a functioning Overlay Button for the Lower Third with dynamic Text Content. Now let’s attach this Overlay to a specific Clip. Select the related Clip and click on the Overlays Icon, then add our Overlay to that Clip, starting 5 Seconds into the Clip and showing for 10 Seconds:
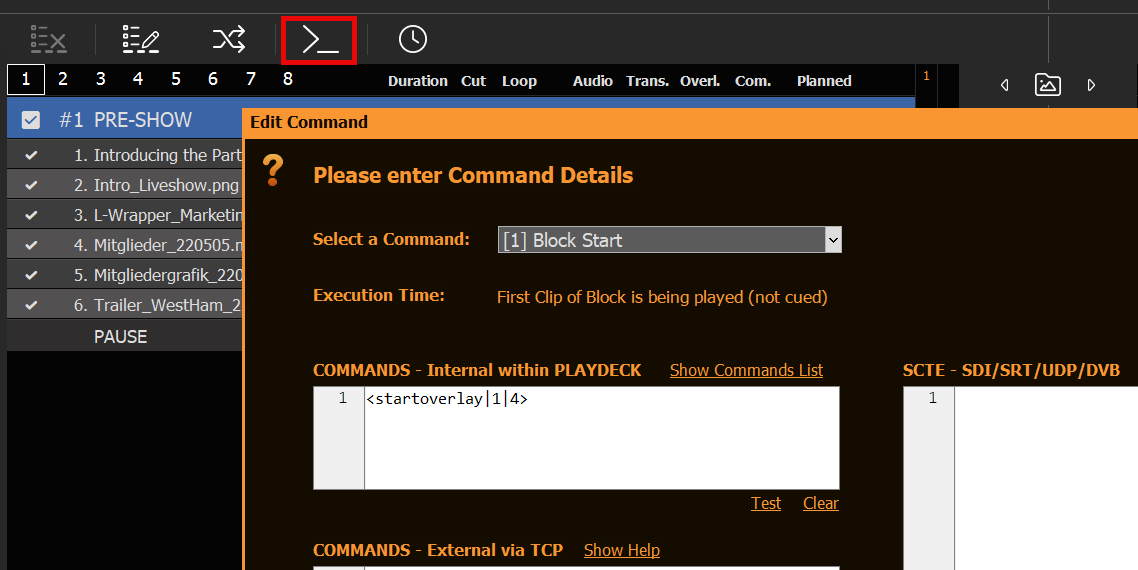
To attach an Overlay to a Block, you can use Commands:
You can copy the Overlay Attachments by right-clicking the Clip/Block and selecting “Copy/Paste Settings”. This will help immensely to duplicate attachments across the playlist.
To automate external Overlays, e.g. ClassX, you would also use Commands on Clips or Blocks, but write your Commands in the “External via TCP” Section:
You can also show/hide Overlays via Actions Buttons via internal or external Commands.
5. Schedule Overlay
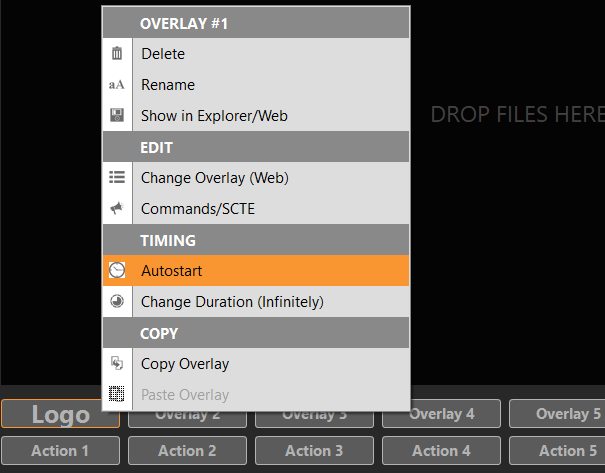
In addition to attaching overlays to playlist items, you can also schedule them to run at a specific time and for a specific duration, by right-clicking the overlay:
6. Remote Control
You already learned about Commands in 4. Automate Overlay with Clips/Blocks. You can call these commands from anywhere and start your overlays via your Stream Deck or any other Remote Control Software.
Here is an article on how to setup and use commands in general:
https://playdeck.tv/howto/commands/
And here you find more information on how to setup and use Stream Deck with Companion:
https://playdeck.tv/howto/companion/
7. External Keying
You can use one Channel of PLAYDECK just for the Overlays and send them to your Mixer via External Keying, which is supported for Device Output as well as NDI Output:
https://playdeck.tv/howto/keying/
