This article will show how to send your channel video feed to any desired target and audience.
In this article:
→ Single-Monitor Output
→ HDMI via Extended Desktop
→ SDI / HDMI Output Card
→ SMTP ST 2110 / IP Output Card
→ NDI (Network Device Interface)
→ Streaming (UDP, RTMP, SRT, DVB, …)
→ Dante Virtual Soundcard (DVS)
→ Director View
Single-Monitor Output
The most simple way to show your Video Feed, is to output your Channel in Fullscreen. Enable Fullscreen by Double-Clicking the Preview or Right-Click and select “Fullscreen”:

The Fullscreen Output will use a much higher quality and FPS as the regular Preview. You can exit the Fullscreen by pressing any Mouse Button or the ESC Key.
This Mode is best suited for quick private Slideshows. Here is an example on how to setup a Slideshow with PLAYDECK:
https://playdeck.tv/howto/slideshow/
HDMI via Extended Desktop
Another simple way to send your video feed is to use your HDMI outputs of your PC or your Graphics Card. To make the HDMI Output visible to PLAYDECK, you need to setup a new “Extended Desktop Output”, like you would do, if you added a secondary Monitor:
1. Connect in Windows
Connect your HDMI Device to your PC physically and turn the HDMI on, so Windows can find it. Connect it to your Graphics Card (preferred) or your Mainboard. Right-Click anywhere on your Desktop and select “Display settings”. You should see your new Monitor and it should say “Display is extended” (That’s why it’s called “Extended Desktop”). If you don’t have access to your HDMI Output Device yet (e.g. LED Screen), you can use any Dummy PC Monitor for Setup. PLAYDECK will later scale your (other) output automatically, if you use the same HDMI Port. Please also make sure, your Monitor uses 60 FPS and not 120 or 144, as this might lead to lag.
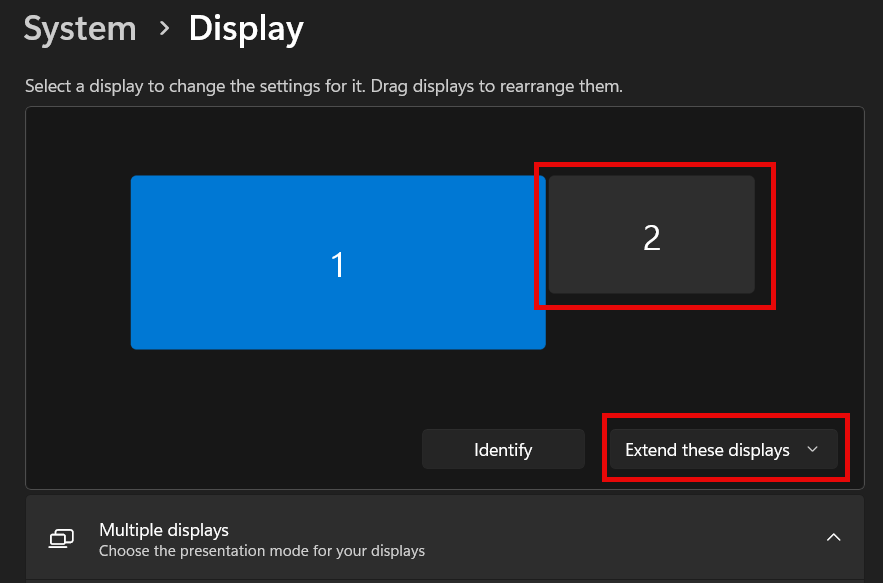
2. Assign in PLAYDECK
Start PLAYDECK and select your new Monitor as “Desktop Output” for your Channel. Once activated, PLAYDECK will “overlay” its output on the Monitor. It will be On-Top of all other Windows Apps and the Mouse Pointer will be disabled. Should you accidently activate this on your PRIMARY Display, press ALT+F4 to close it, as you cant access Windows or PLAYDECK otherwise.
PLAYDECK is able to re-connect to your Desktop Output, should it disconnect or on a power-loss or if the HDMI Device is receiving power after PLAYDECK has been started already.
This Mode is best suited for local transmission to a TV or LED Screen, e.g. during exhibitions or events.
SDI / HDMI Output Card
Output Cards have a huge advantage over Desktop Output:
– Stronger Video Signal for longer cable transport
– Much less CPU/GPU Usage, as Card will offload resources
– No Frame Drops, as Cards have integrated Frame Rate Control and Conversion
– Much higher picture quality, especially Colors
Output Cards are almost always worth the costs and are highly recommended. They provide a much more stable video transport solution compared to Desktop Output and an overall better experience.
Find a list of all supported Output Cards:
https://playdeck.tv/howto/supporteddevices/
If you need a recommendation, we mostly use BlackMagic DeckLink Cards. They are available for SDI and HDMI:
https://www.blackmagicdesign.com/products/decklink
1. Install the Output Card into your PC
You would need a separate PCIe Slot on your Mainboard. Imagine this Card as “Secondary Graphics Card”. Please make sure, that the PCIe provides the necessary bandwidth needed by the Device. Some PCIe Slots are “shared” and only have half the bandwidth, leading to stuttering video output. This might be changed via BIOS. You can also “host” your Card in an external housing for mobile production, like the “Sonnet Echo Express” and connect it via Thunderbolt, but please be aware that bandwidth available via Thunderbolt is lower than the PCIe bandwidth required for some some Cards like the “DeckLink 8K Pro”.
2. Install Driver for Windows
Most Cards need a specific Driver installed for Windows to operate. Those Driver also deliver Tools to test the Card before using it in PLAYDECK.
Make sure, you always have the latest Version of the Driver installed in your System for maximum stability and quality. For BlackMagic Card, PLAYDECK needs at least “Desktop Video 14.5” as Driver, otherwise the Card will not work as intended:
https://www.blackmagicdesign.com/support/family/capture-and-playback
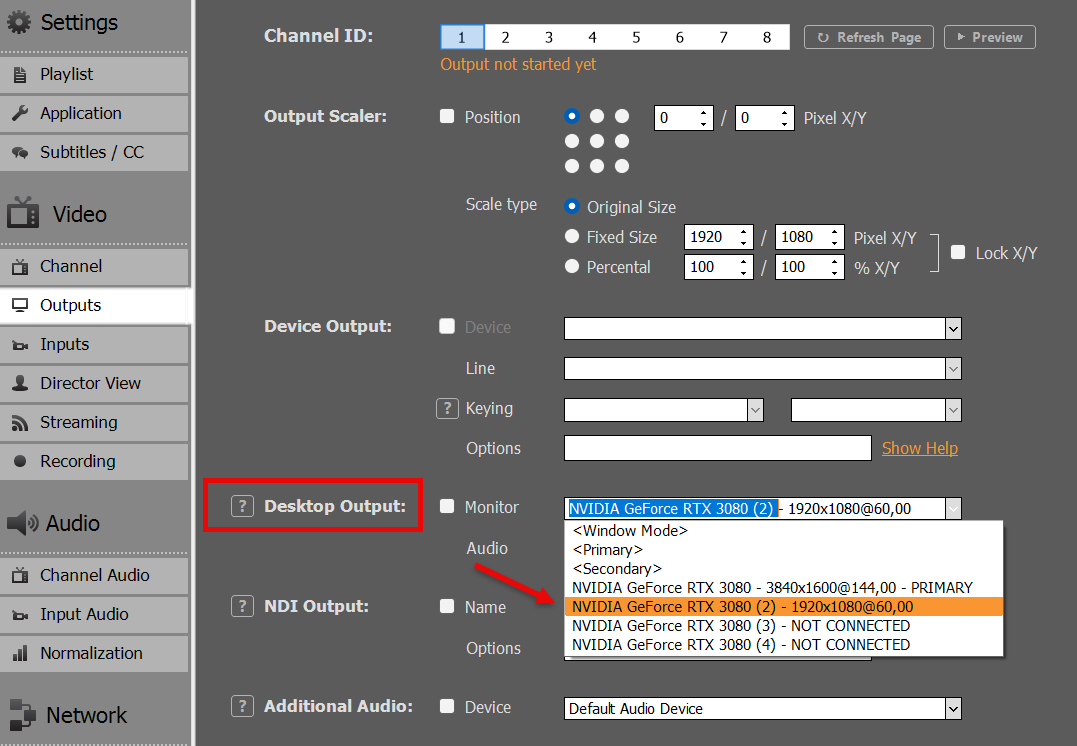
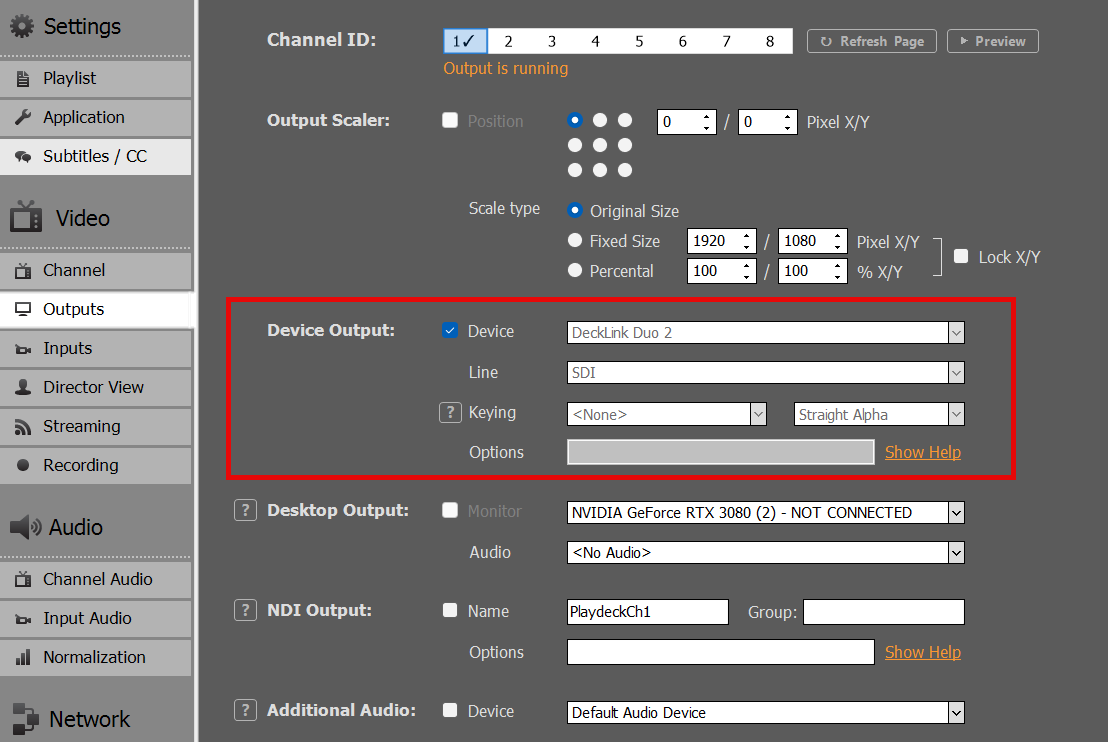
3. Activate in PLAYDECK
Select your Output Cards and Line in PLAYDECK and activate the Device Output. Unlike Desktop Outputs, these Output Cards don’t need a connected display via SDI or HDMI, they will activate right away:
SMTP ST 2110 / IP Output Card
These Cards are very similar to SDI/HDMI Cards described above. Please read there for Installation.
The difference between 2110 and SDI Cards is, that 2110 Cards send the signal via LAN (local area network). This is a modern and growing standard for Studios to transport video signals within the company. While it is theoretically possible to use existing LAN for ST 2110, it is recommended to use a separate LAN with specific PTP-aware switches (precision time protocol). Once setup, the main advantage is, the multiple receiver can easily access the video feed generated by PLAYDECK.
We provide a separate article for 2110 Devices and their Network setup options:
https://playdeck.tv/howto/2110-device-setup/
NDI (Network Device Interface)
NDI is another Network Transport Option for your video feeds. It can be used with the existing LAN (local area network) and doesn’t need specific network configuration. It provides its own “discovery system”, meaning: You send your NDI signal into the network and it will be automatically detected by any NDI receiver.
NDI is the preferred method to exchange video feeds with other Applications. Here are some examples:
https://playdeck.tv/howto/obs-studio/
https://playdeck.tv/howto/vmix/
NDI can also be used in a Cloud Setup, e.g. Amazon EC2 instances, to transport between server:
https://playdeck.tv/howto/amazon-ec2/
You can use NDI to “loop” the Signal within PLAYDECK for specific Tasks, like this Picture-In-Picture:
https://playdeck.tv/howto/pip/
There are many tools available to help you setup NDI in your environment:
https://ndi.video/tools/
If you need to setup a NDI Discovery Server, this will help you:
https://ndi.video/tools/access-manager/
https://docs.ndi.video/all/using-ndi/ndi-tools/ndi-tools-for-windows/access-manager
Note: There has been a problem with NDI causing stuttering after a window update. Here is the solution:
https://www.vmix.com/knowledgebase/article.aspx/376/windows-update-affecting-ndi-stability
Streaming (UDP, RTMP, SRT, DVB, …)
You can pick out of several Streaming Protocols, which all serve a different purpose.
– UDP/RTMP Streaming: Low-latency Live Streaming
– SRT: High-reliability Broadcasts
– DVB: Traditional Broadcasting
– And many more (RTP, RIST, Icecast, HLS
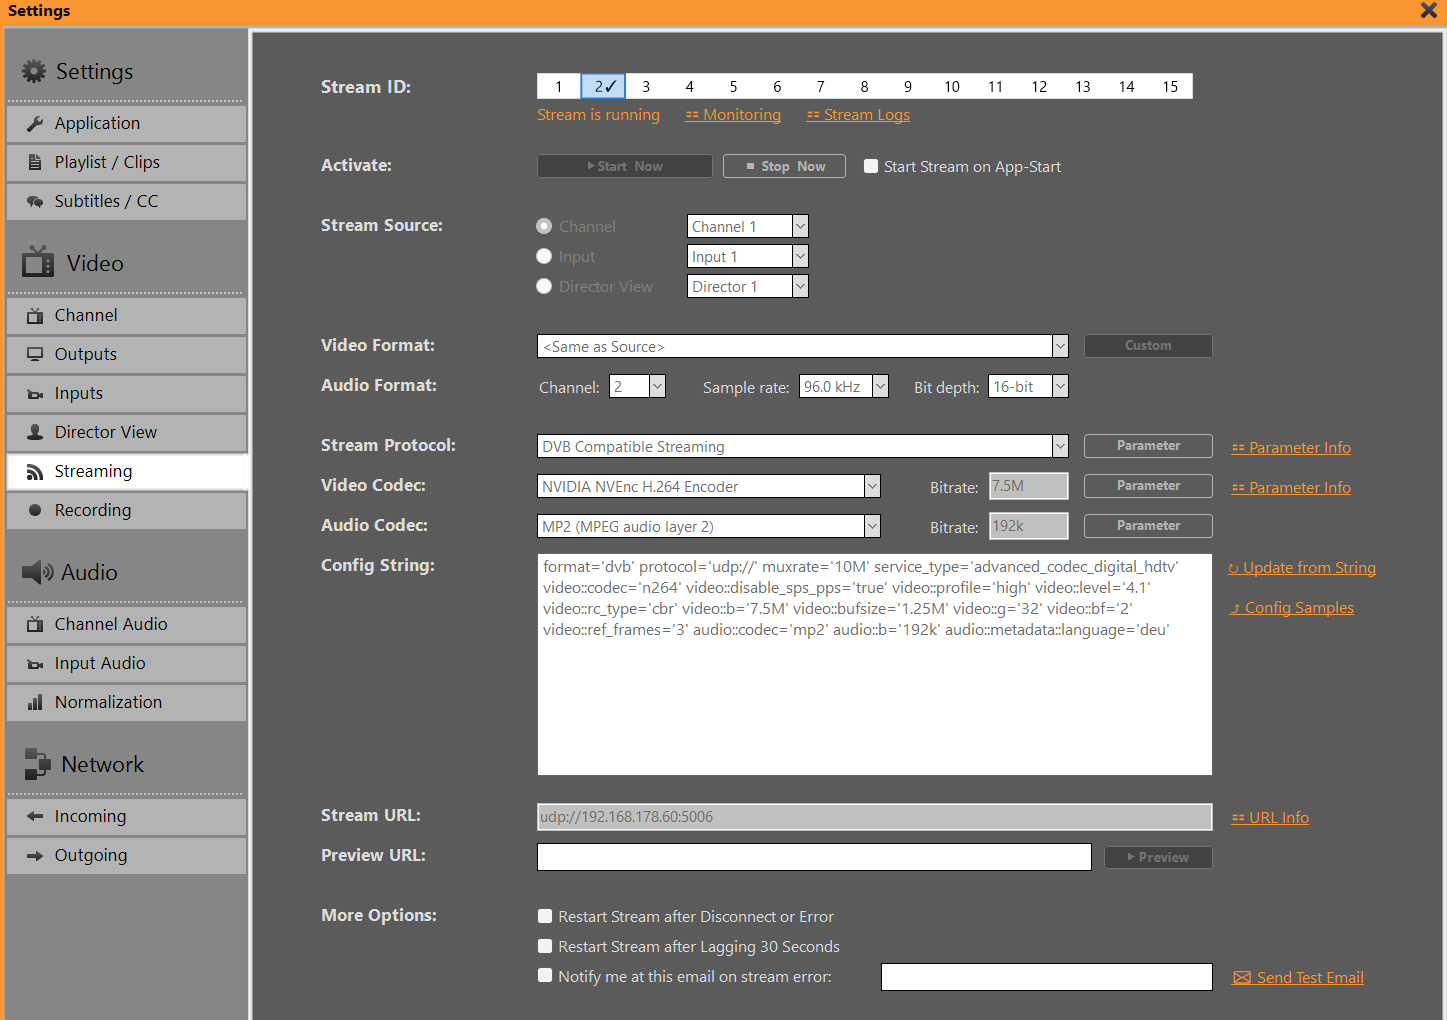
We provided a more in-depth article for streaming:
https://playdeck.tv/howto/output-streams/
Dante Virtual Soundcard (DVS)
This is strictly speaking not a video feed, as DVS is audio-only. This is yet another Network (LAN) Option. The use case for DVS is, if you need to send your audio feed SEPARATE or ADDITIONAL to your video feeds, or in audio-only productions. The most common use case is, that in live events, the audio mixer needs ALL audio feeds of ALL PLAYDECK channel, meaning: He wants to receive 8 audio channel in stereo pairs of your 4 video channel.
We are providing an article to setup and use Dante:
https://playdeck.tv/howto/dante/
Director View
This is a specific Output option PLAYDECK provides, to inform your crew of the state of affairs: This will mix several different video feeds into one video feed and overlay information about remaining time. This is meant to provide assistance in a multi-room or multi-person environment.
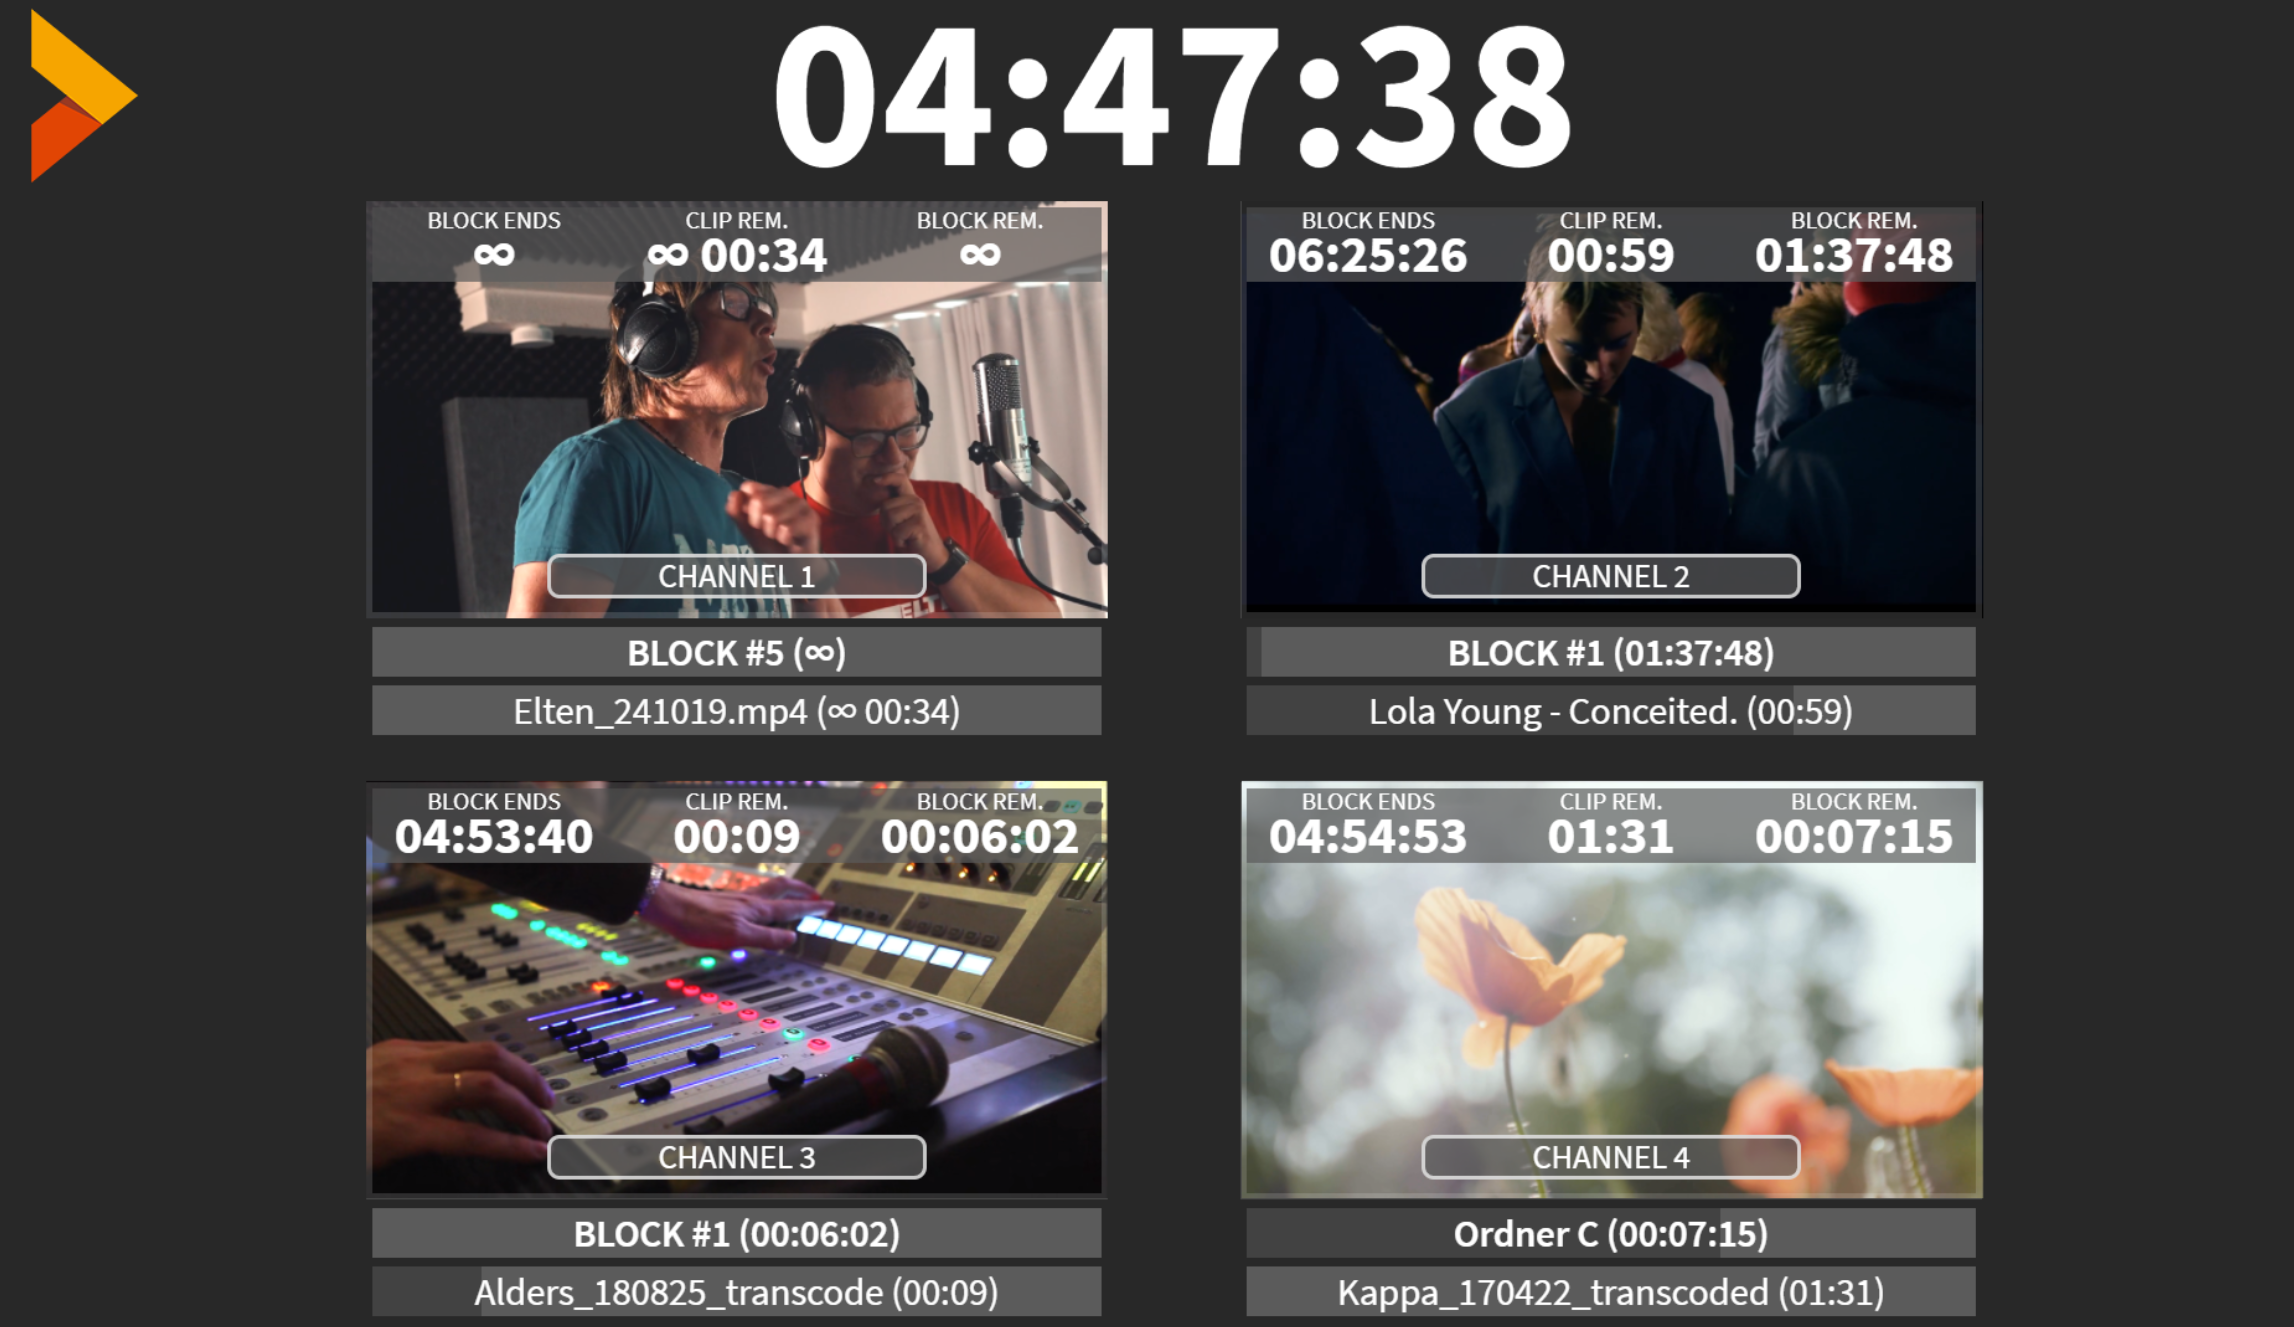
This video feed works like a separate channel: You can send it parallel to your other outputs. You can setup and send up to 4 different Director Views. You can pick how many and which channel should be included:
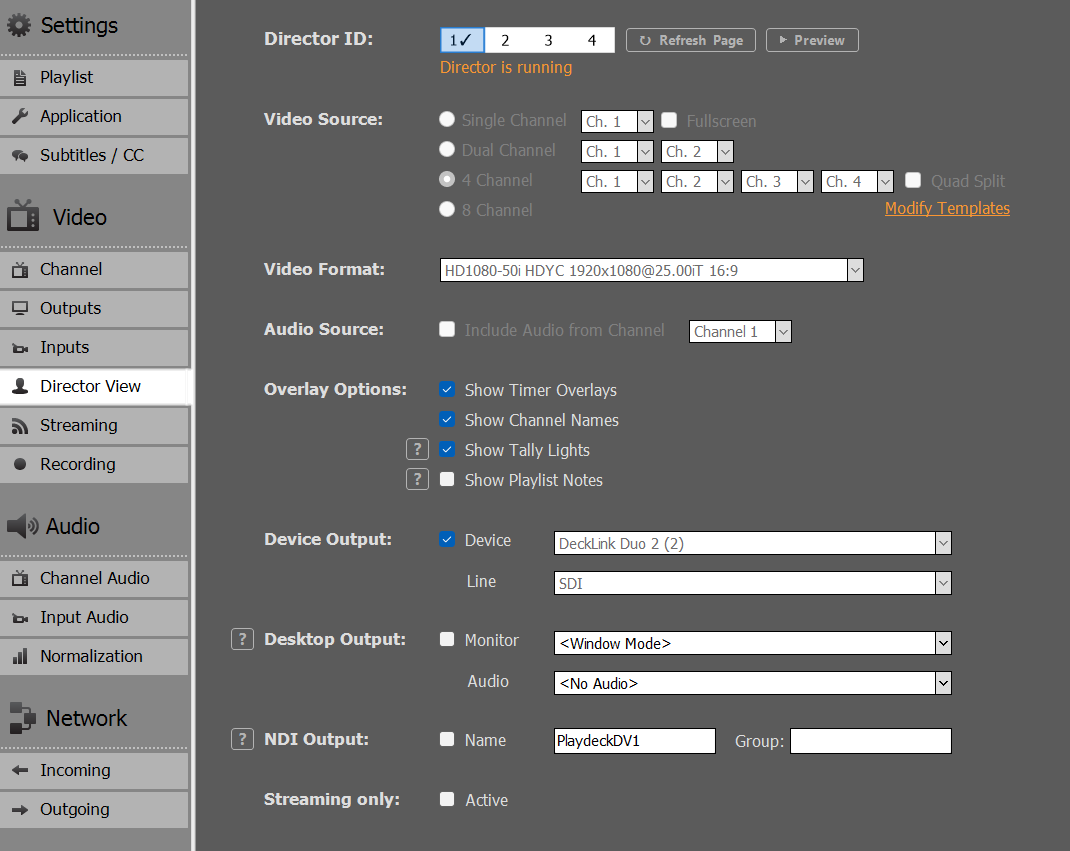
In addition, you can modify the overlay to fit your own company, e.g. integrate your own logo or change fonts.
